이펙트아카데미 특강/외주/커뮤니티
 유니티 이펙트 튜토리얼 - 그라운드크랙 뎁스 마스크쉐이더 튜토리얼
Hi there!
Welcome to a new tutorial about how to make cracks on the ground!
We will cover:
◉ Ground crack texture
◉ Ground crack mesh on 3dsmax
◉ Shaders needed on unity for the effect
◉ A quick set up
So lets go ahead to photoshop and create our ground crack texture. Because we are going to convert it to illustrator strokes, this can be done in illustrator too. (im explaning this with photoshop because there are a lot of people who plays along with PS but didnt touched Ai)
The crack can be whatever you want, you can add one from the internet, draw it by yourself or take one of your own crack library (if you have one of those xD), after that make sure to have the project saved because we will need it later to make other type of texture.
The requirements for the final image now will be: transparent bg, white fill and stroke effect. Like this:
Now that our crack meet the requirements lets save the psd and convert it to Ai. Personally i recommend to learn Ai a bit because it will save time on doing things like this.
Go ahead to a converter(Ive used this one for the tutorial: https://convertio.co/es/psd-ai/) and upload the psd. Then click on convert and download it.
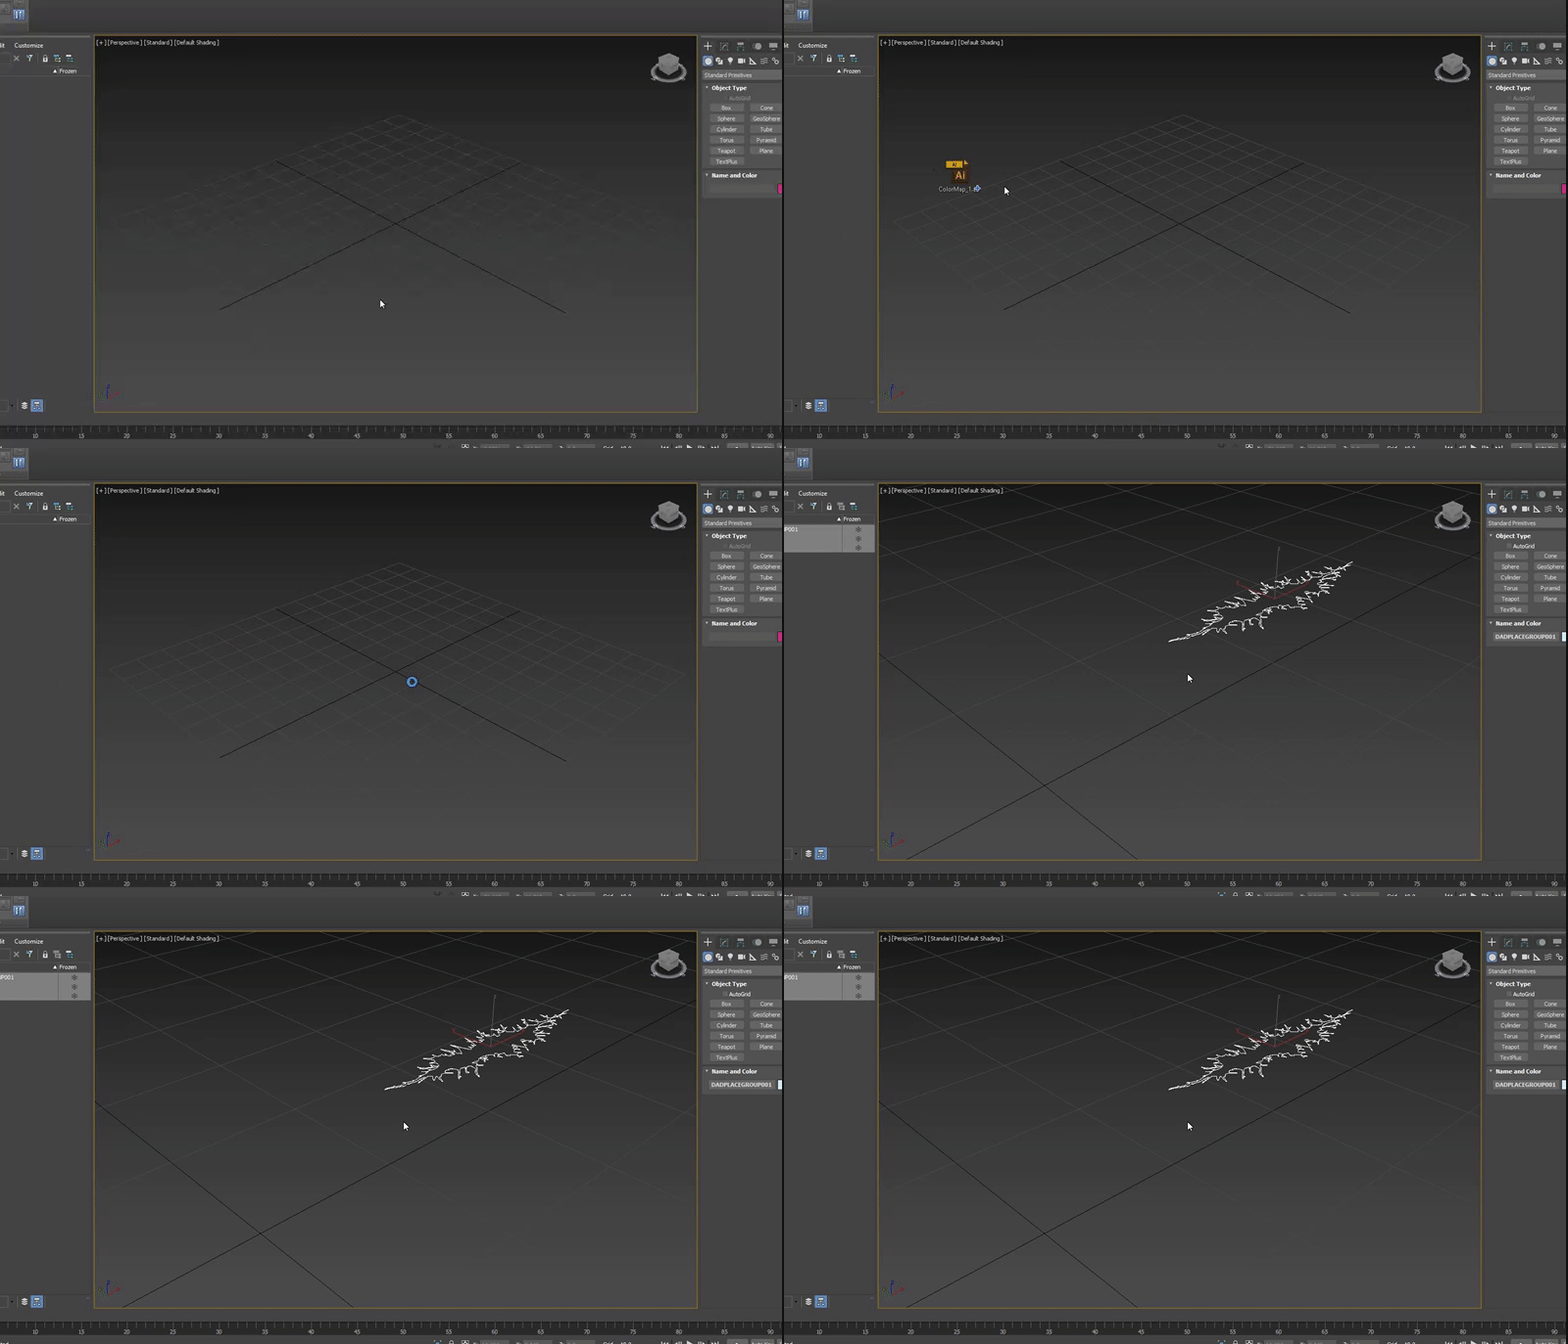
Okay then, now we have our strokes, lets go and open up 3dsmax.
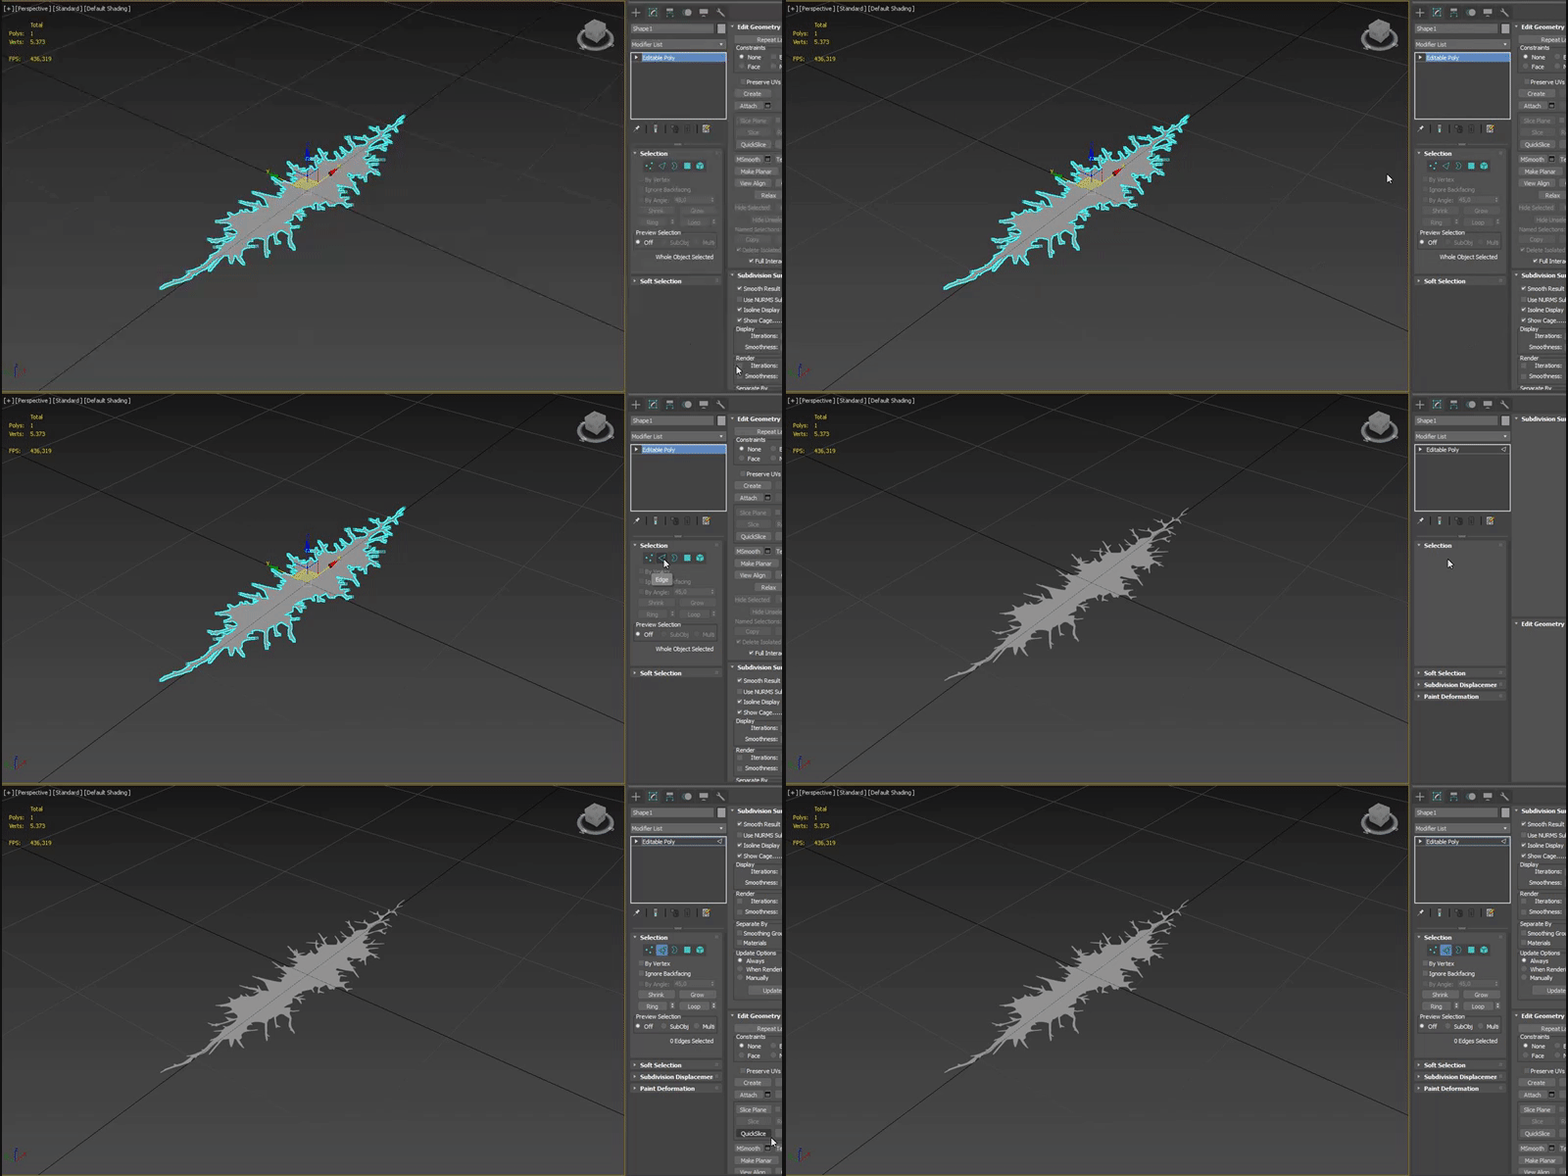
Take the .ai file and drop it into 3dsmax
Yay! as you can see the cracks are converted nicely to a spline! :D
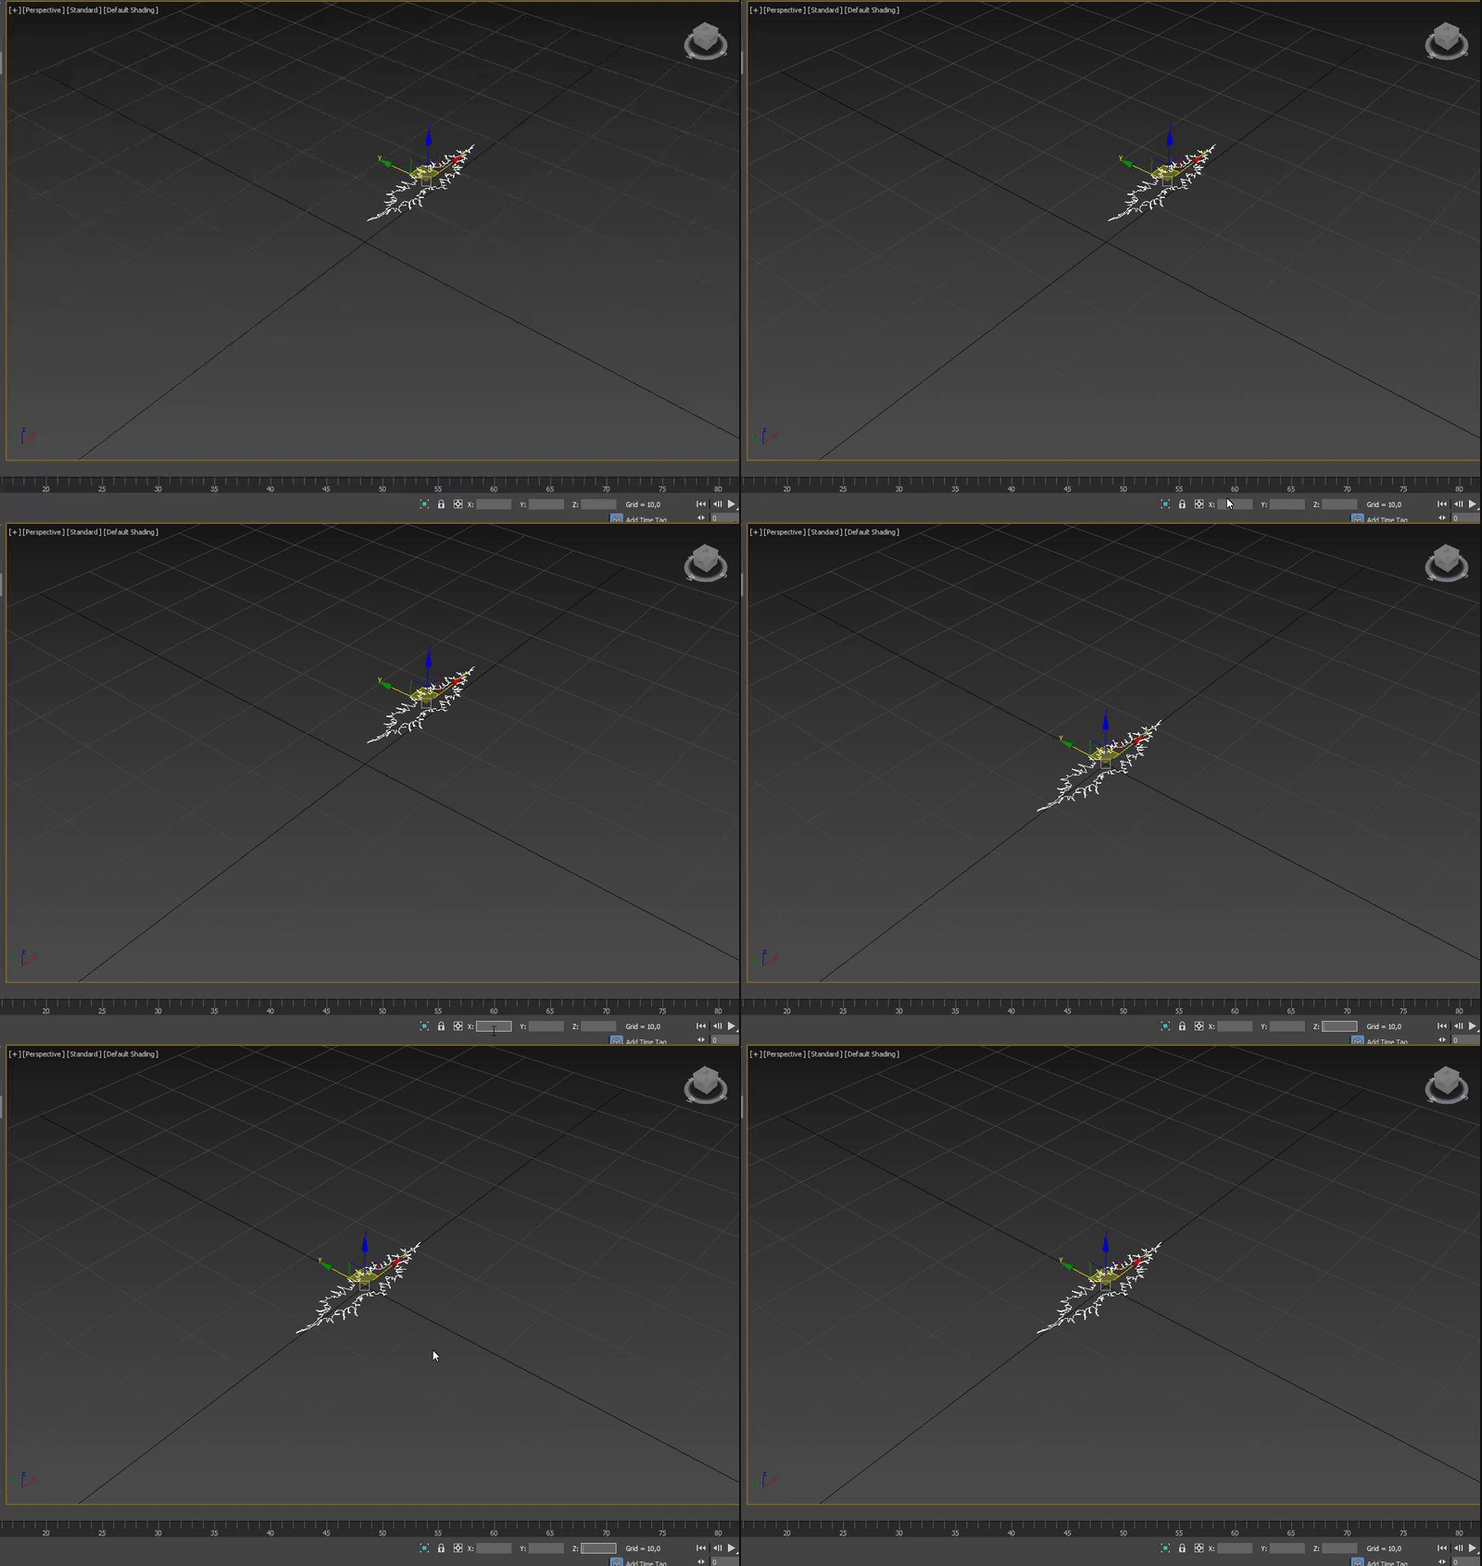
So next step is to set its position to 0 on all axis
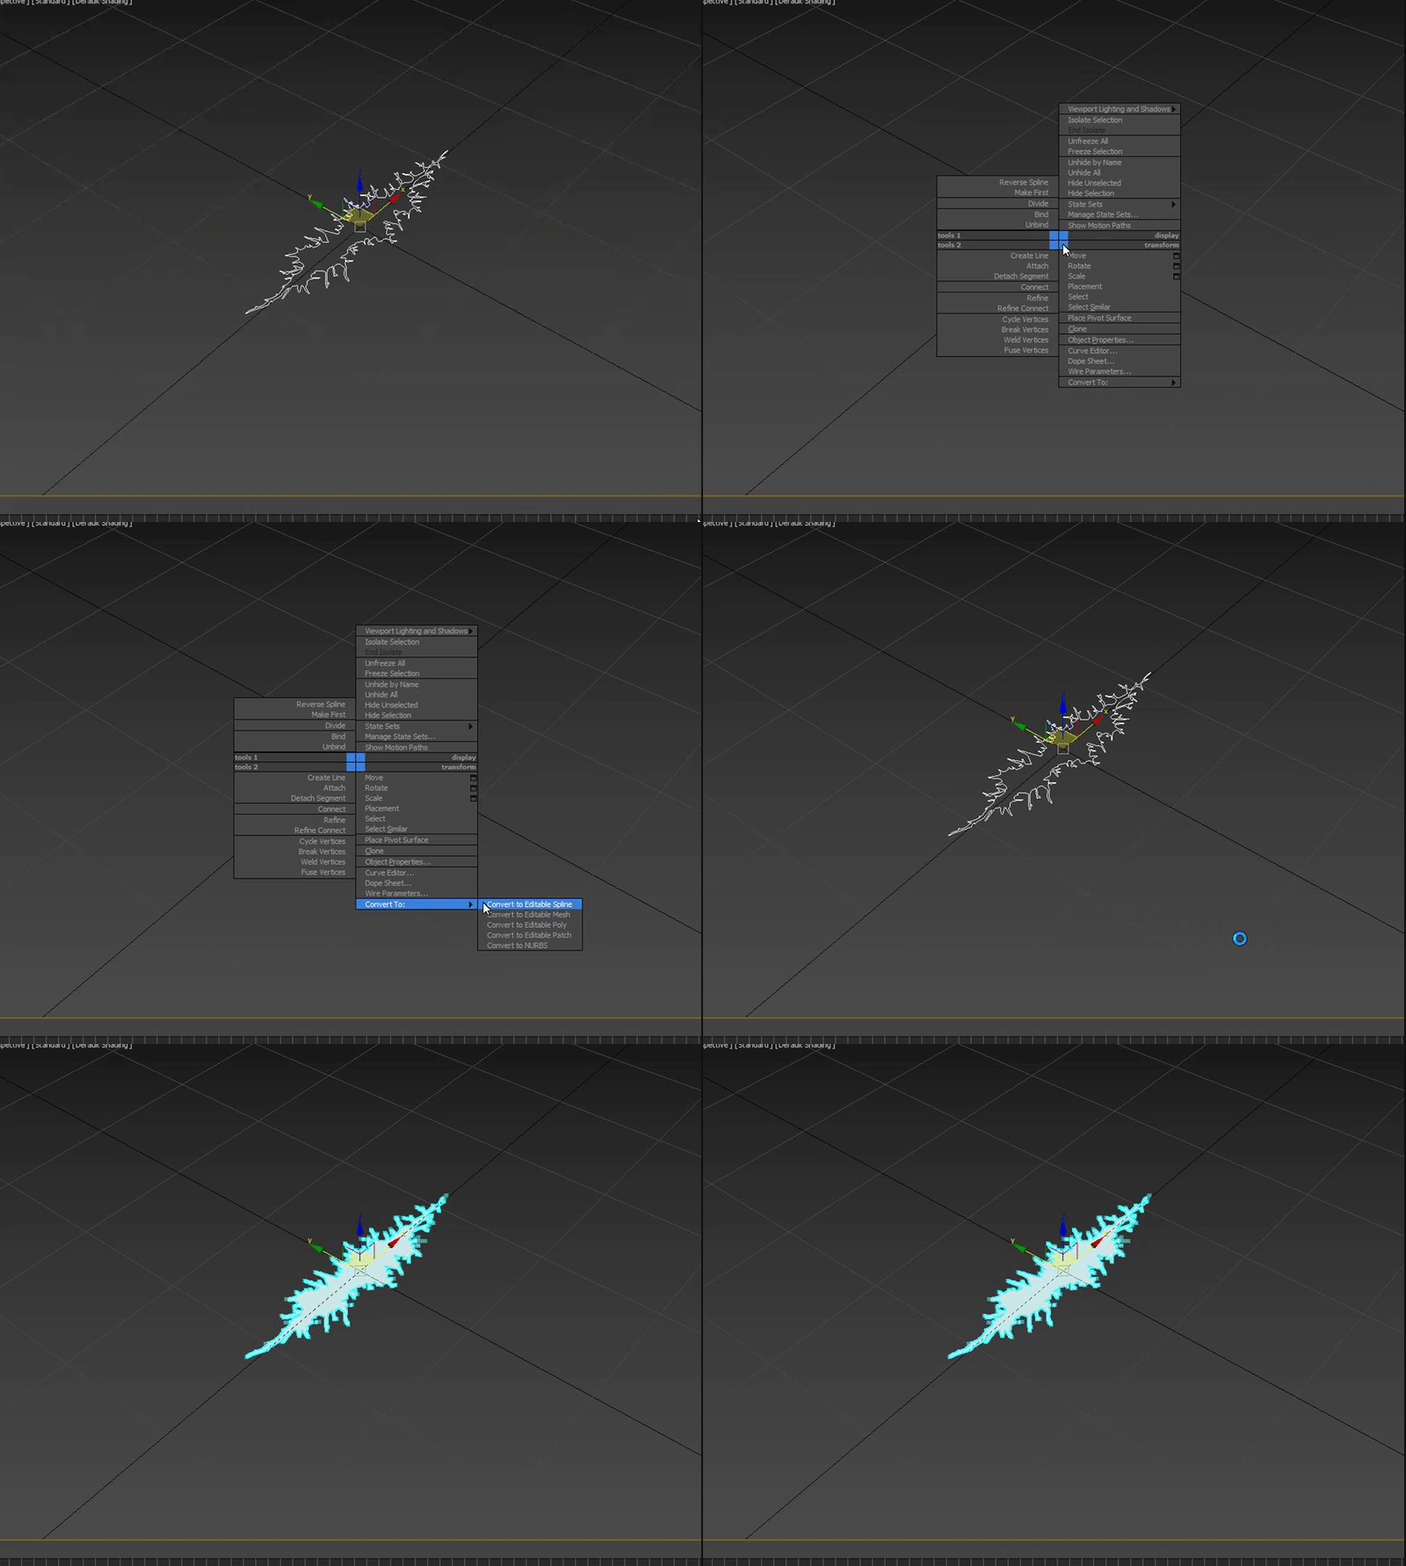
Right click and convert it to an editable poly
And as you can see our crack will be filled, another tick for our to-do list.
IMPORTANT NOTE: If your crack have too much vertex (the example one has 5k) i totally recommend to optimize it removing some vertex.
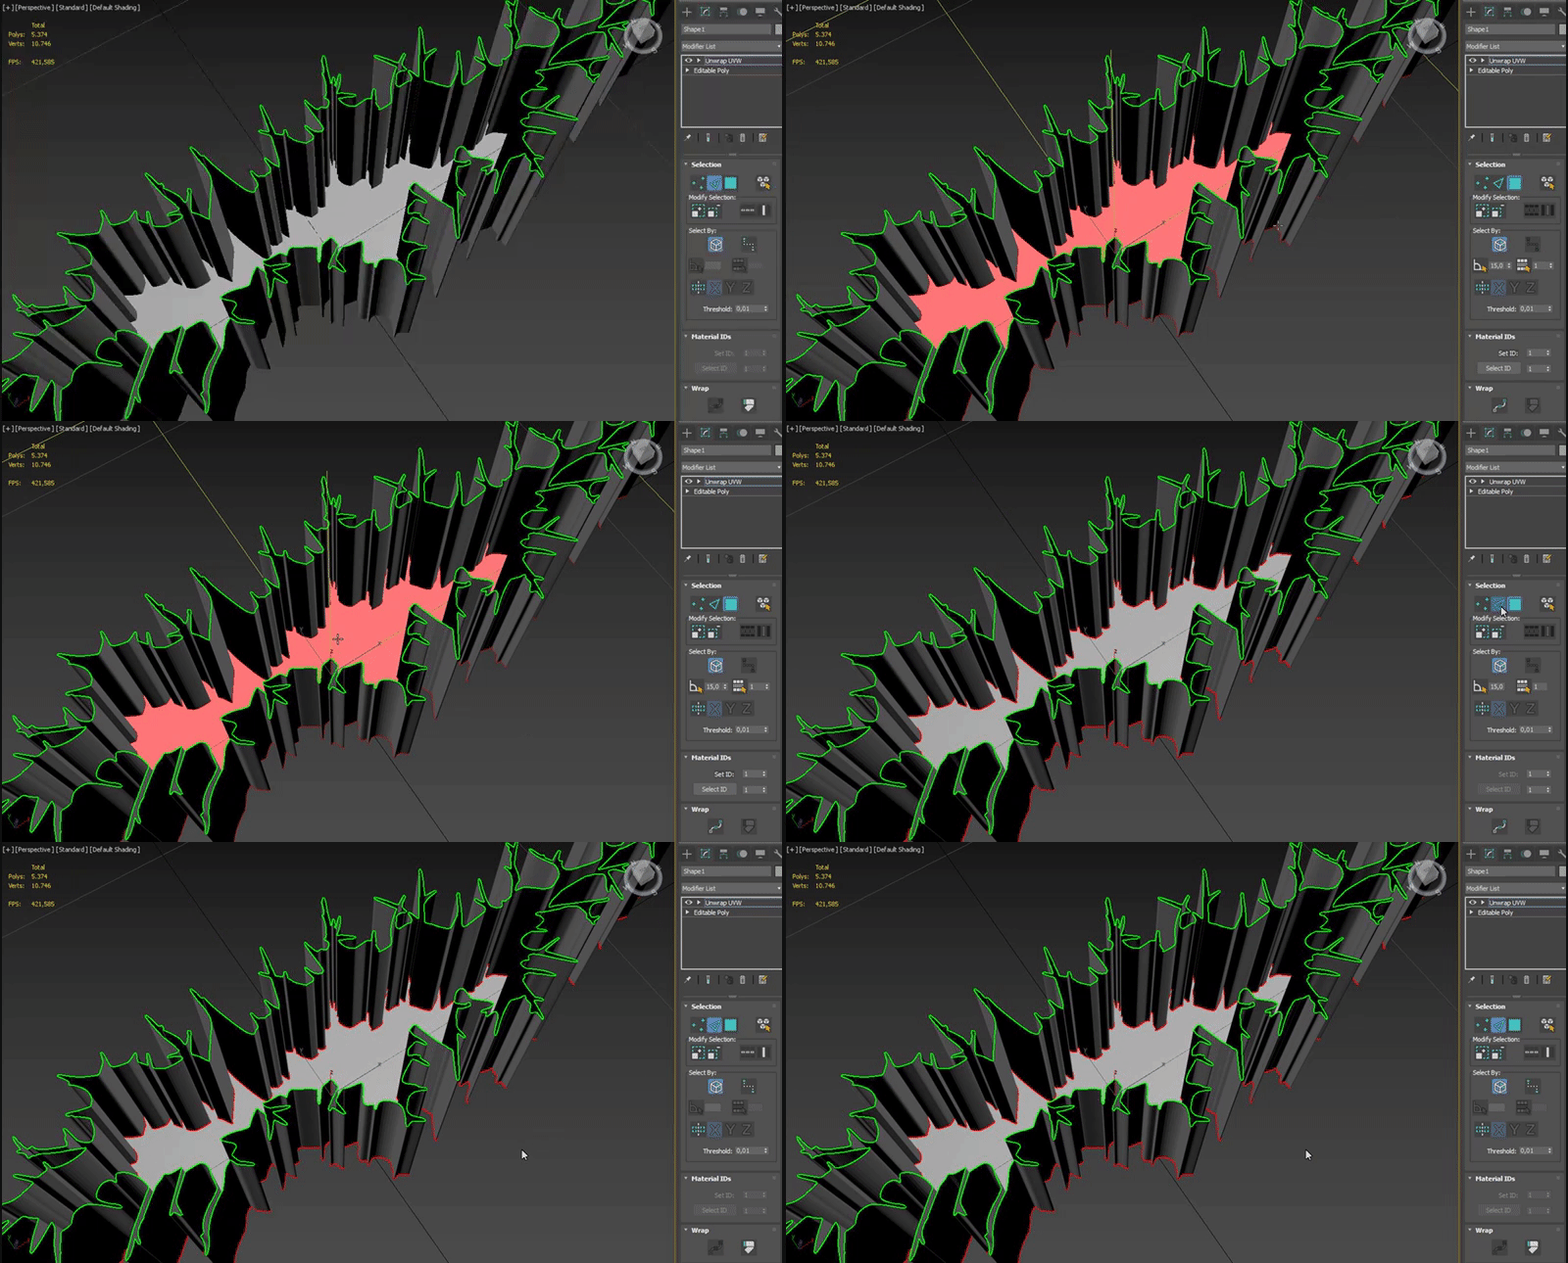
Now, on the right side, click on the edge icon under "Selection" foldout to say 3dsmax that we are going to manipulate the edges of that object.
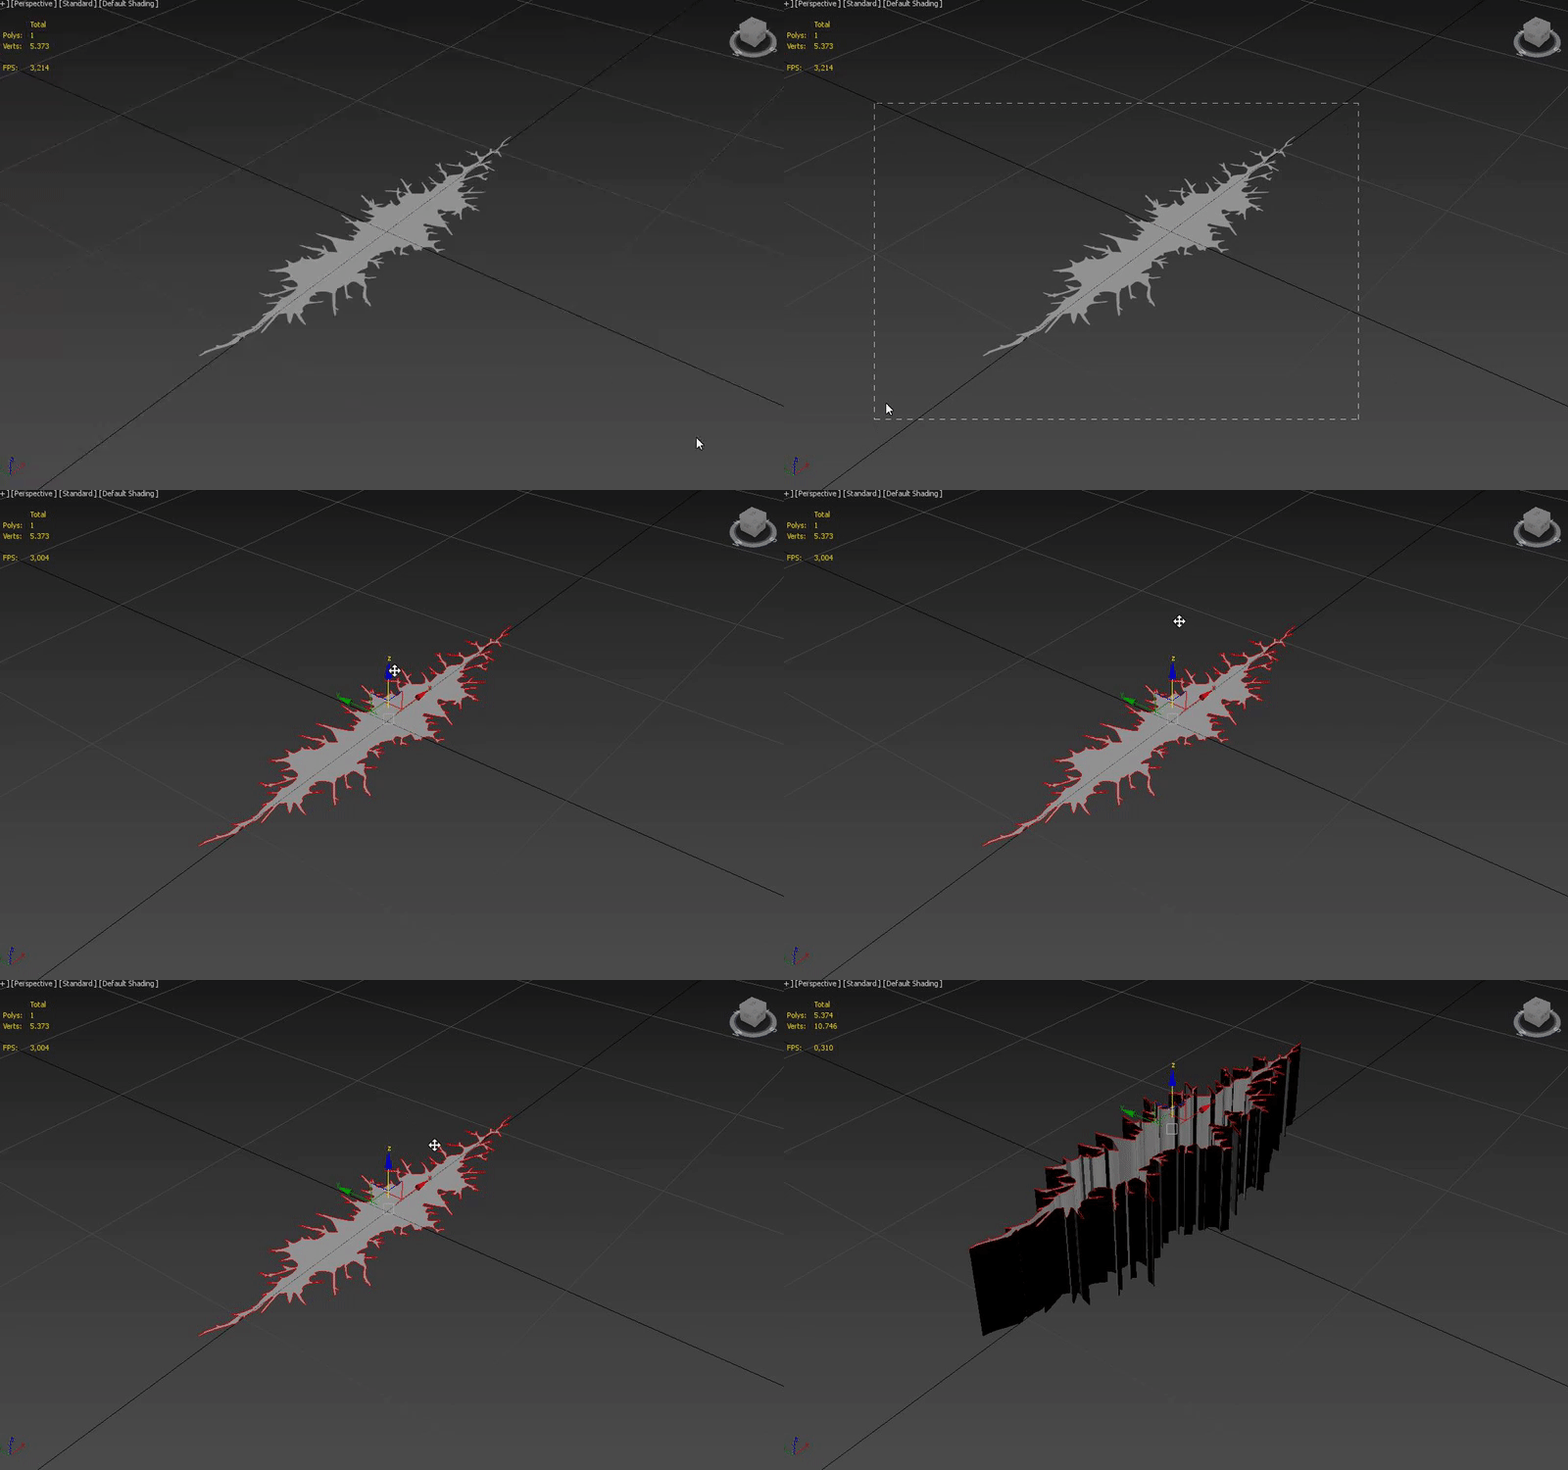
Now select all the edges (the red ones are the selected ones) and with shift PRESSED, move it upwards to make the walls.
Stop holding shift and you will be able to move those edges to fit to your desired altitude.
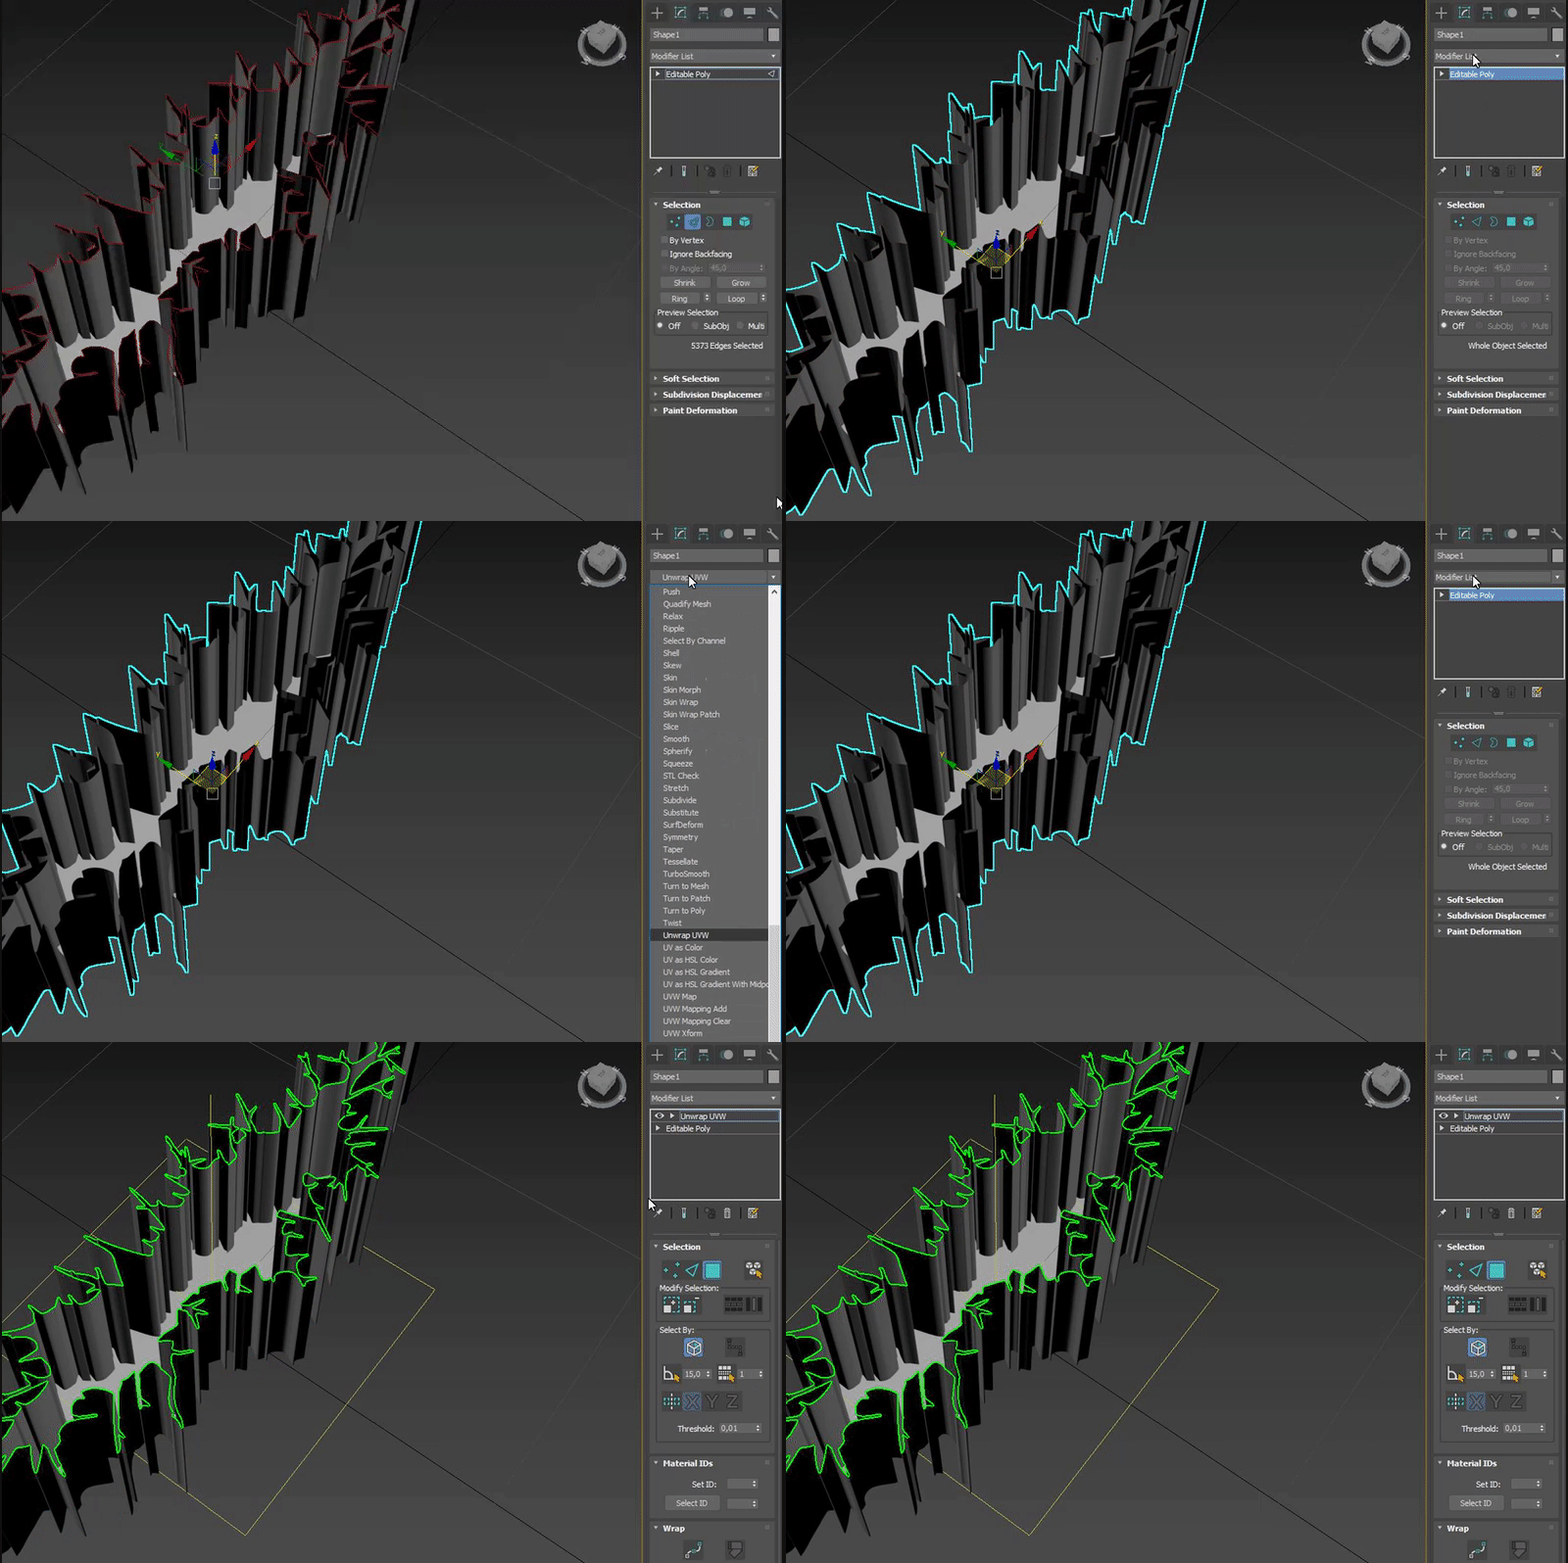
Now we are going to make the UVs of this mesh. Unselect the edges option and add a Unwrap UWV modifier to the object:
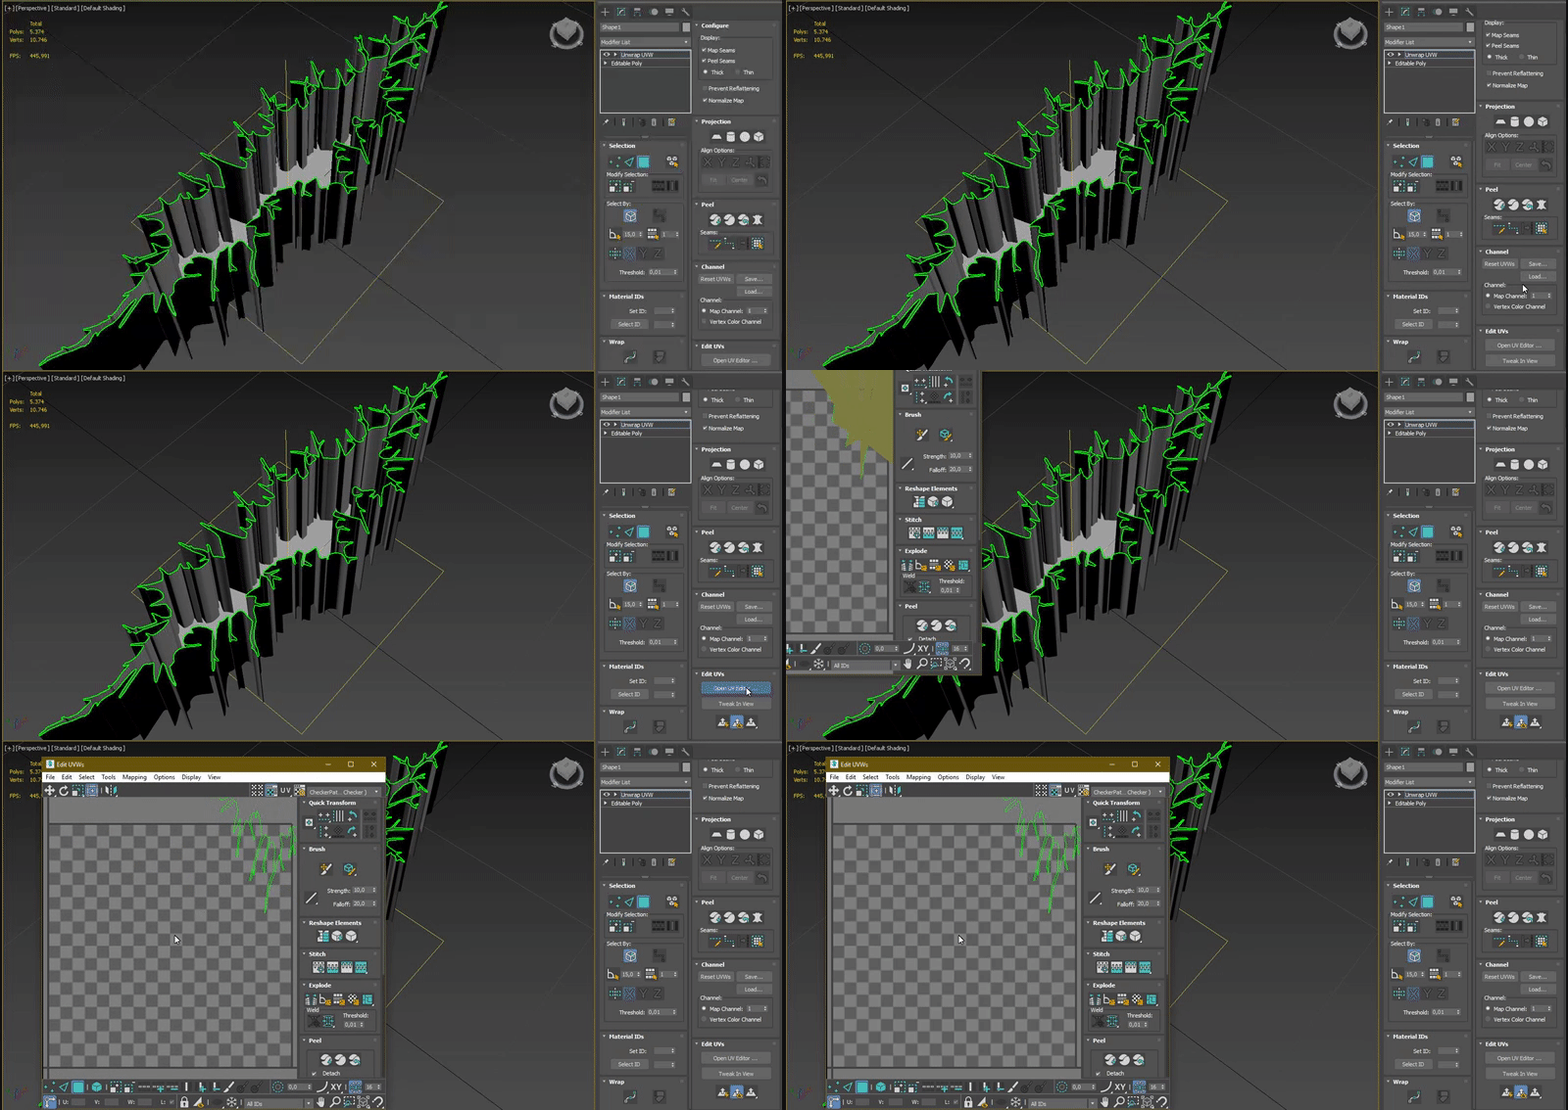
Some edges will appear in green, those edges are the cut ones. So lets go ahead and open the UV Editor
Here is where we are going to see the UVs of the mesh, and as you can see, we can only see the cuts that 3dsmax made for us.
But, we do want our own cuts so close the UV Editor.
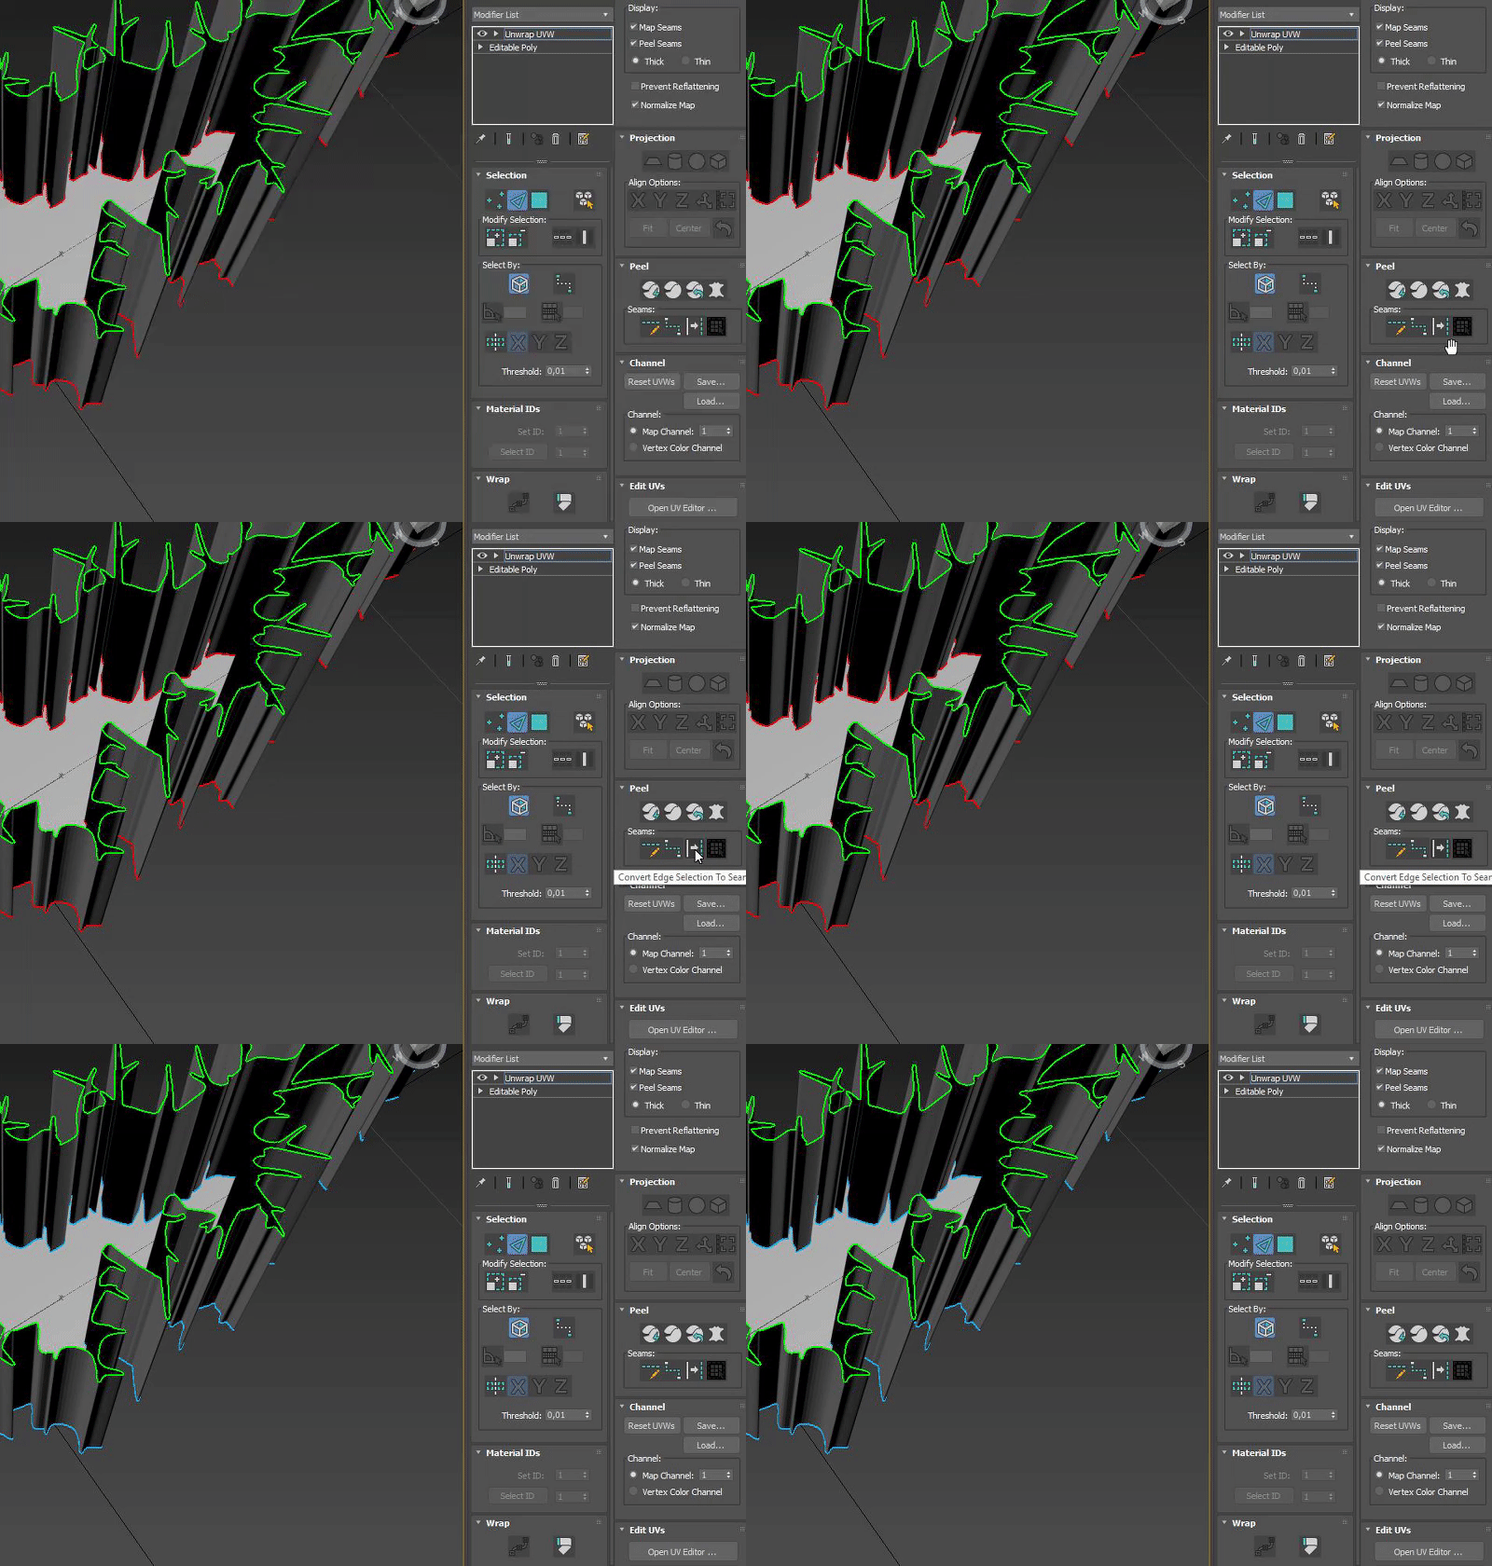
Now, we have to select the floor edges and on of the wall edges to separate the floor from the walls and make the walls plane.(Will explain why are we doing this later on)
To select all the floor edges, first select poly selection , select the floor and then WITH CONTROL KEY PRESSED, switch to edge selection. (So much selection there huh?)
With those edges selected go to the foldout "Peel" and to convert edge selections to seams button, when you press it the red edges will become blue:
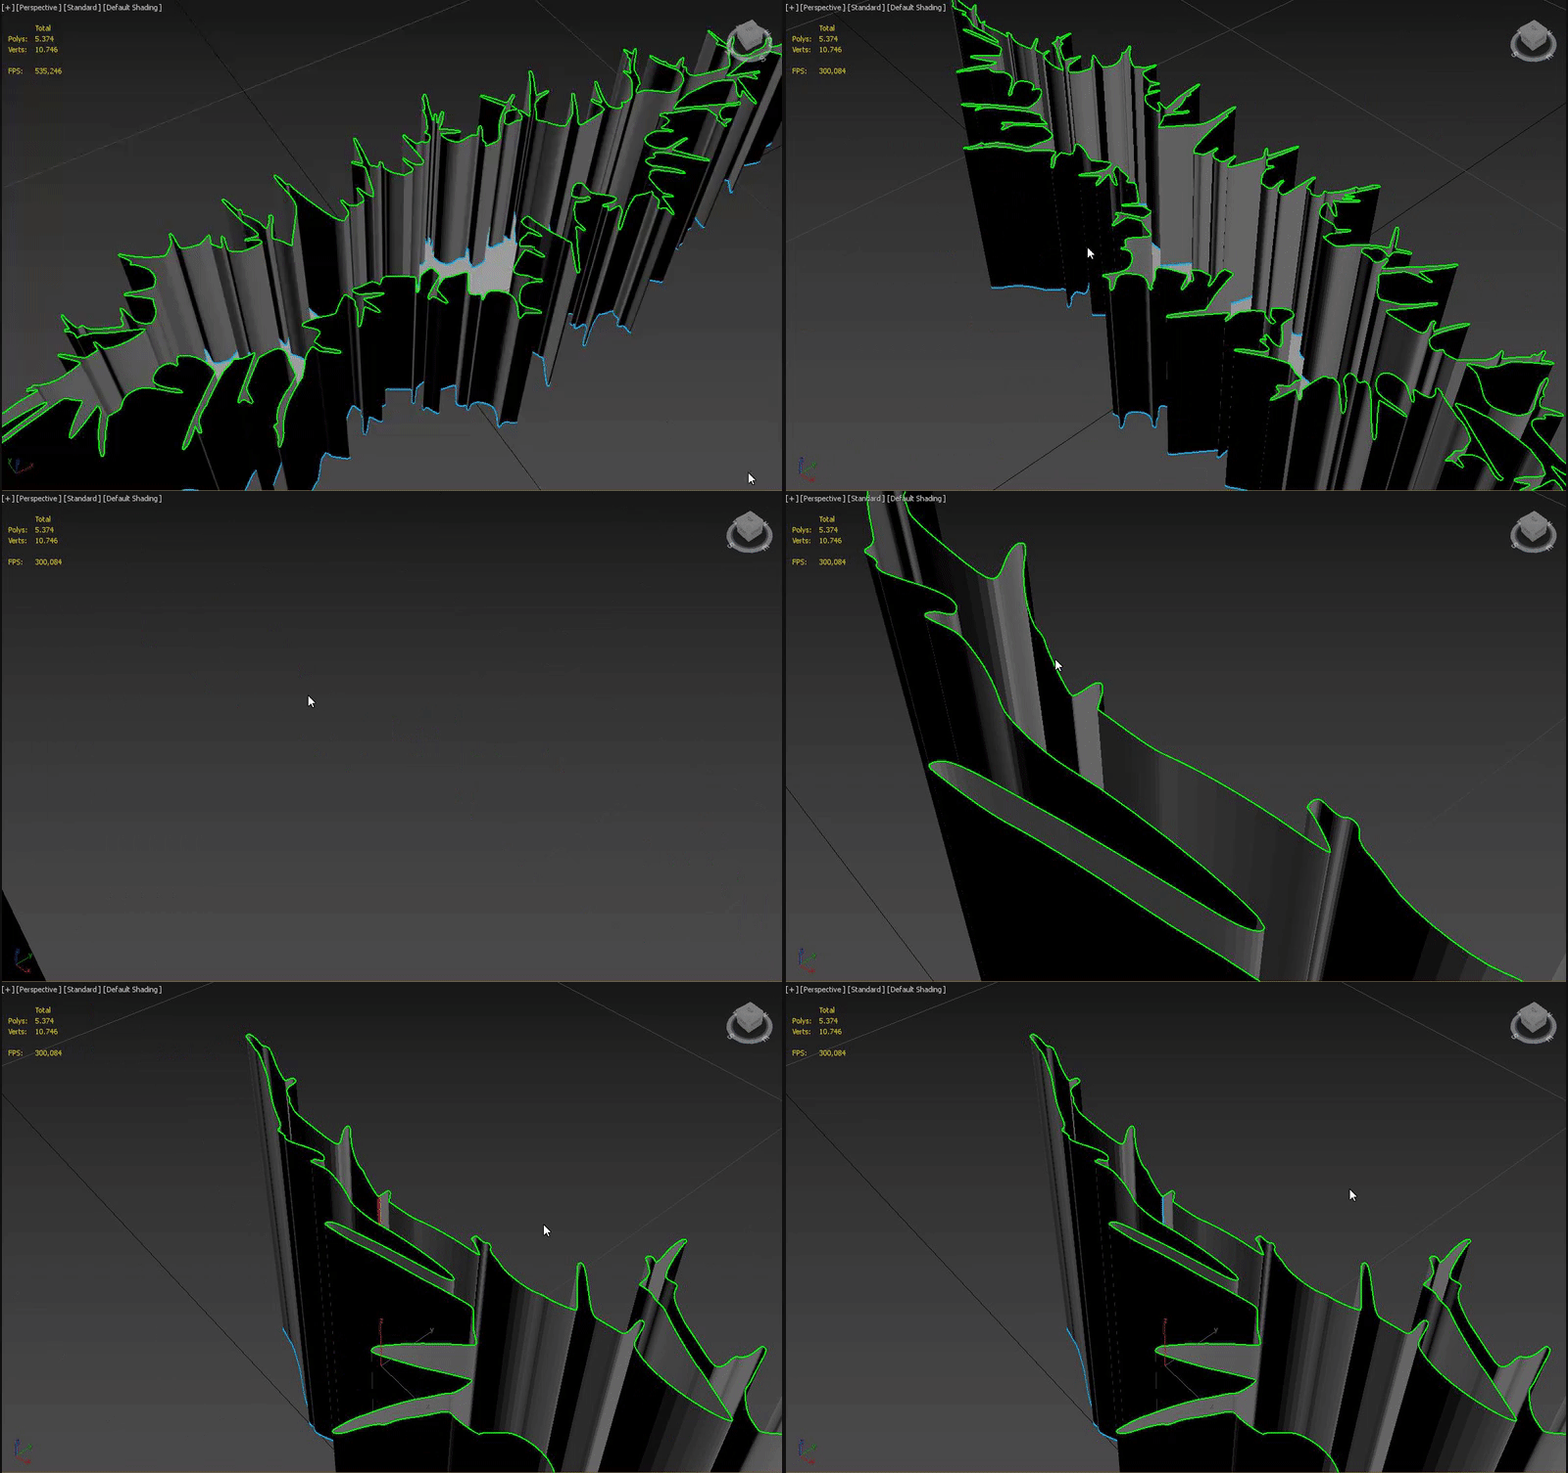
Now take one vertical edge of the walls and convert it to seam too.
Normally UVs seams are cut on edges where the player arent going to look very often. Why? very simple, that seams are tha limits of the mesh maps (Color, normal, specular, metallic, roughness...) so, for example, if a seam is in the middle of the face of a character, the player will notice a straight line on the face. Obviously there are ways to avoid this kind of things, but is good to know it.
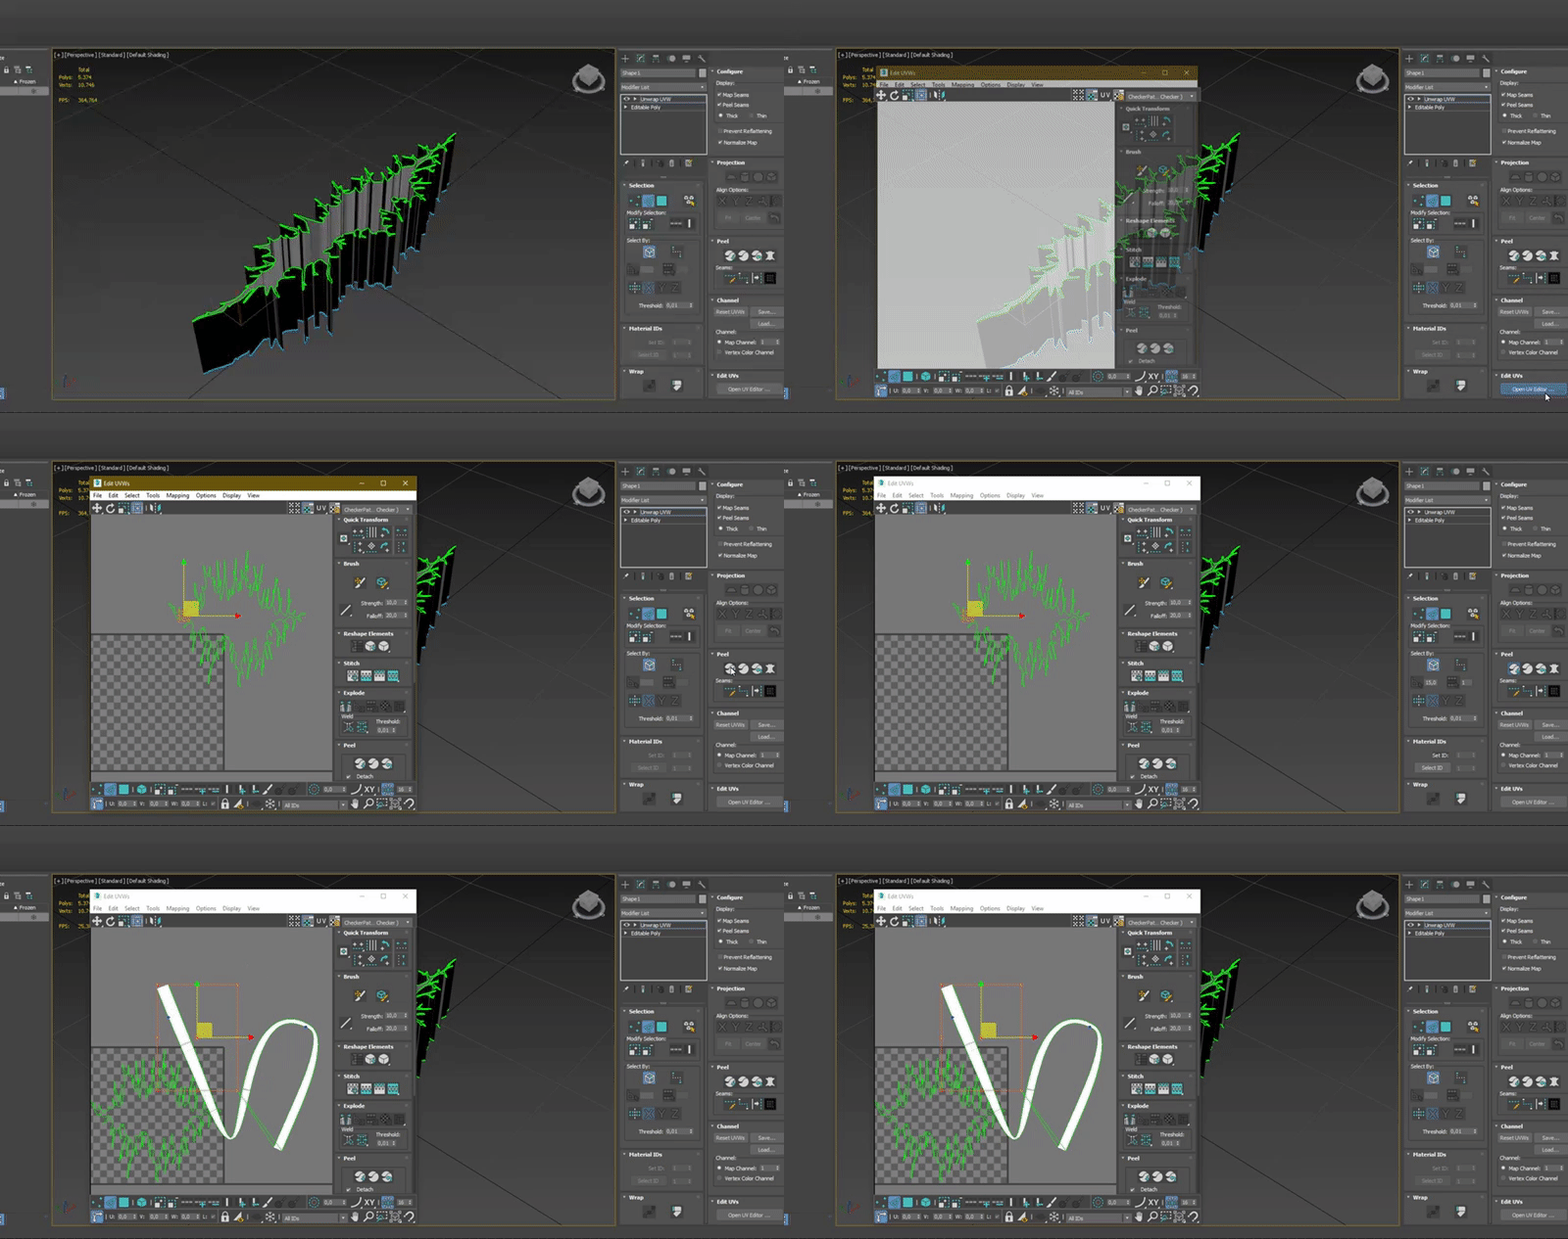
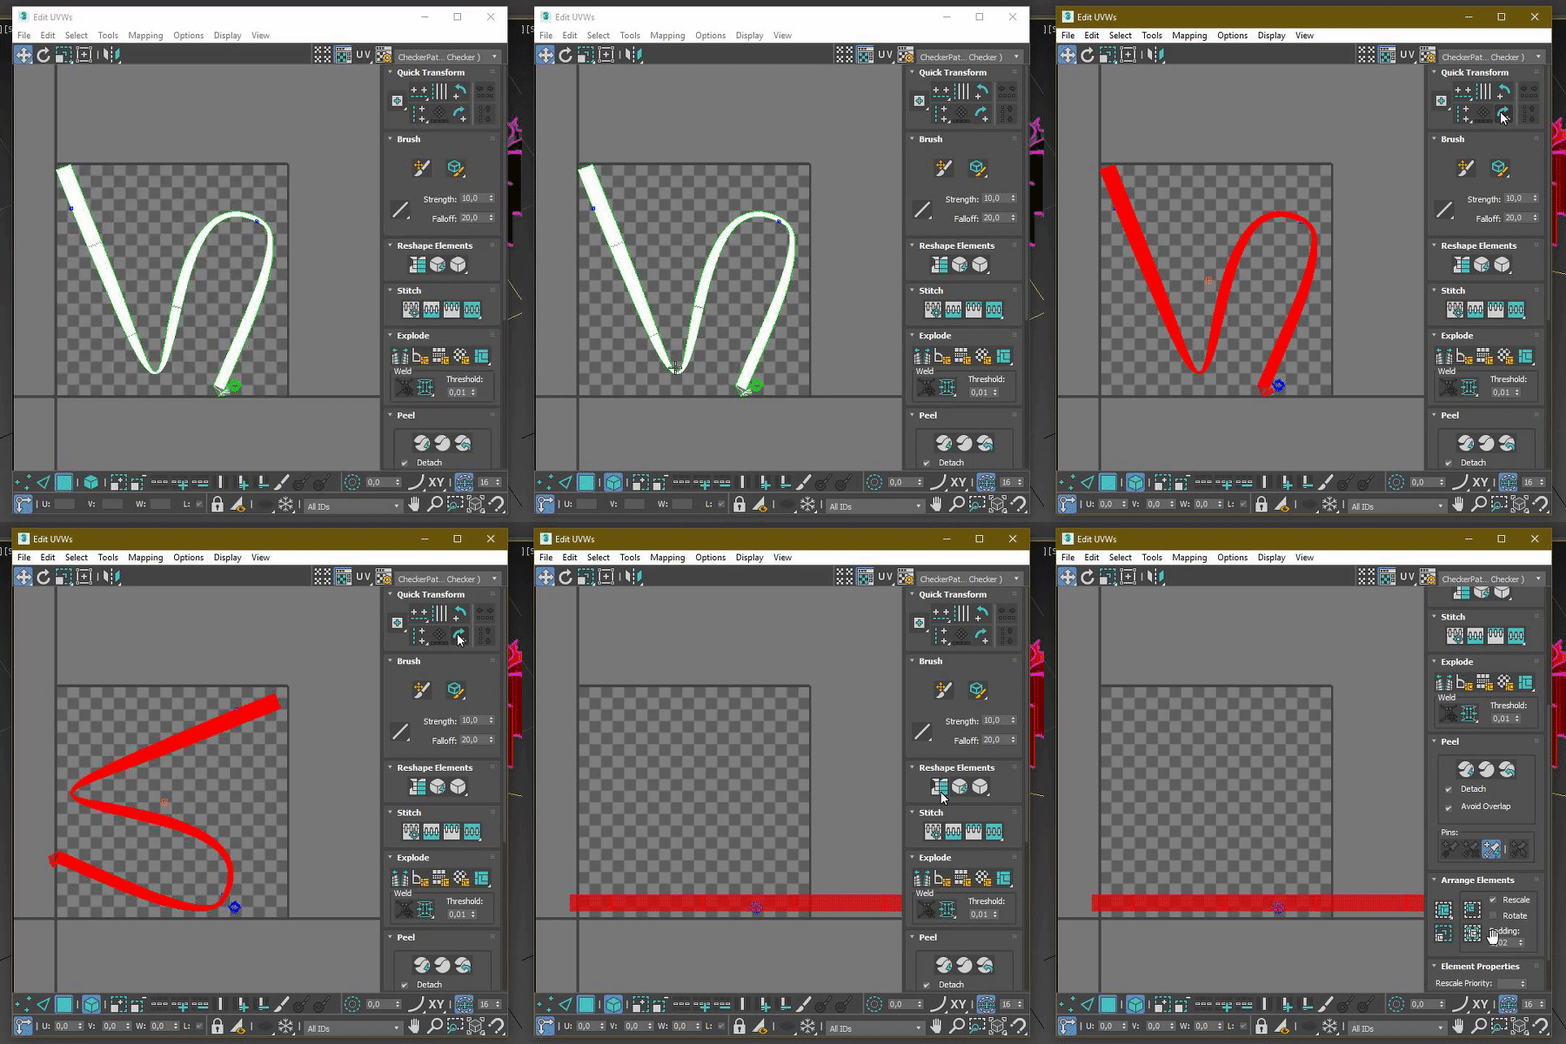
To finish with the UVs, go ahead to the UV editor, to see the changes, and click on the quick peel button
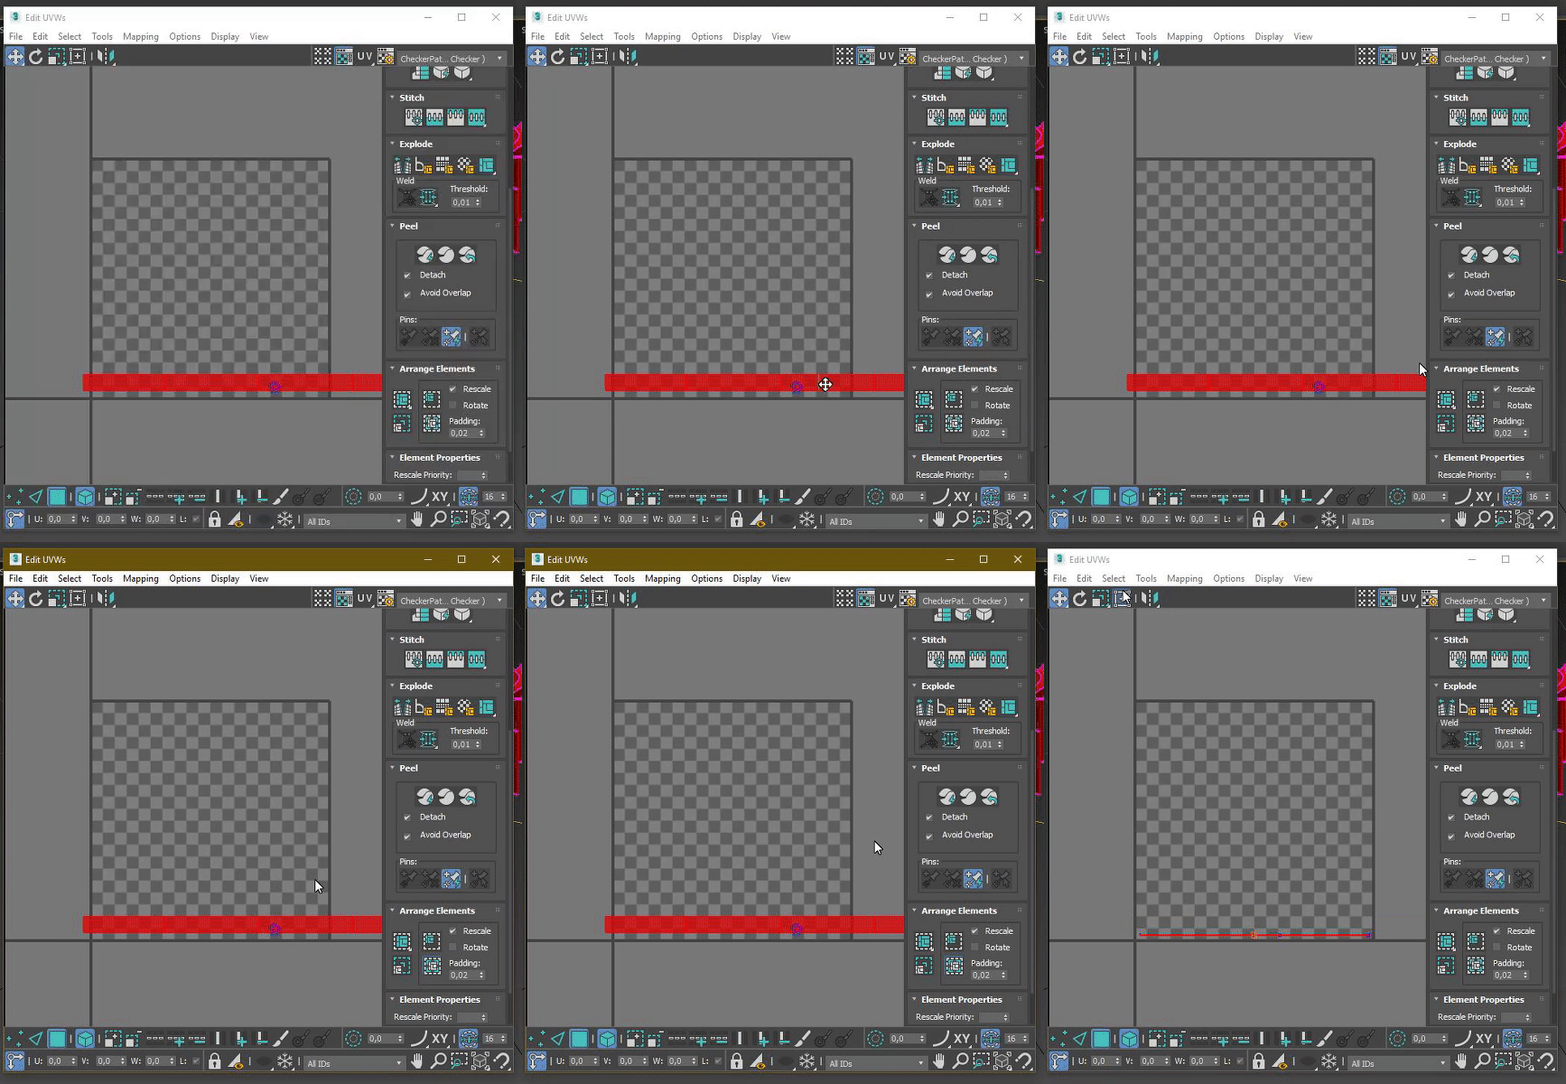
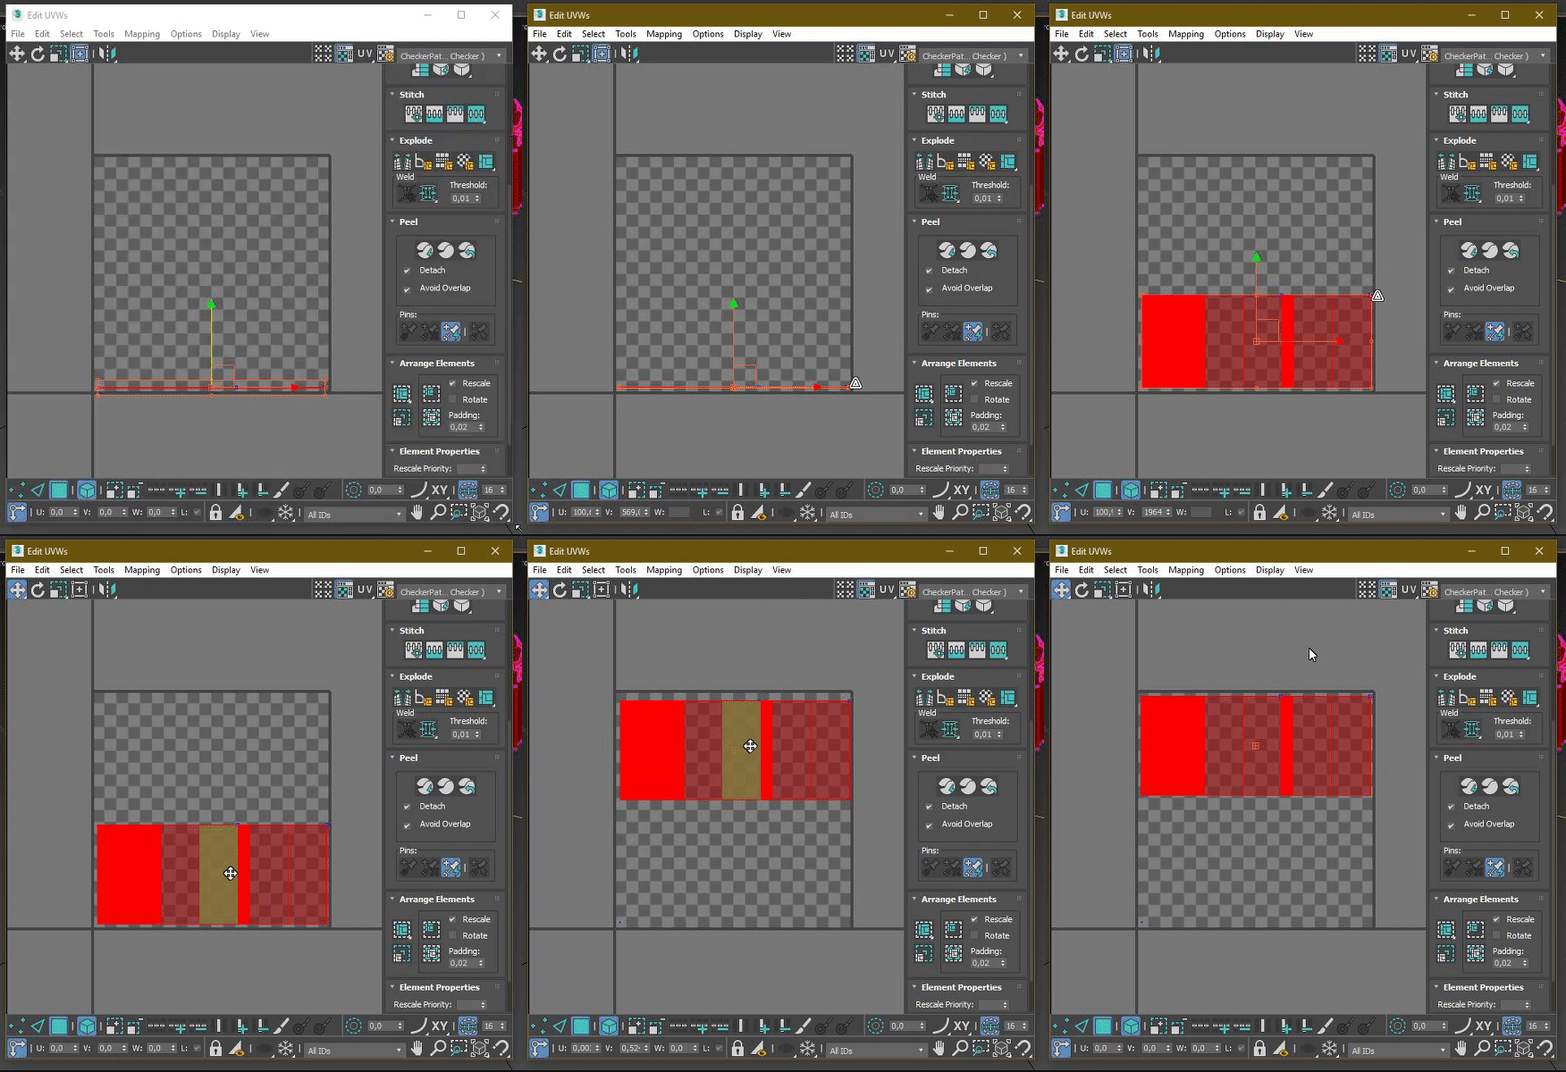
You will see that the crack remains same but now the walls are show( thats because walls were hiding on the crack). BUT, that walls are doing what they like and we want em to be a nice rectangle. Now select it,rotate it, straighten selection and pack it. Then rescale it with freeform to fit where we want to
And dont forget to select the floor and rescale it too, then adjust it to have something like this:
Again, this isnt the best way to cut the UVs but its ok because we want this UVs only for the glow we will see later.
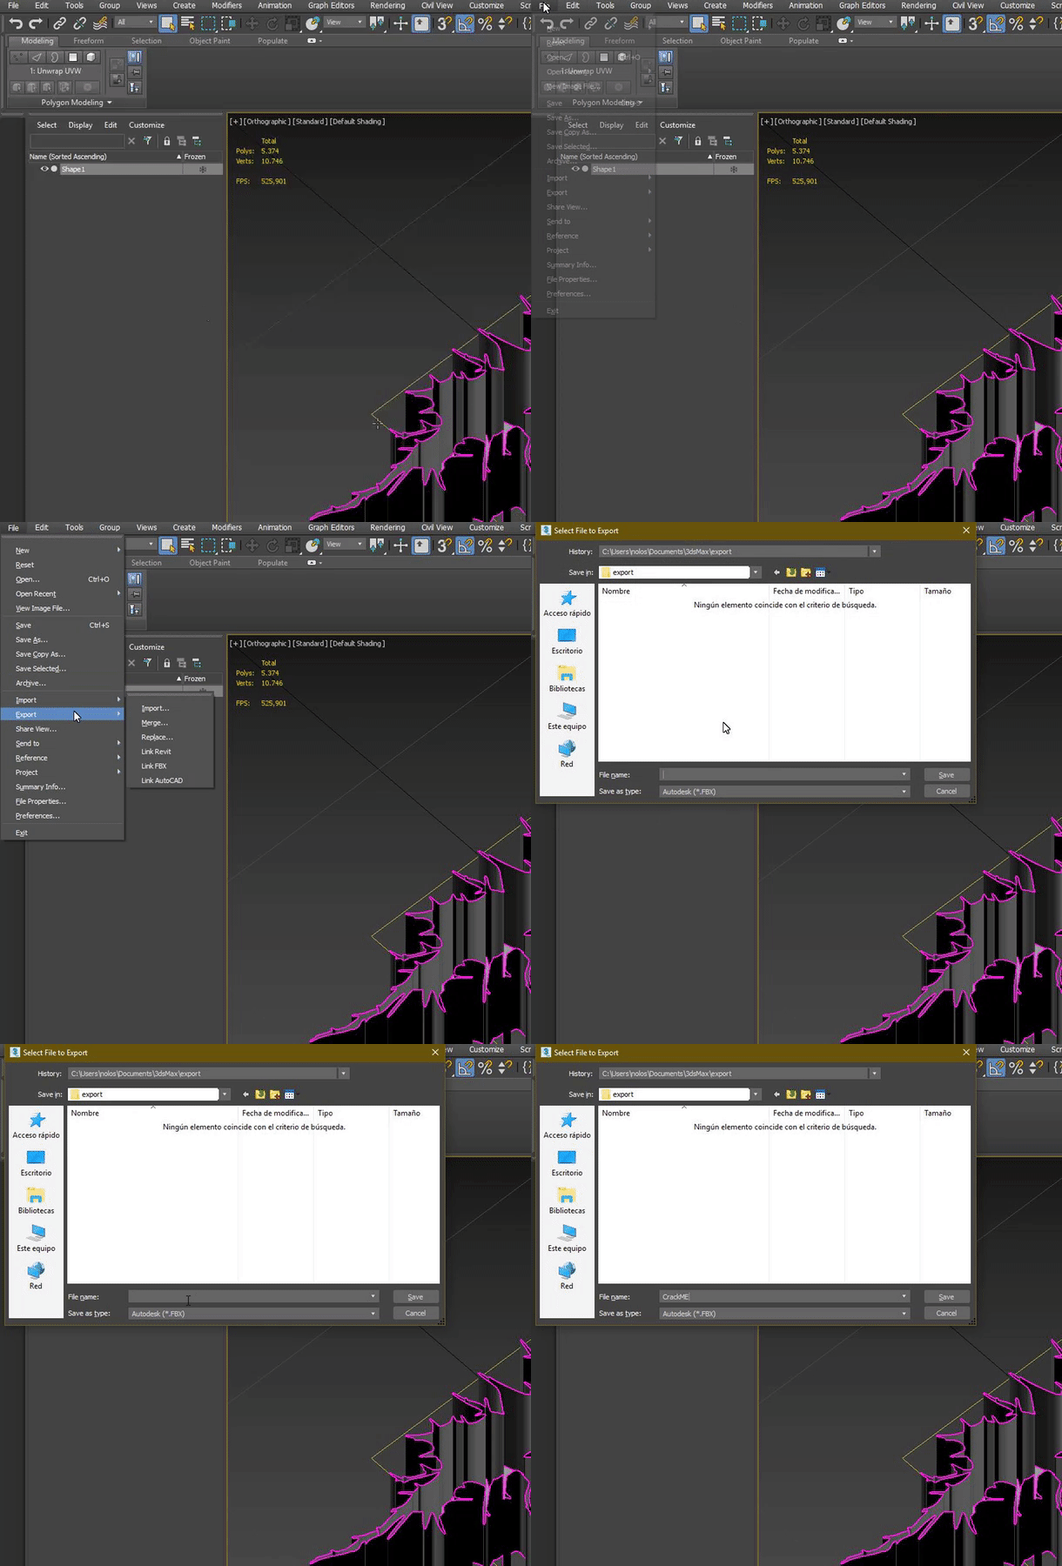
And we are done with the "boring" part!! :D lets export as fbx/obj and add it to unity.
NOW nice people, NOW is our moment to shine. But before shining really really bright on unity, go back to that photoshop file for the crack, and save it with a black background. Something like this:
Lets close all non unity things (except this window obviously) and start with the shader part.
We will need 3 shaders:
◉ Hole Shader (will be that, a hole to see through)
◉ Hole Crack Shader (will be the mesh we made
◉ InThings Shader (whatever we want to put in the ground crack)
Starting with the hole shader, the simplest one.
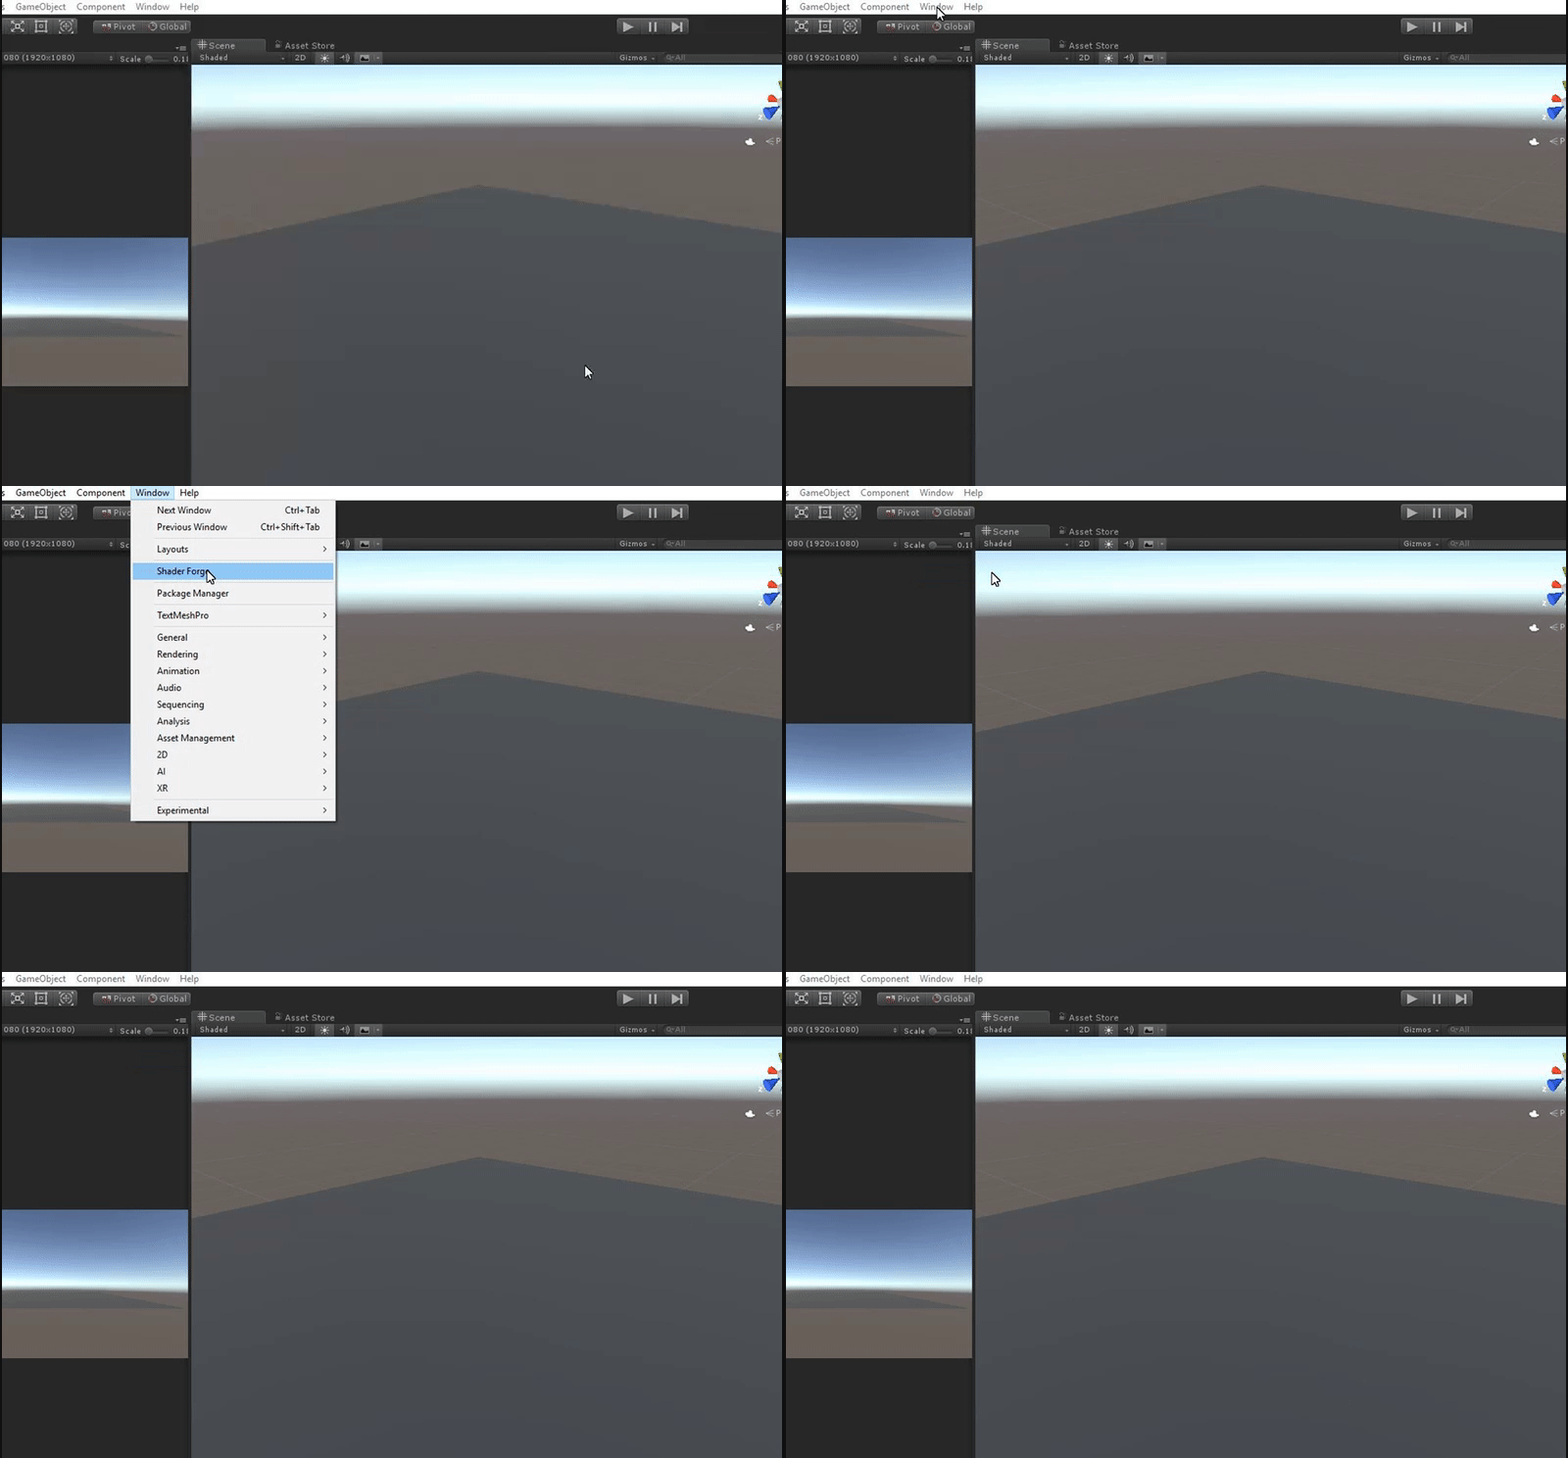
Go ahead to Window > Shader Forge
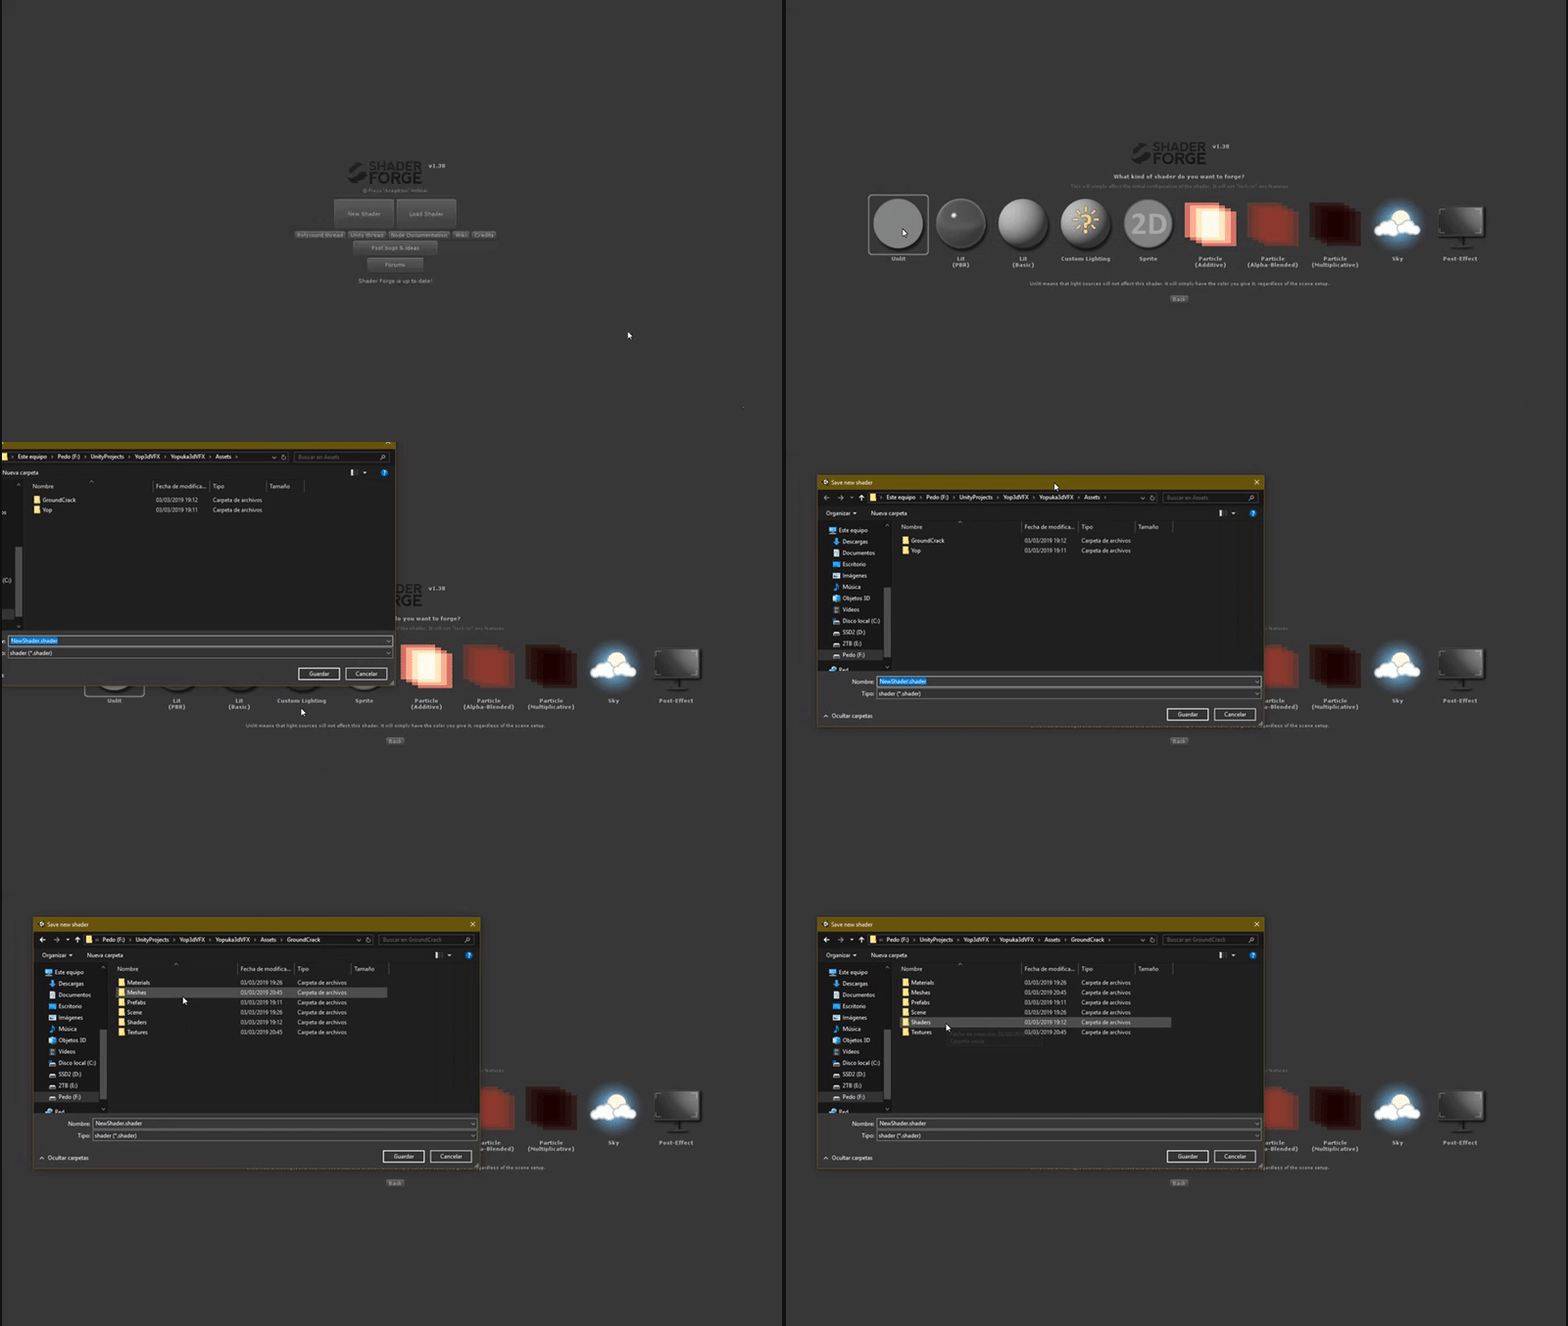
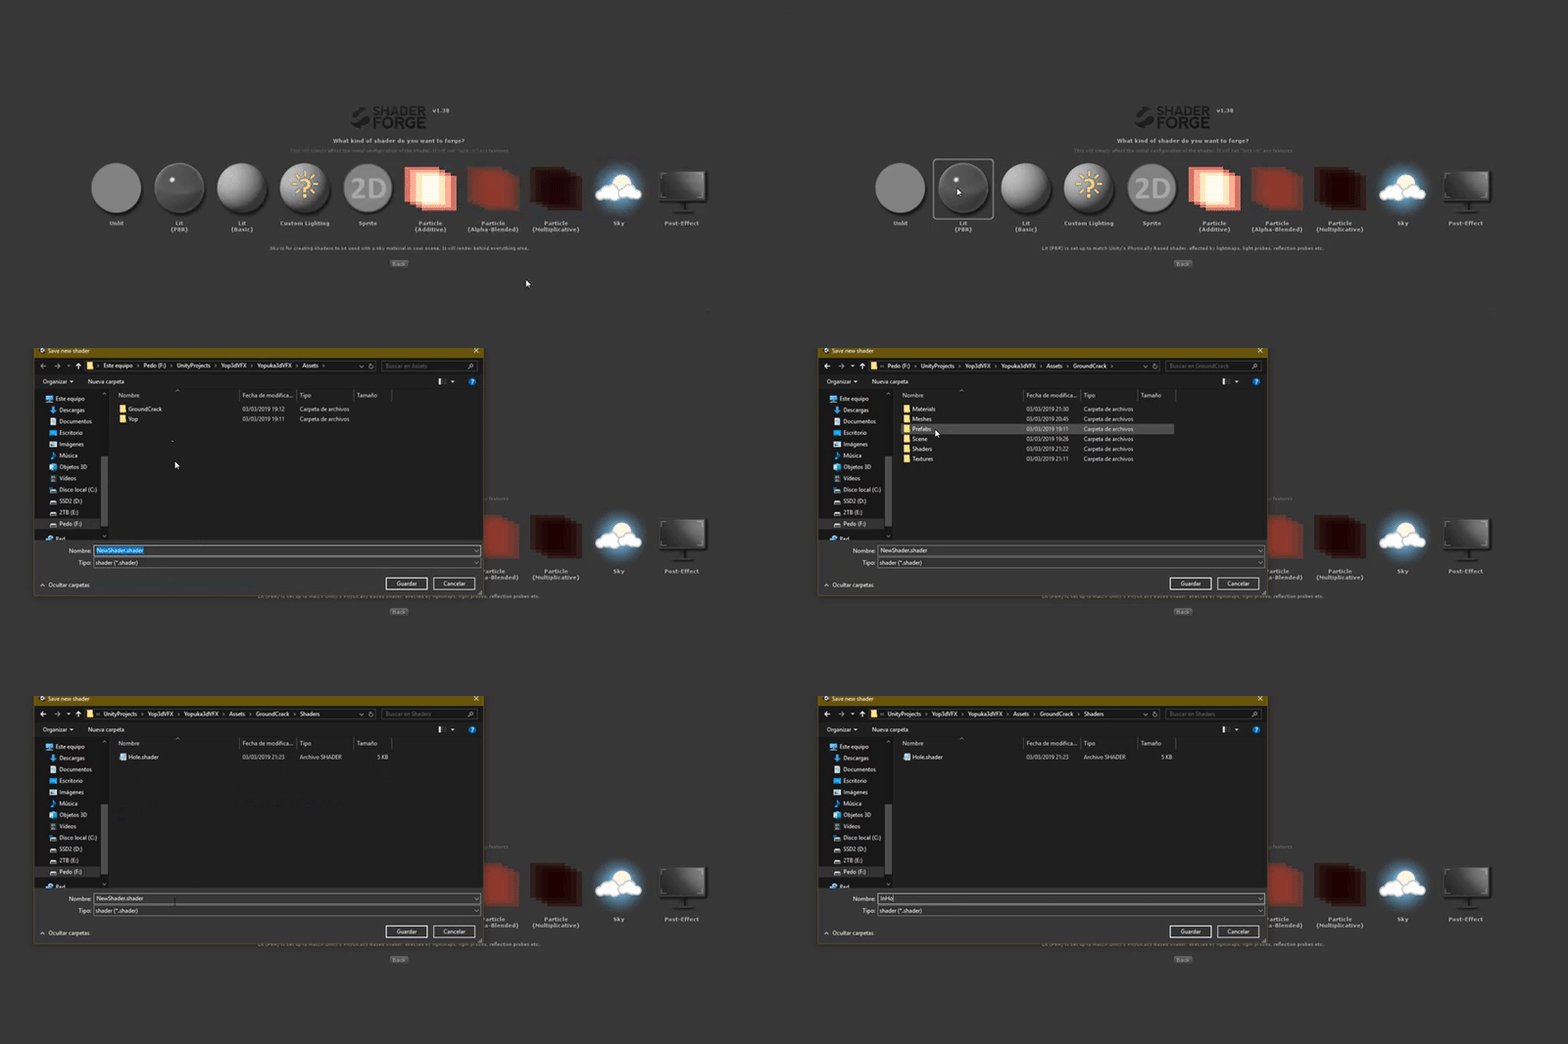
That will popup ShaderForge window. Hit New Shader > Unlit , and save it with a descriptive name
First of all change the Path name. Then change the LOD to 200
Next step is going to Blending options and change BlendMode to "Alpha Blended" because we want to modify the alpha on the shader. Unmark R,G,B,A, and unmark "Auto Sort".
Now, the magic on this effect is like this:
With hole shader we say to our camera, that based on a texture, dont render ANYTHING in that hole with the Render Queue.
So we are going to give this Hole shader a X Render queue and LOD. To make the things we want visible in this hole we are going to mess with their Render Queues and LOD to be able to render it in.
Back to our "Auto Sort" option, set order to Opaque Geometry and substract 2, then change "Render Type" to Opaque and mark "Write to Depth Buffer" to finish out the settings of the shader.
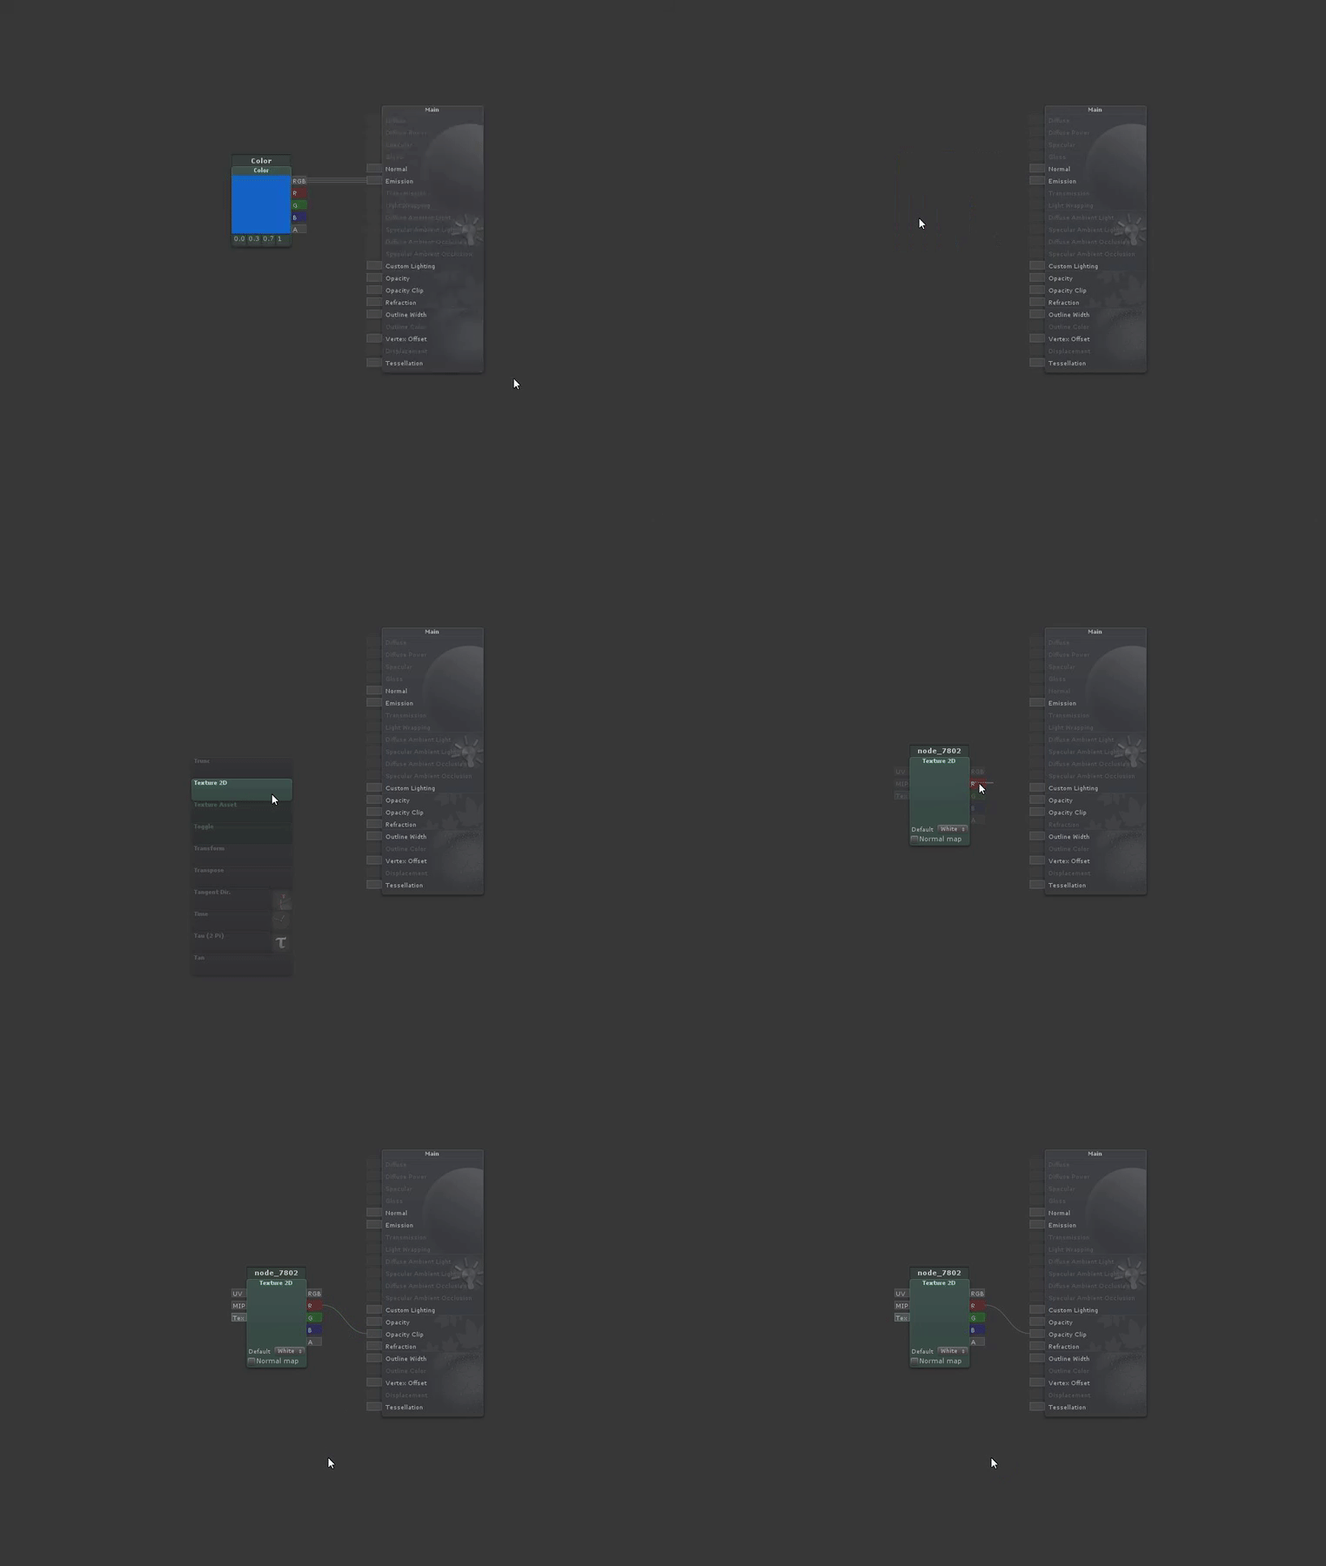
As you can see we dont have any warnings or errors in the shader but is alpha blended and opacity is not connected. Ignoring that we are going to delete color node and add a Texture node, then pass that Texture node Red channel to Opacity Clip.
Dont forget to rename the texture, we dont want unordered shaders in our workspace
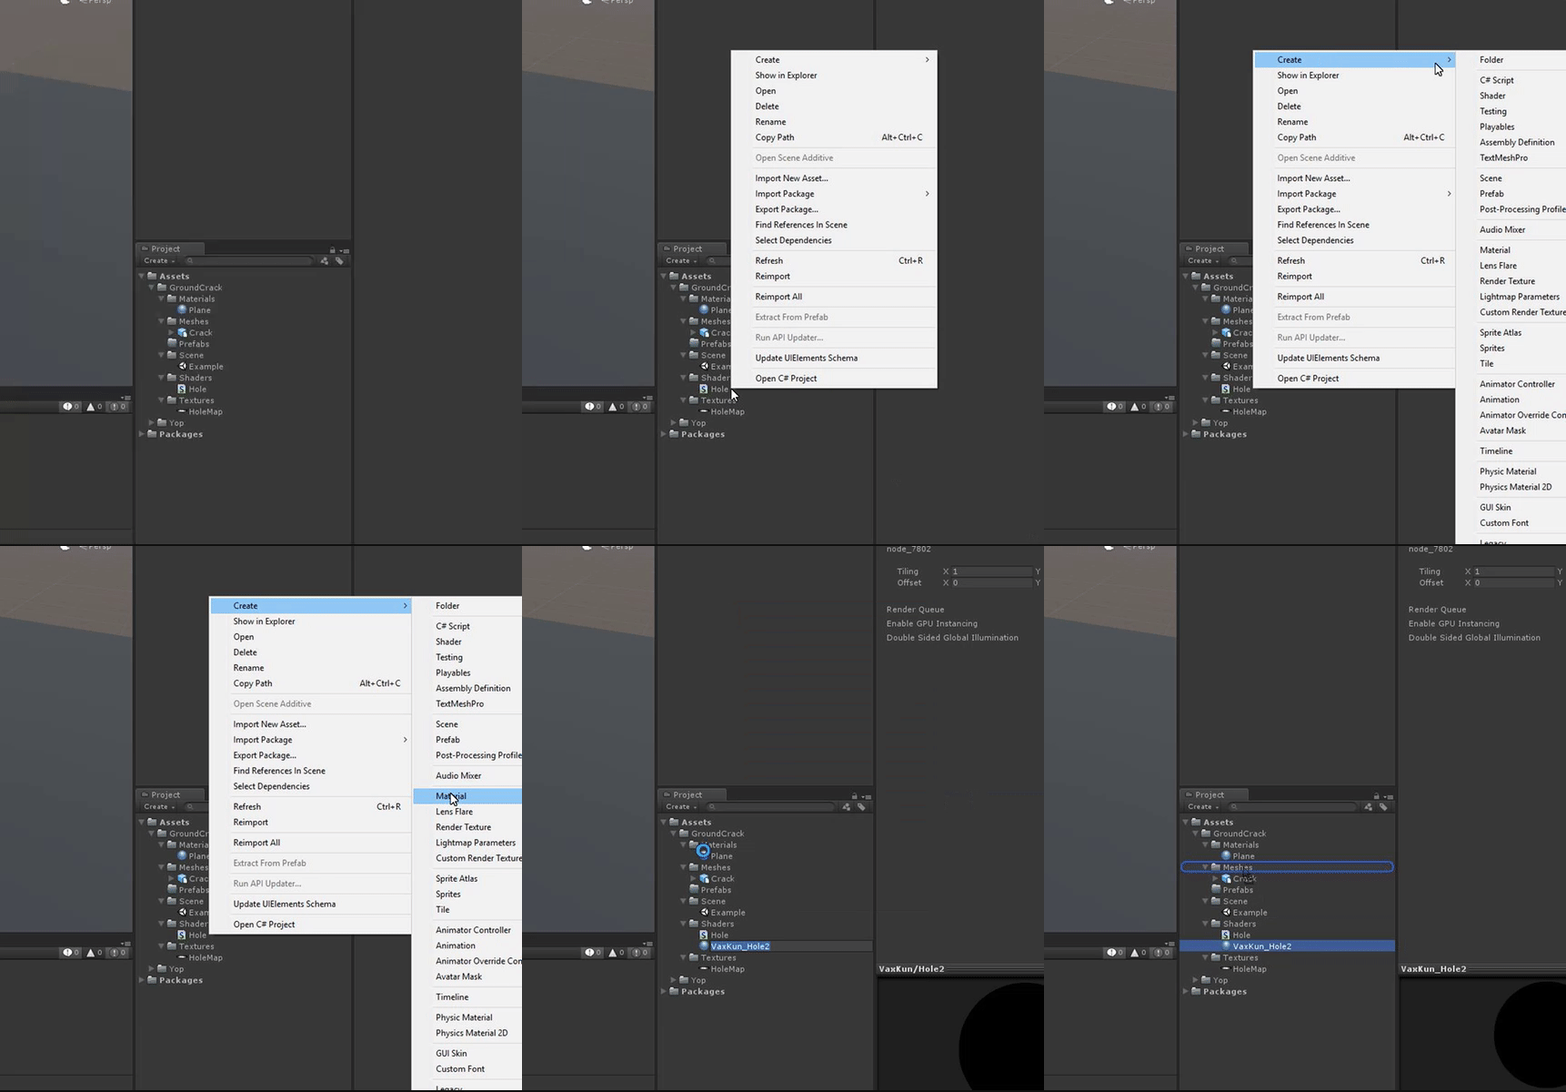
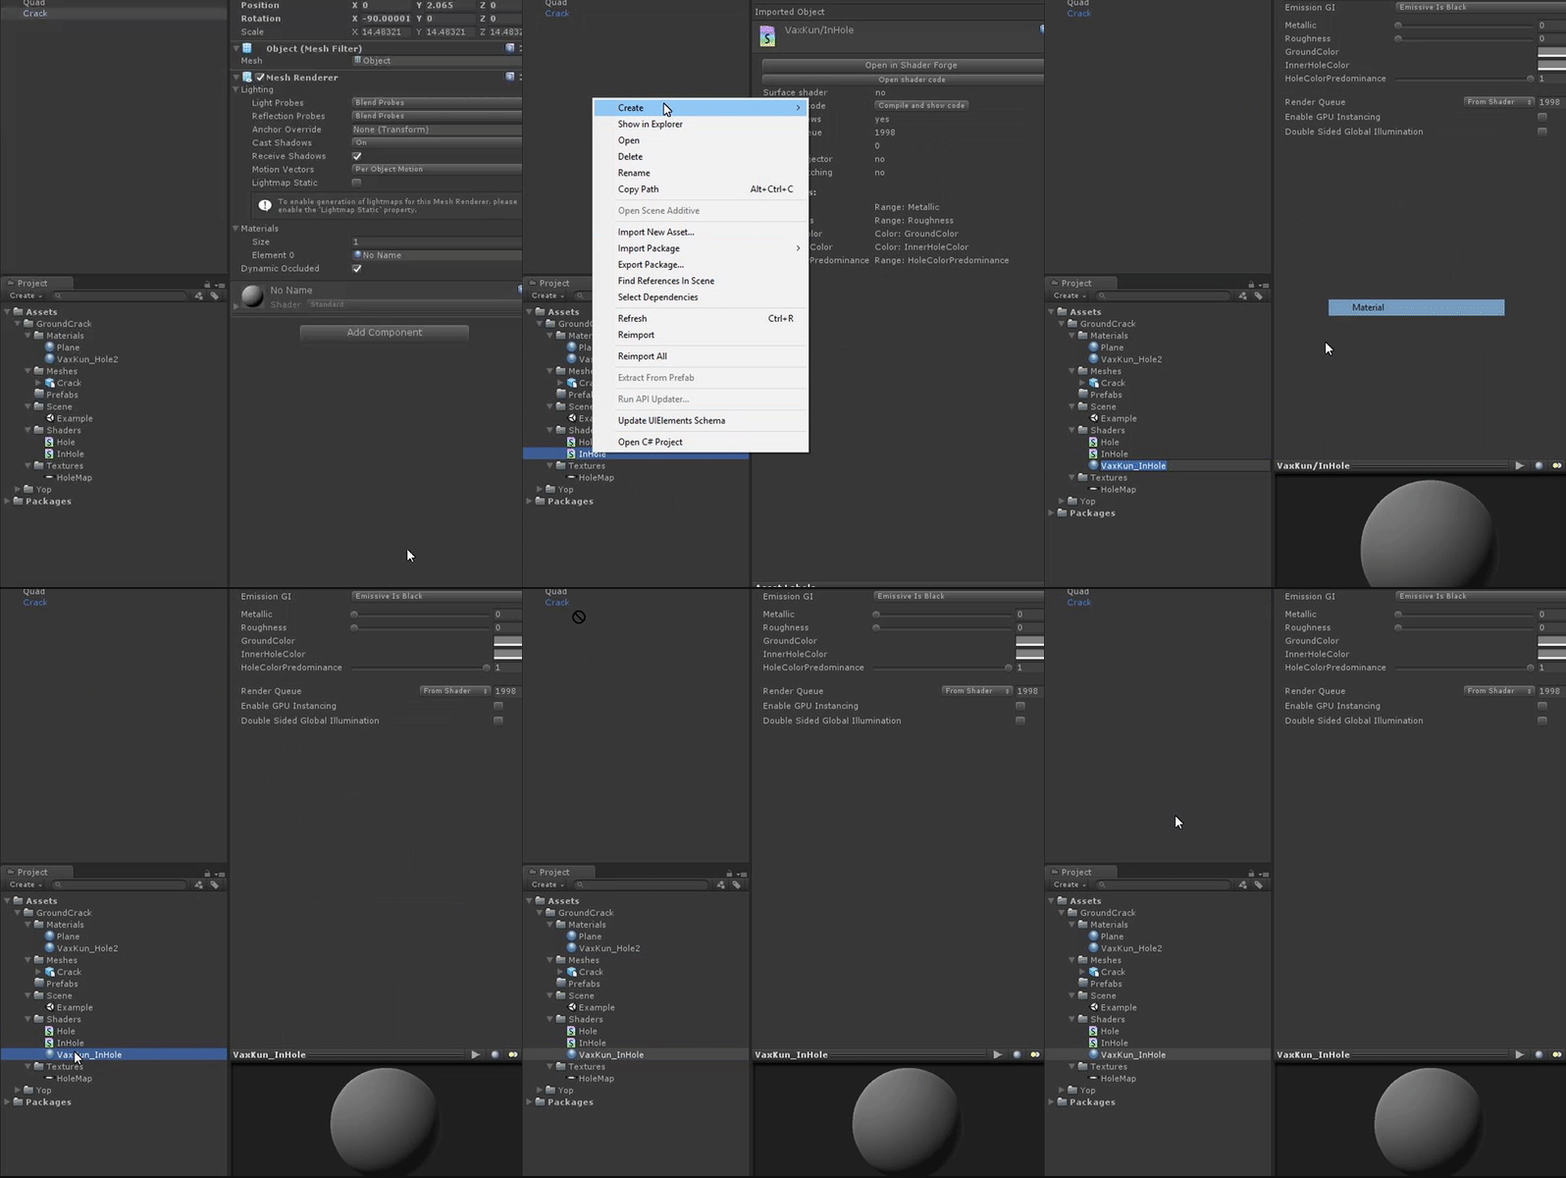
Now close shaderforge or ignore it. Lets go to unity and create a material for that shader
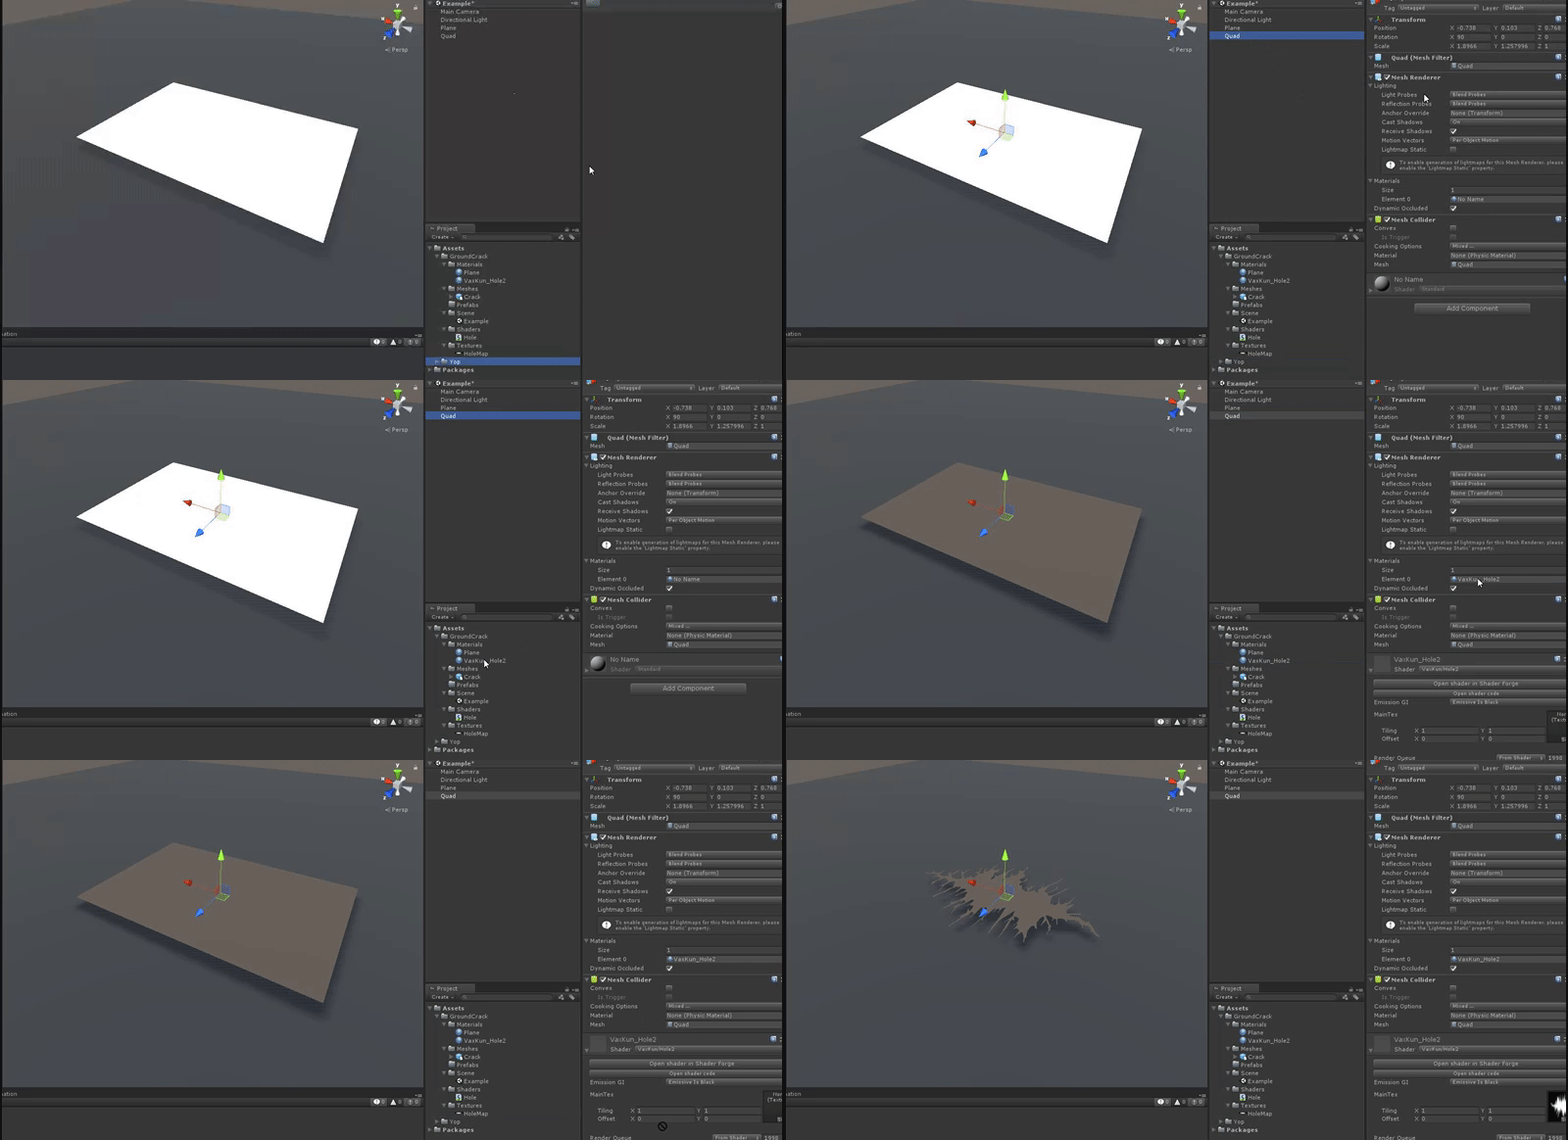
Now add that material to a Quad and see how strange it looks. Then add the texture we have made before
As you can see throught our object we can see the skybox :D so we are done with Hole shader.
Lets go ahead to second shader, the hole walls shader.
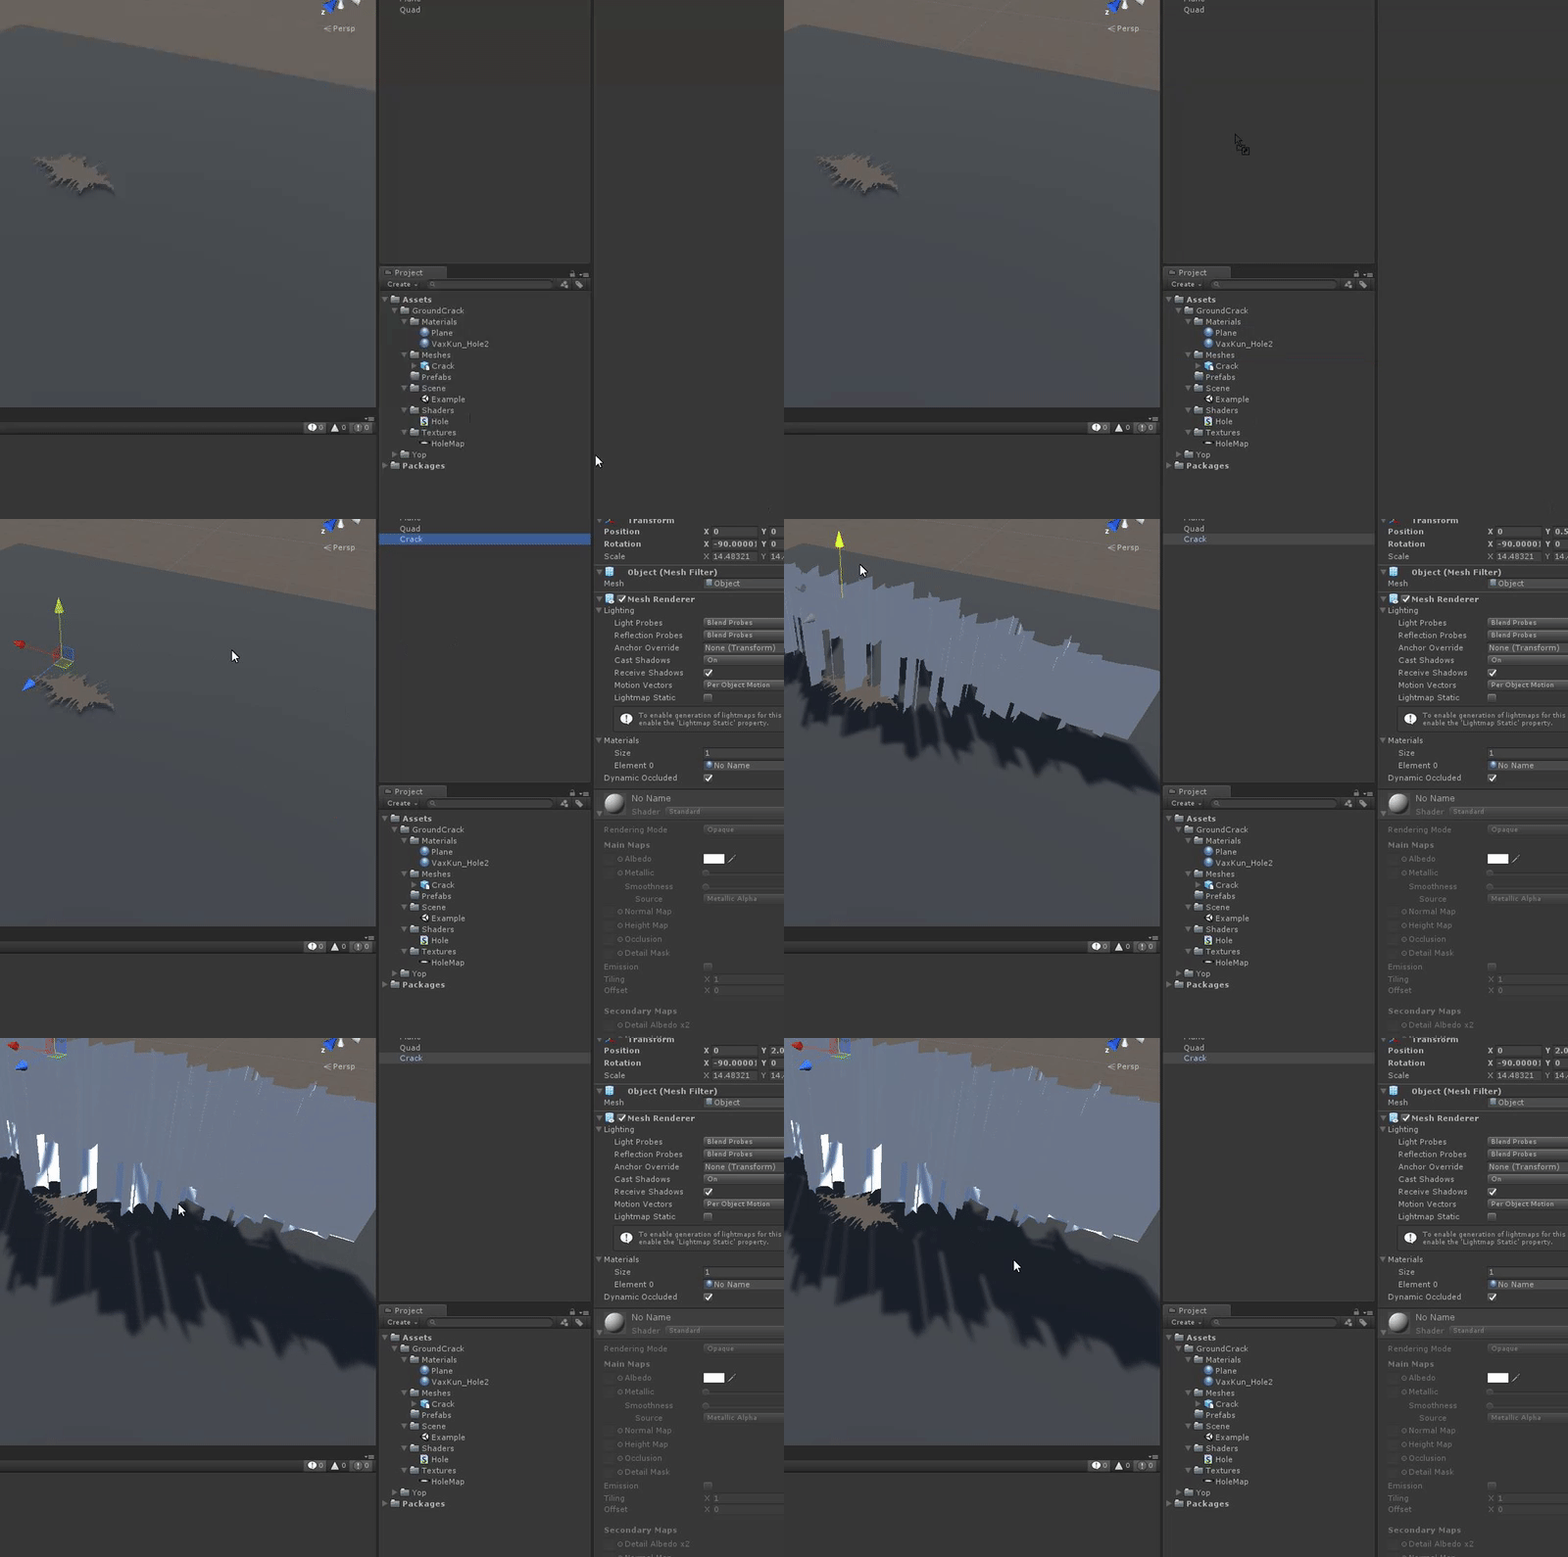
First, add the walls mesh into our hierarchy.
Now we have our lovely mesh here, lets go back to Shader Forge, Window> Shader Forge, and new Lit(PBR). Remember to save it with a nice and descriptive name.
Its time to adjust the settings.
On Shader Settings we only have to do one thing: change de path.
Now, leave lightning untouched(if you want to change the Gloss mode or the specular mode its ok), geometry wont be touched so go directly to Blending.
The only thing we want to change on Blending is the Auto Sort. Unmark it and select "Opaque Geometry" and substract 2 of it.
Now that all the settings are done lets go to the node part.
Of course we can leave it like that and got to the next step, but we arent here to make boring effects, so we are going to add a nice glow to the crack.
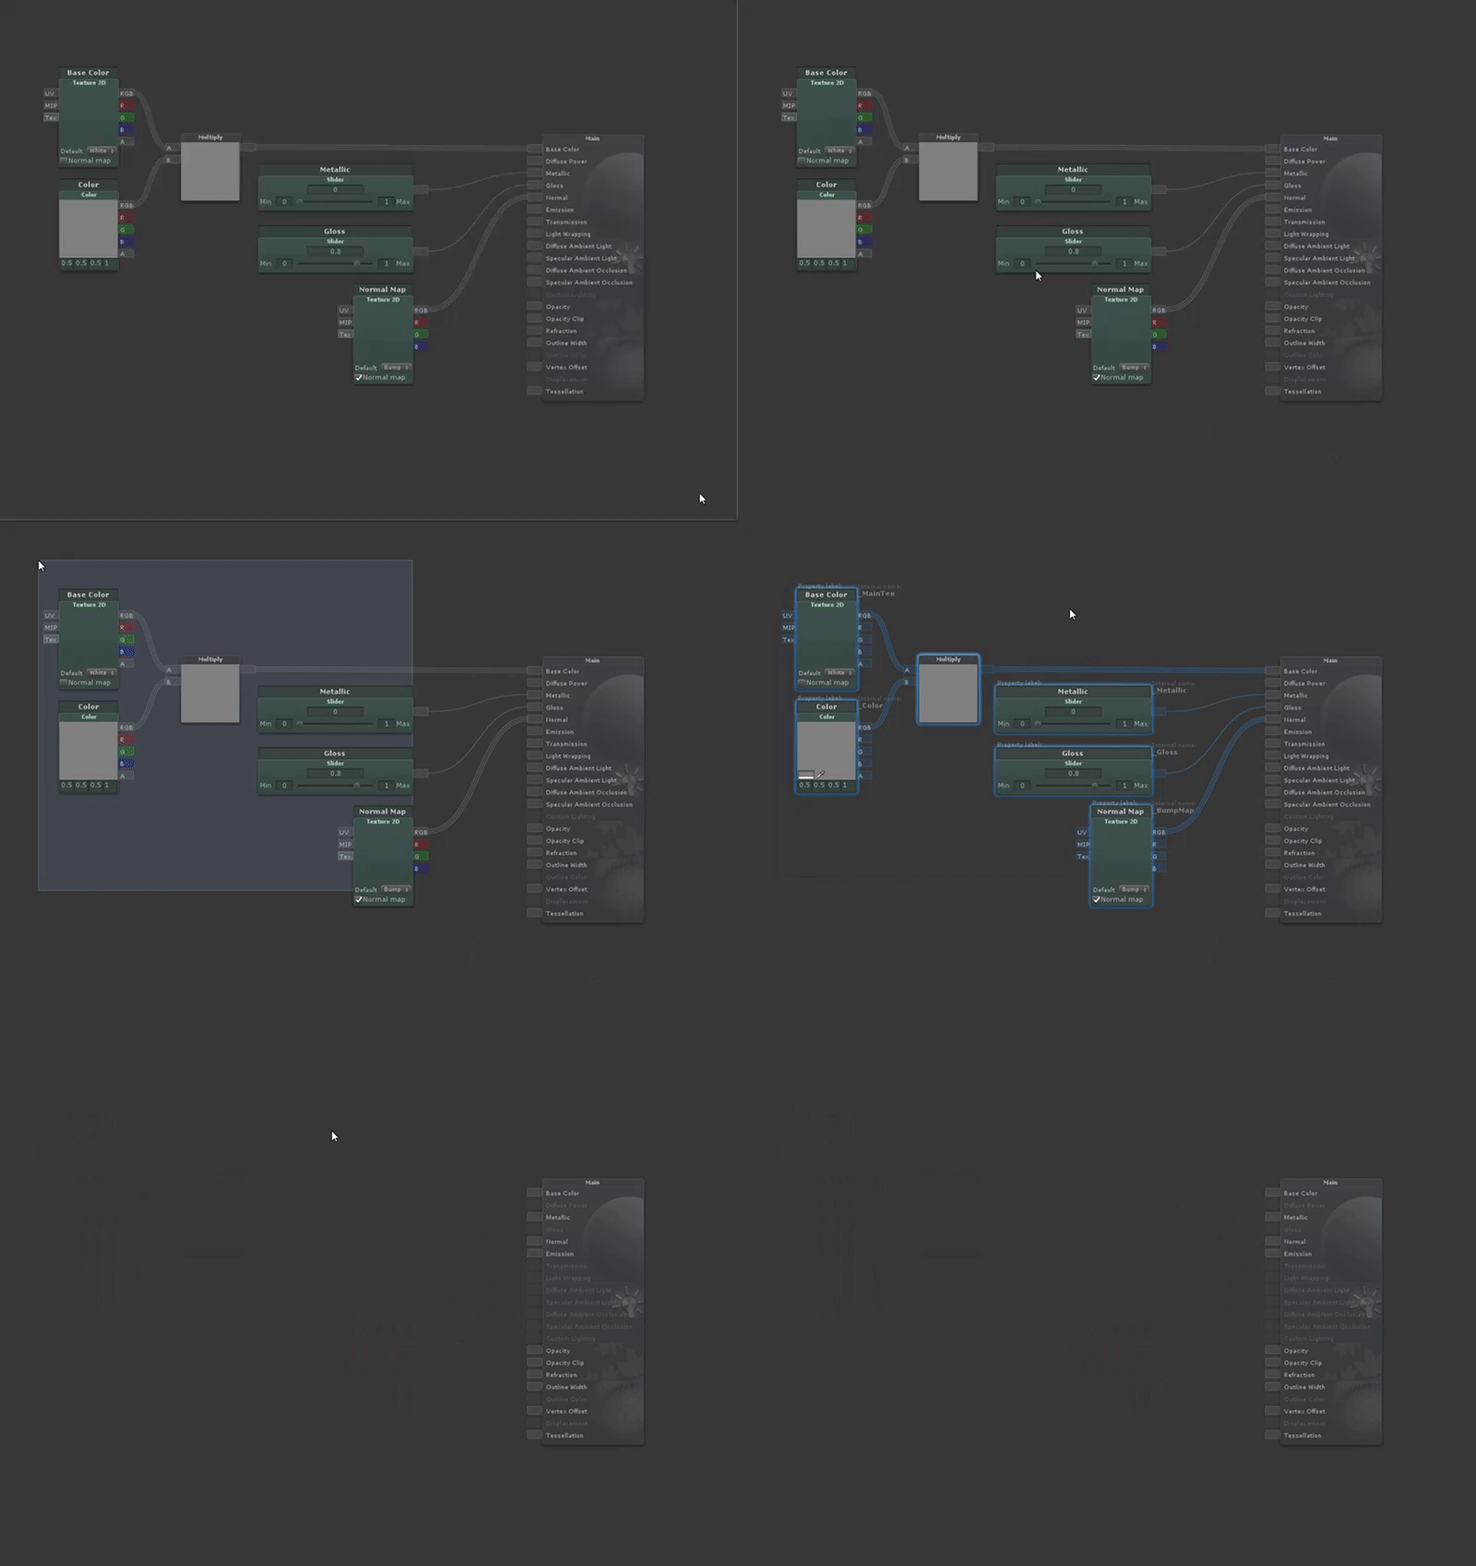
So, lets delete all the nodes and start without nodes. With ALT pressed, select all the nodes and delete them.
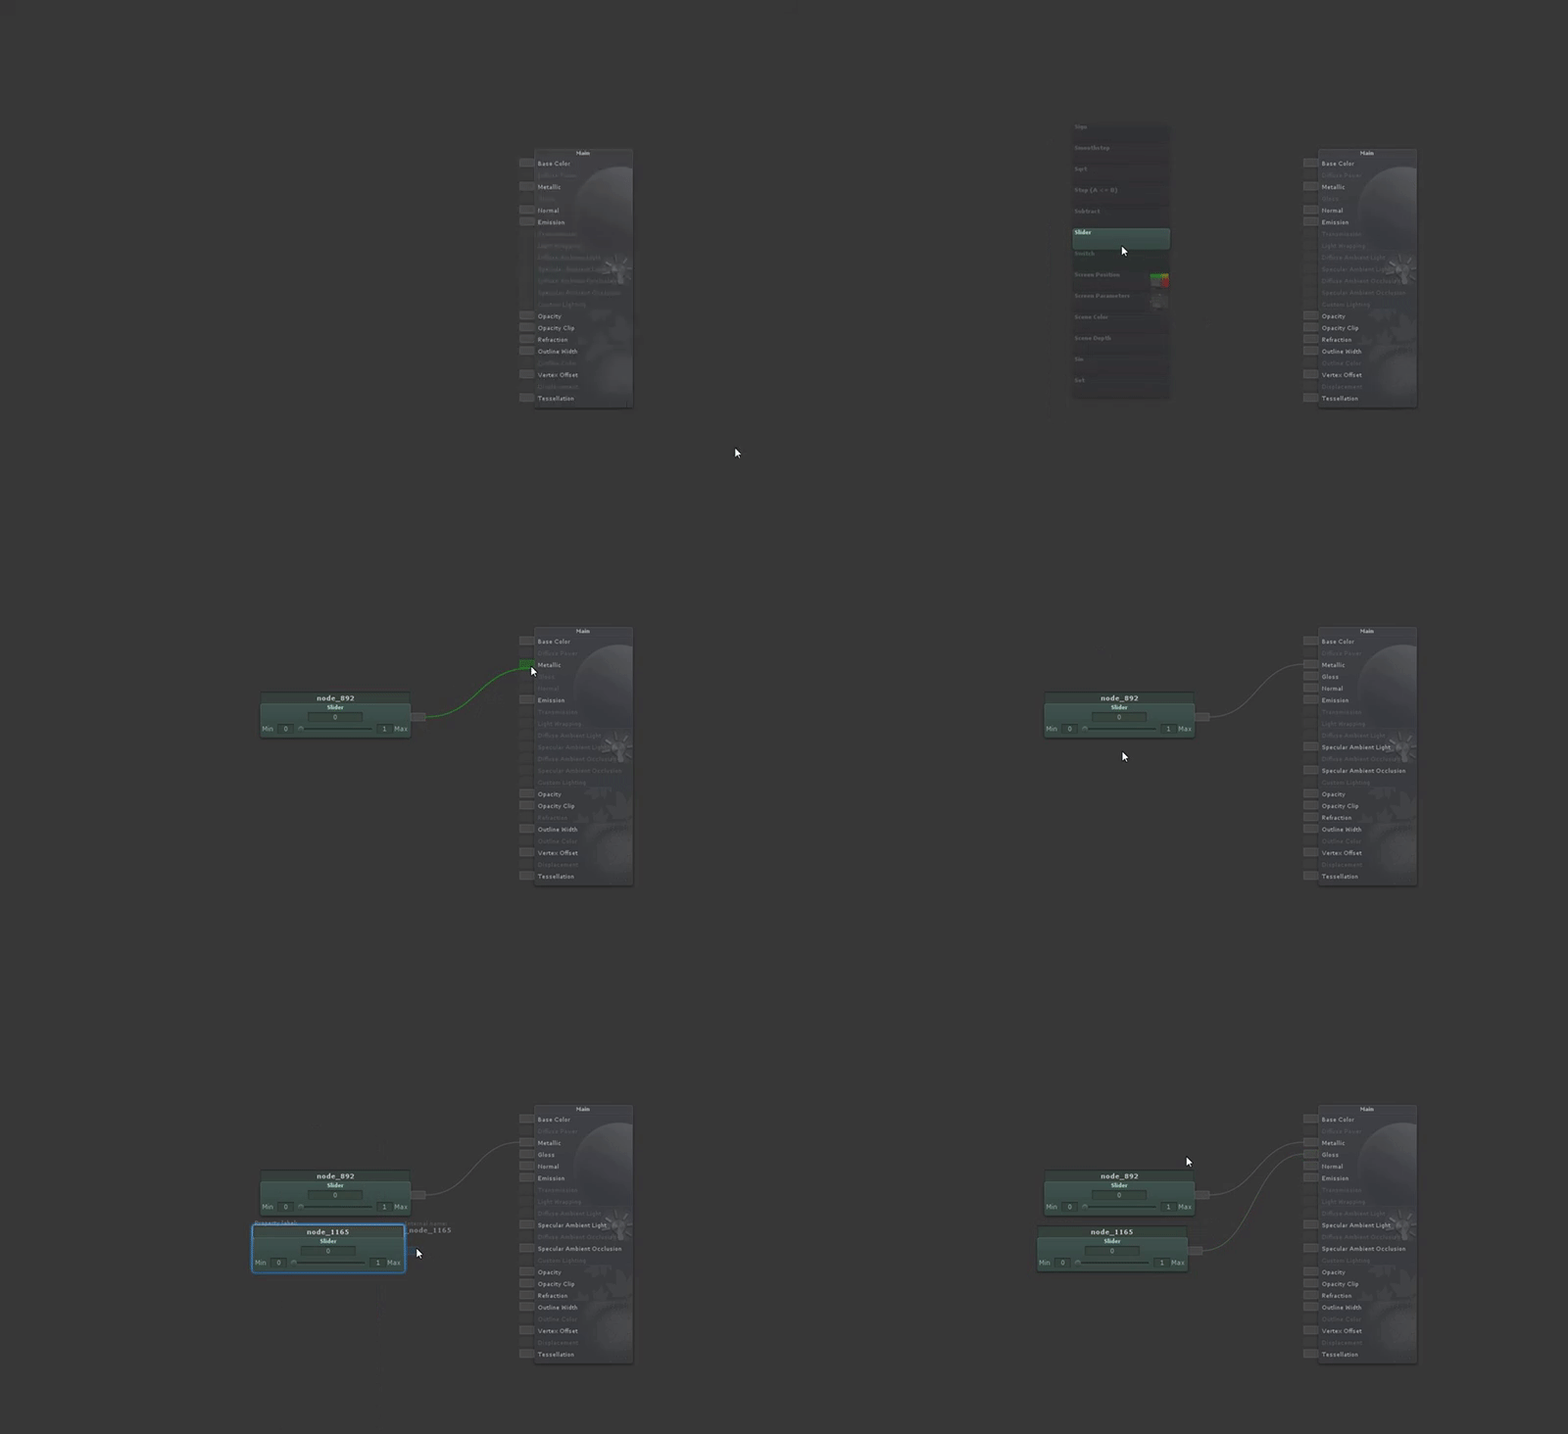
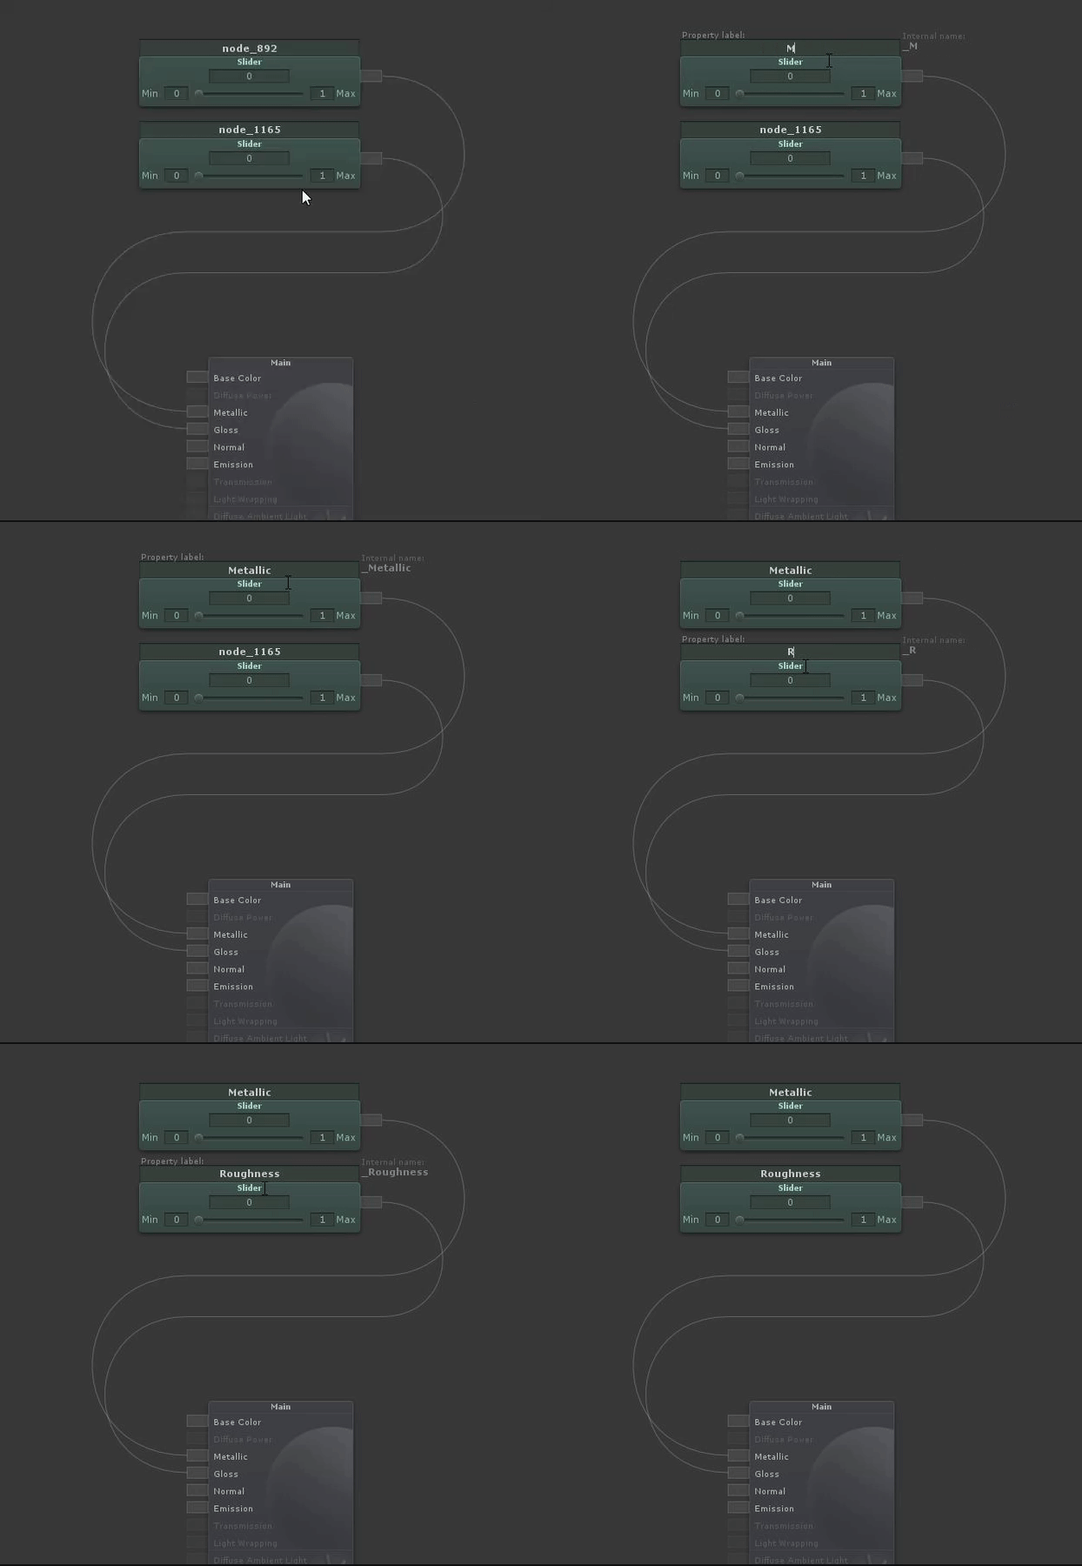
Now, lets start adding the Metallic/Specular Glossiness/Roughness sliders.
Dont forget to rename them.
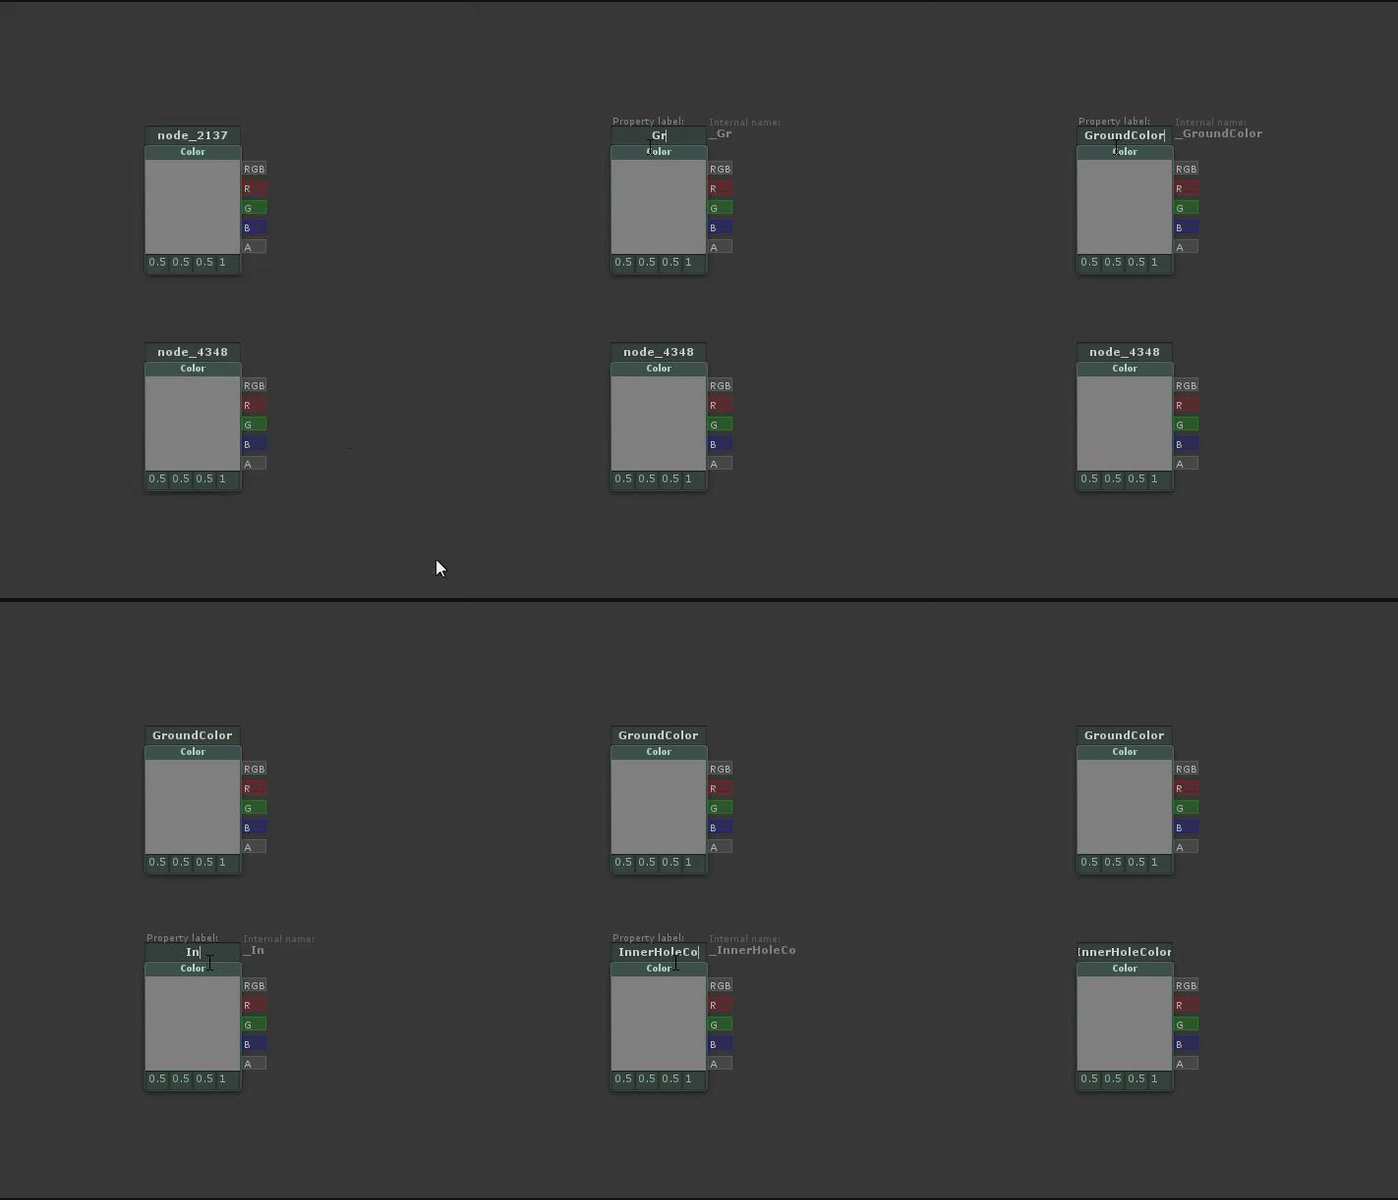
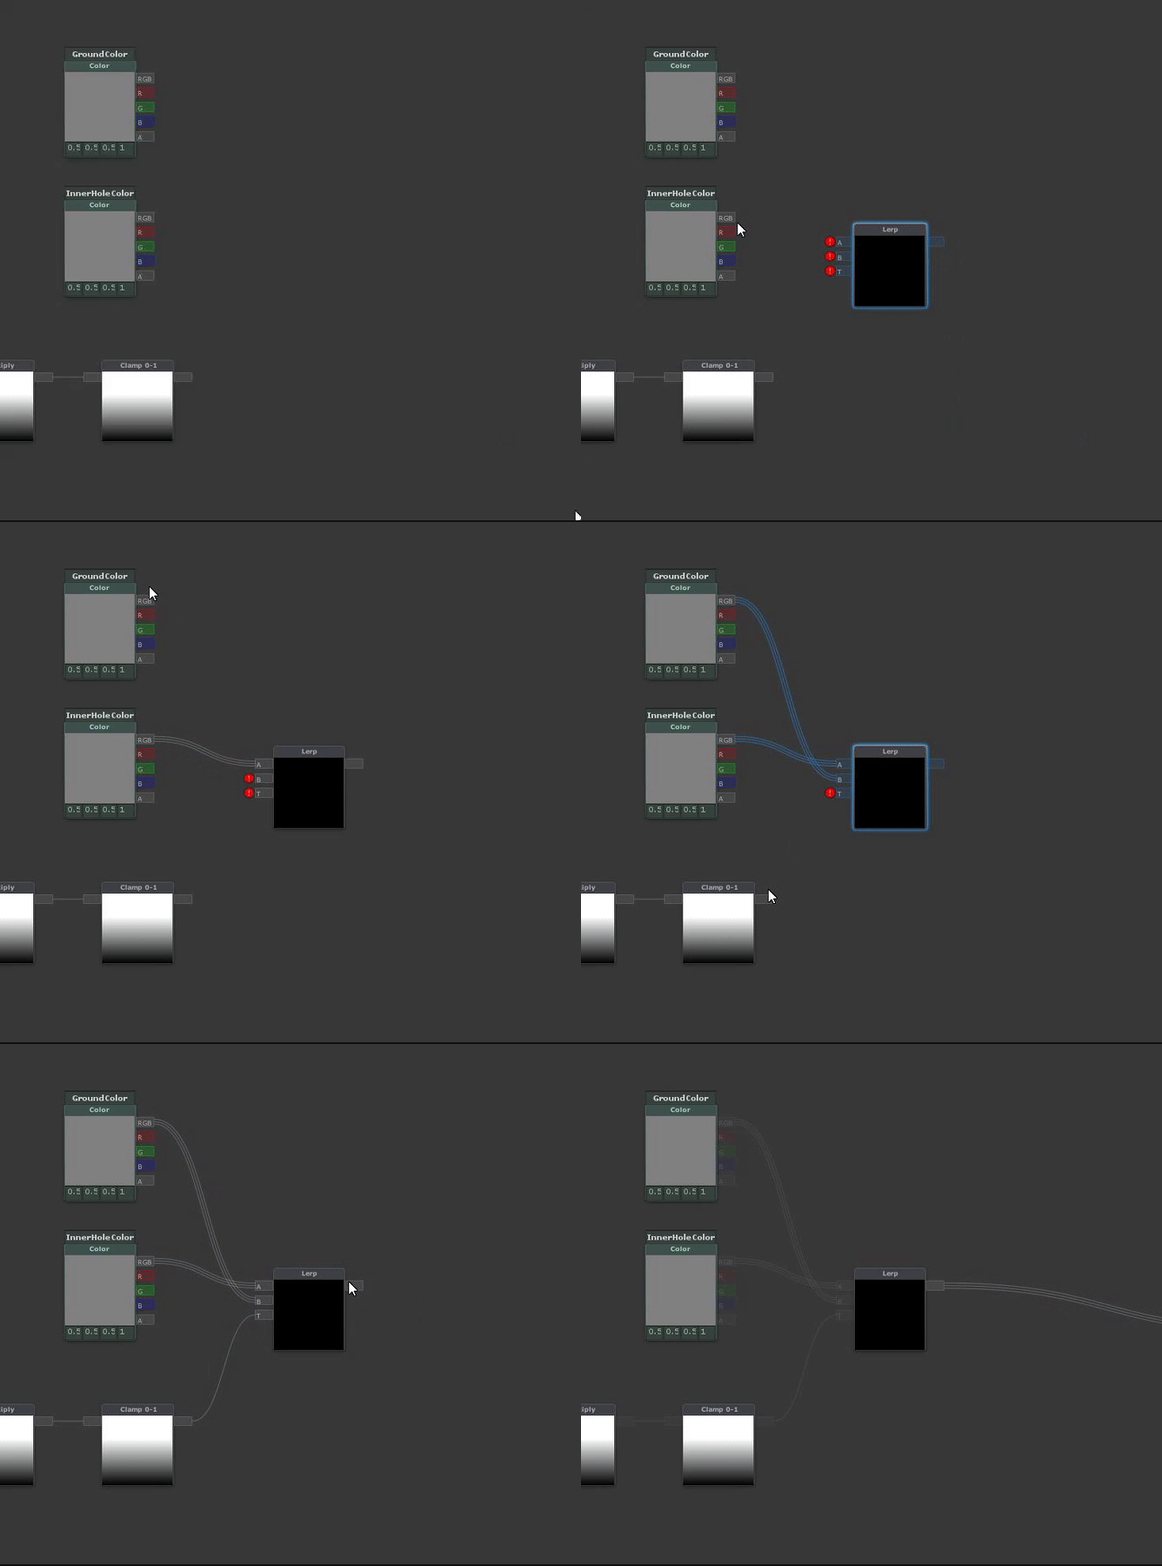
At this moment, its time to start with the Base Color. Lets create 2 colors: the ground color, and the inner hole color.
Now we want to use each color with a glow base, so we want to create that guide.
Dont be afraid, its pretty easy to do! :D
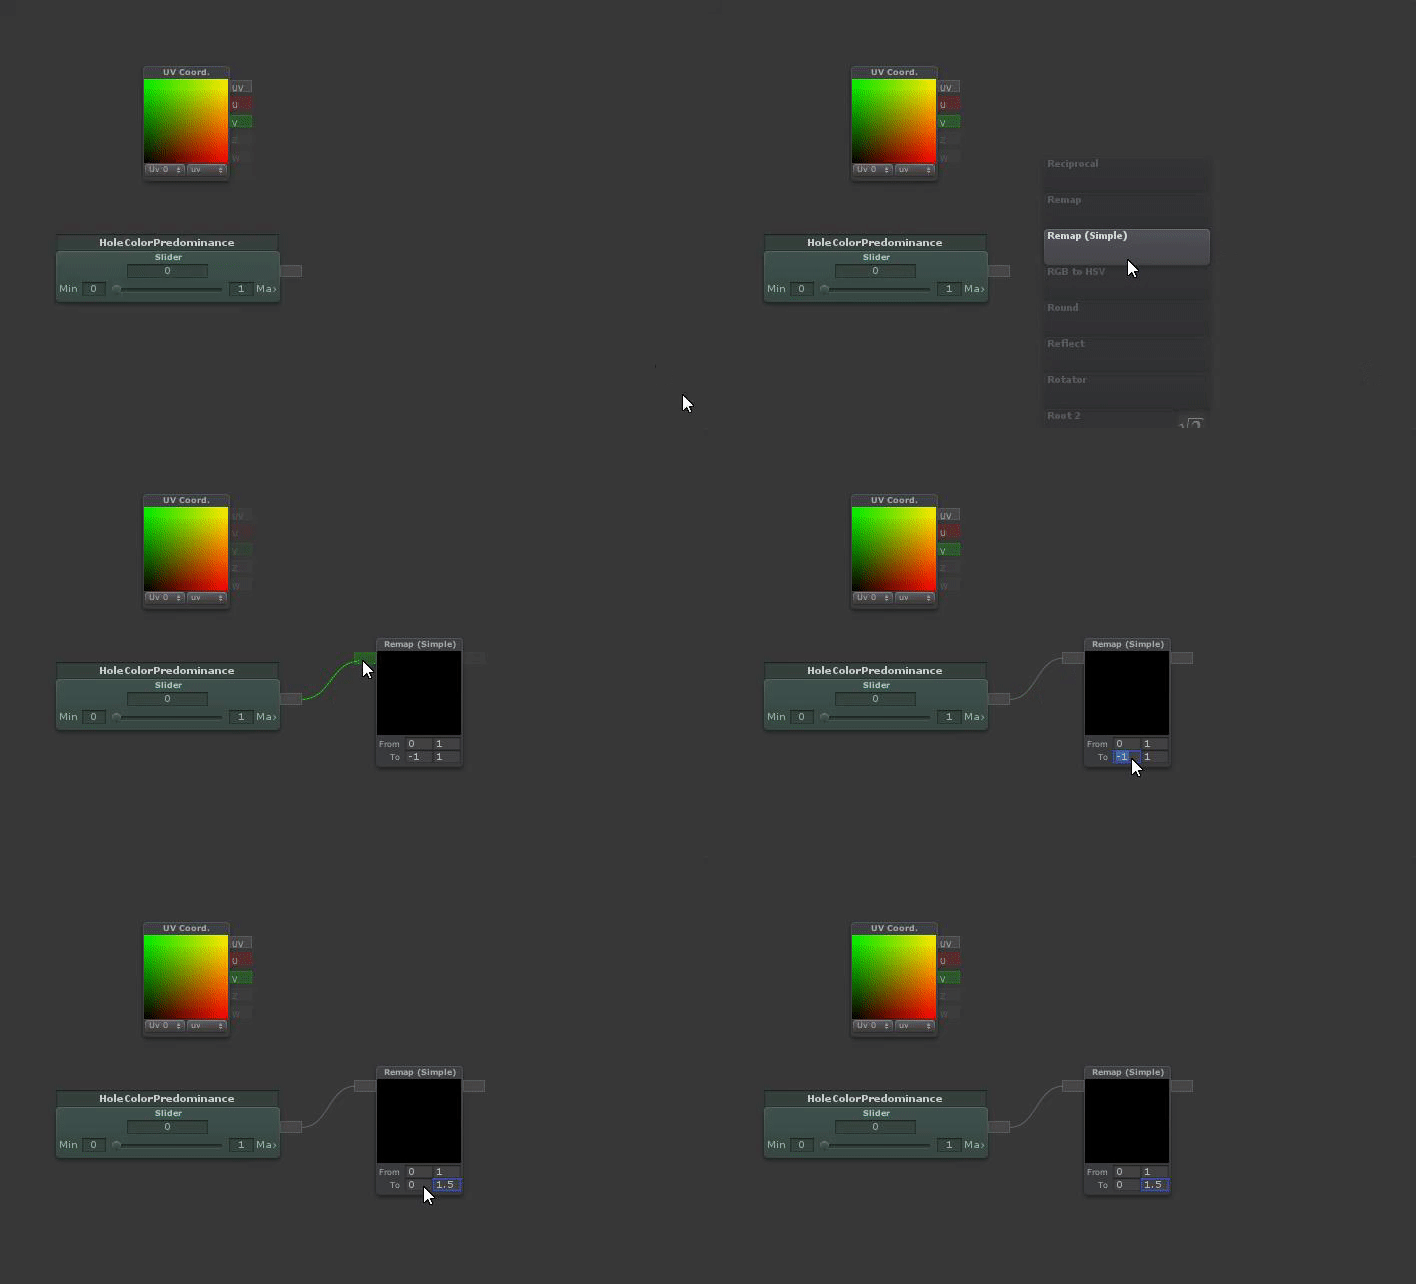
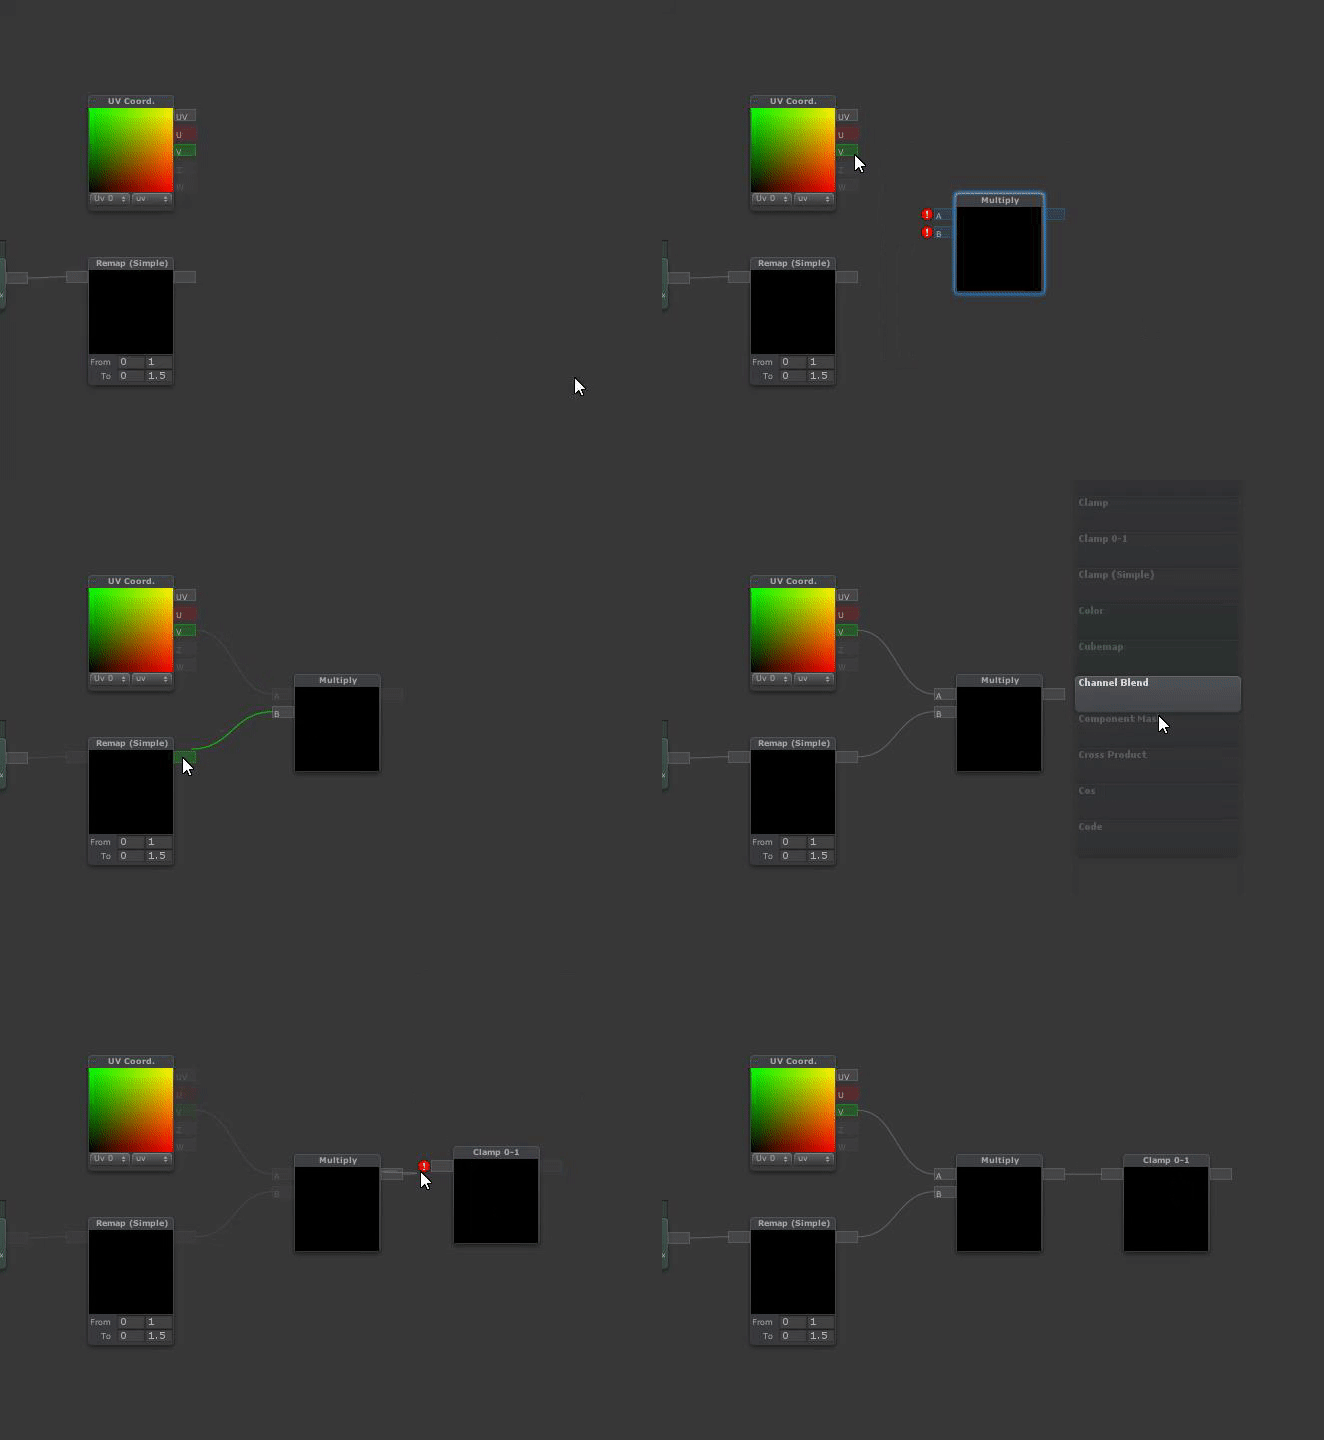
First of all lets add this nodes: UV Coord and a slider.
Before combining the vertical of UV and the HoleColorPredominance slider, we will need more input from that slider. But because 0 to 1 variables are waaay to useful, instead of change its max value, lets remap it:
Now, combine them like an alchemist with a Multiply node, then Clamp the output.
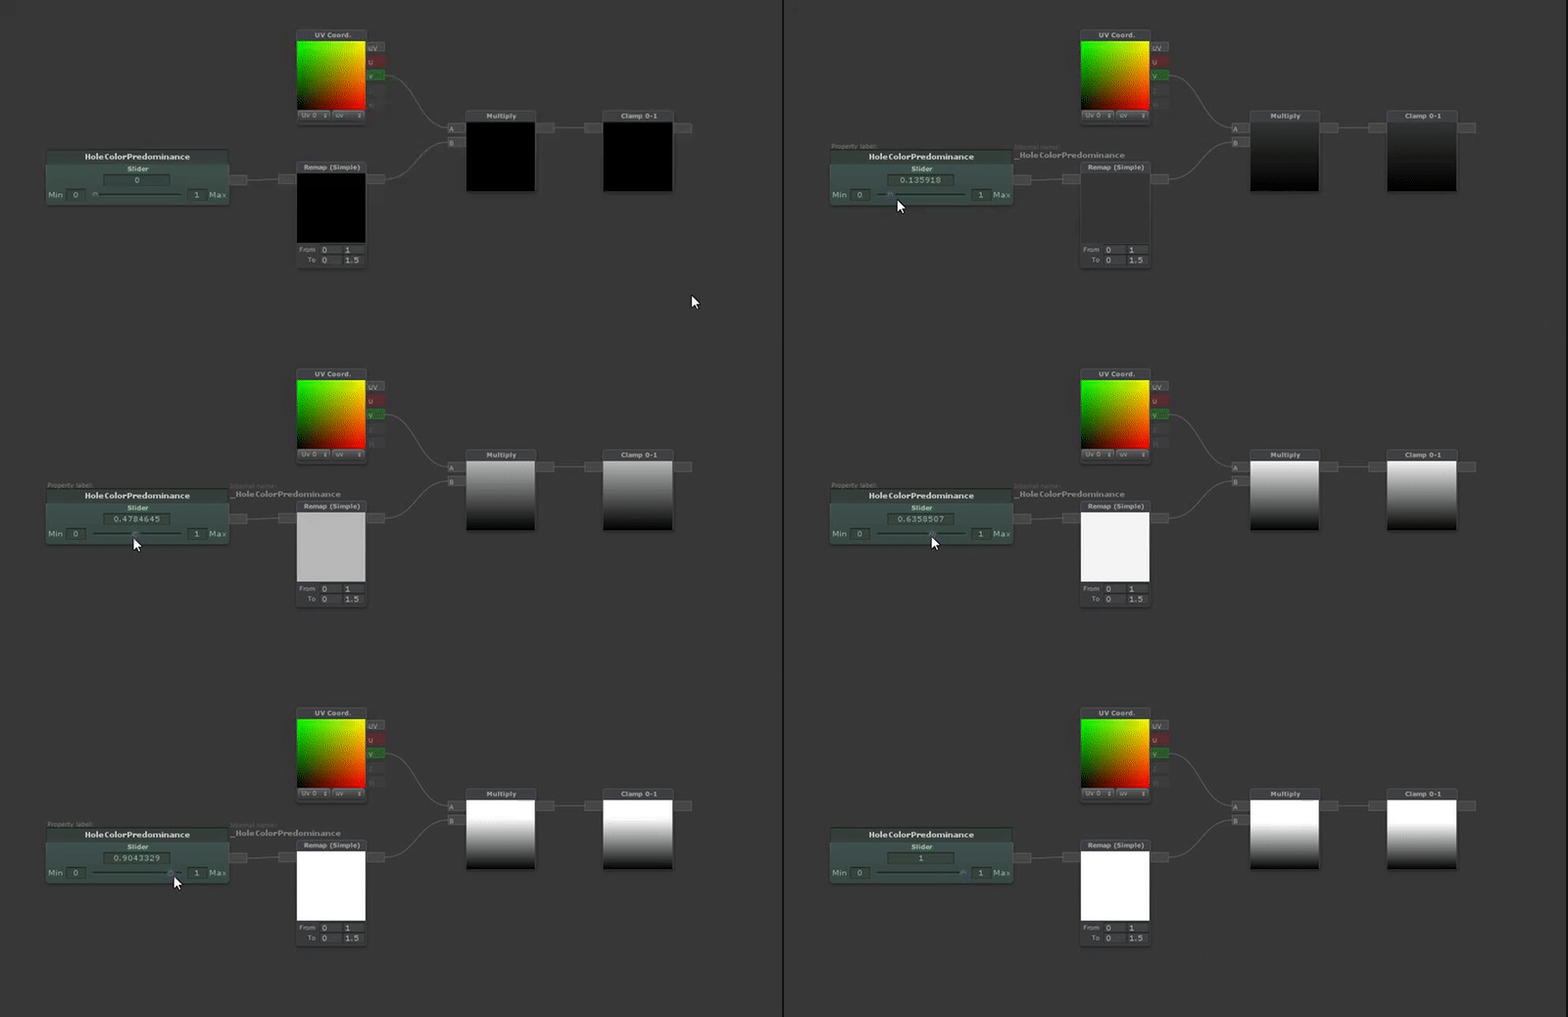
But OH WAIT, isnt it all black?!?!
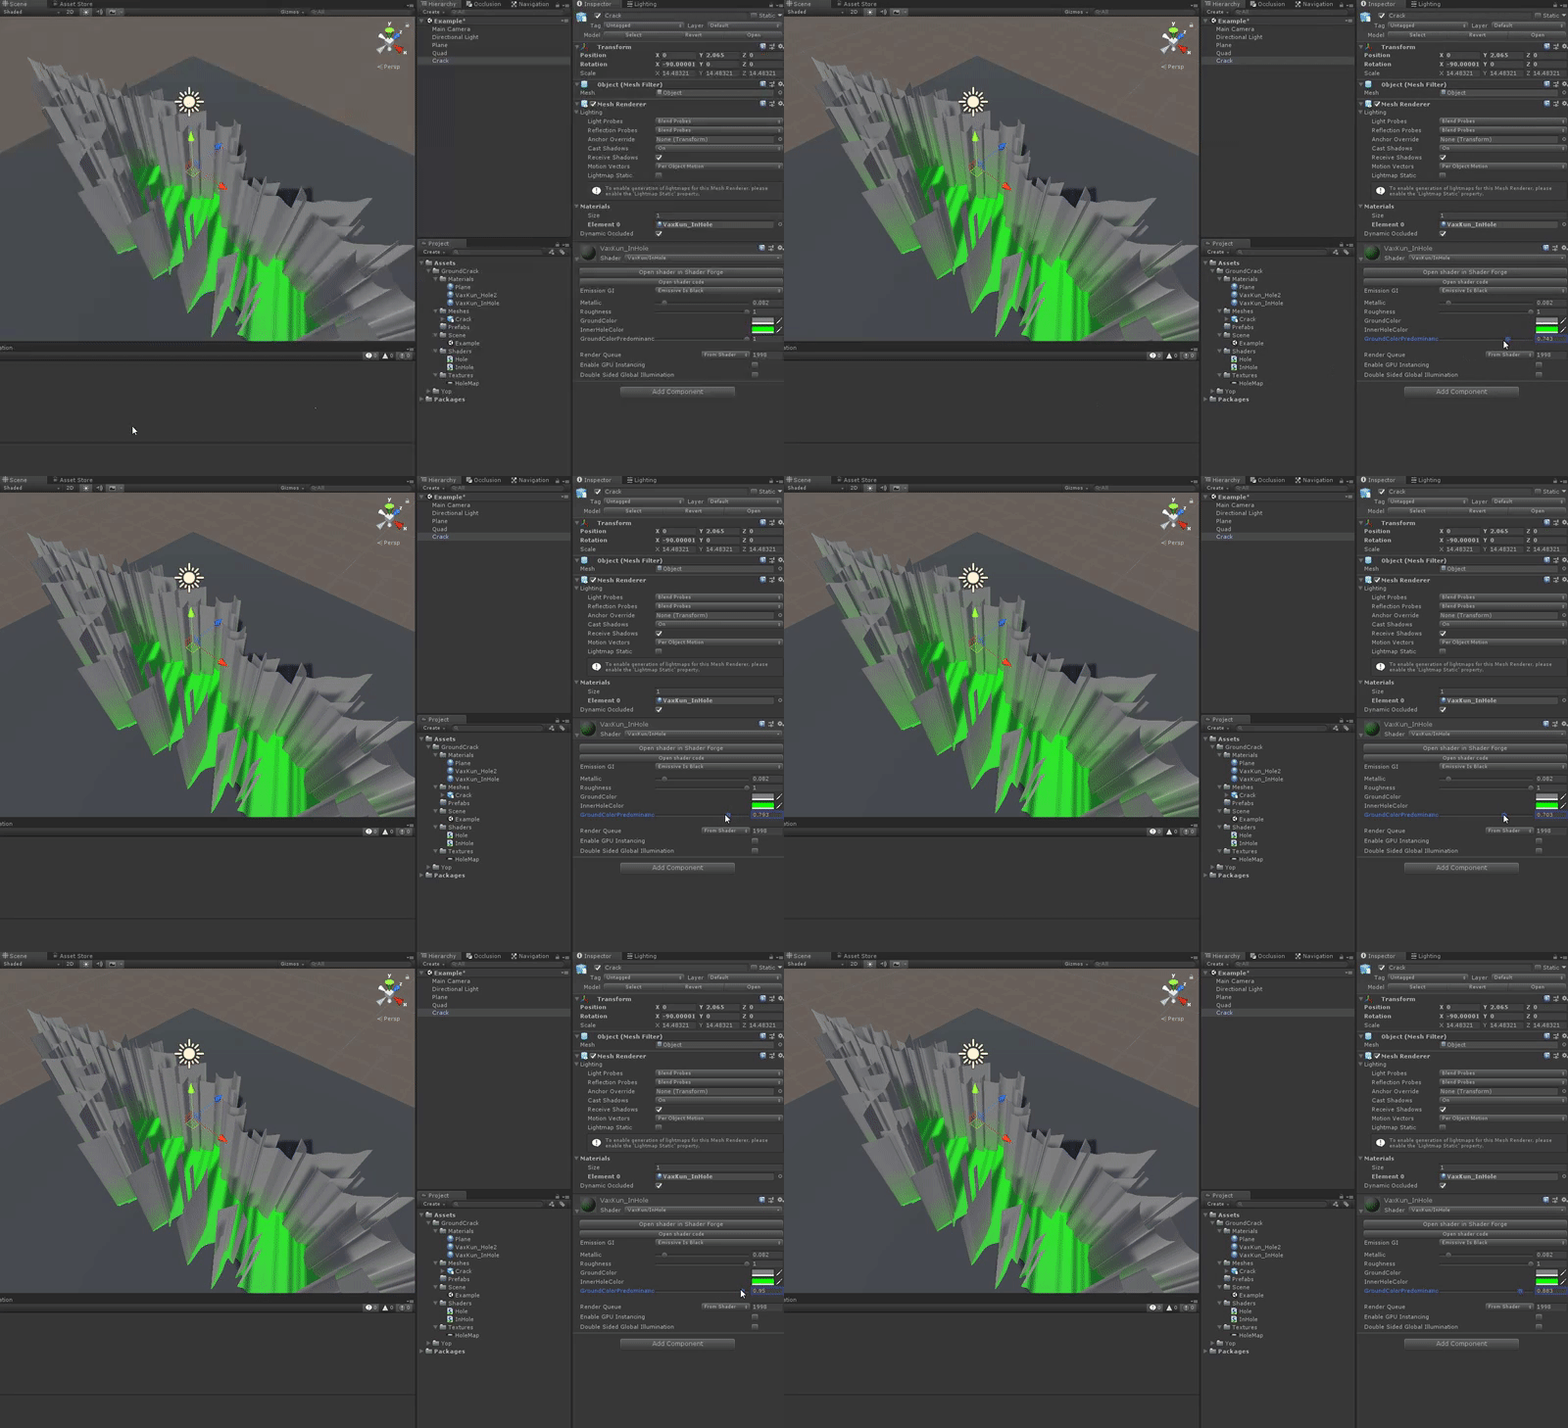
Its because the Ground Color Predominance is on "0" for sure, move it to see the guide moving
The next step is calling our best friend Lerp and giving him the colors and the guide:
Pretty nice!
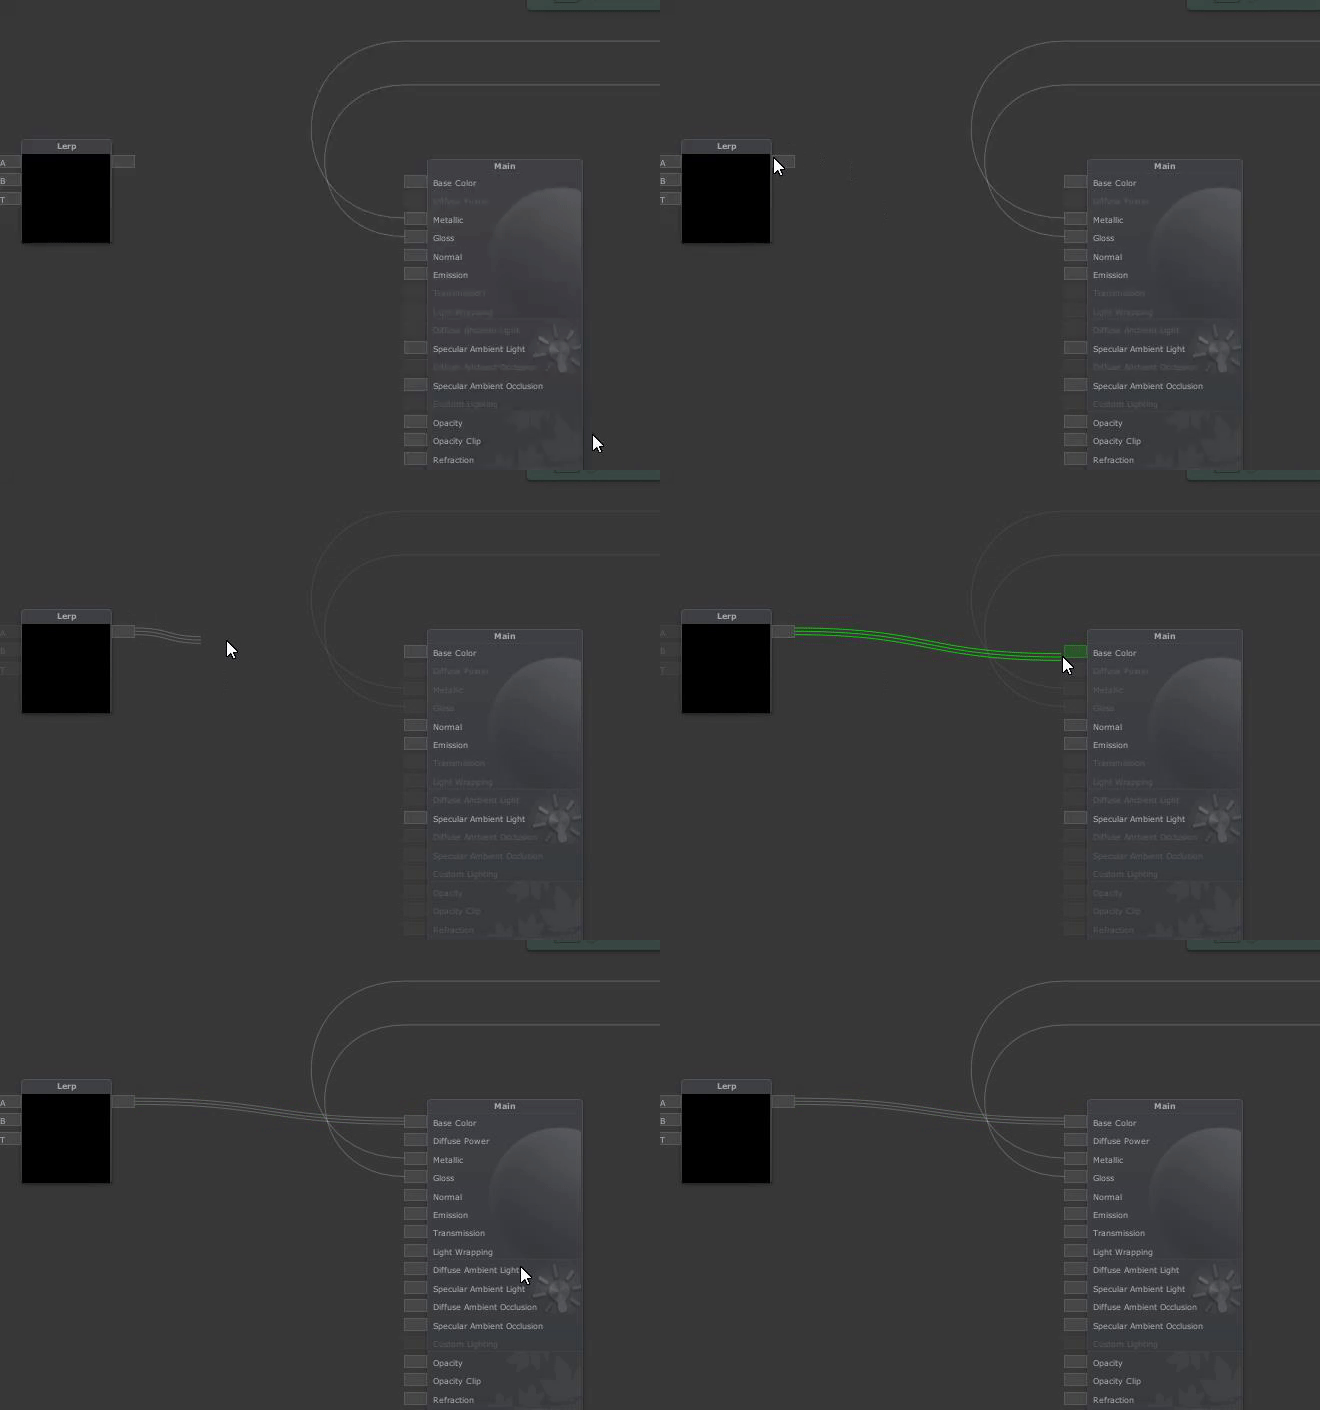
Lets go and add it into Base Color
Now, we will gotta be able to add the material to the mesh so we can see how it looks:
Lets tweak a bit the material properties , i will leave it like that for the moment.
Okay, its time to translate that colors to emission too. By the way we are going to add it a glow over time.
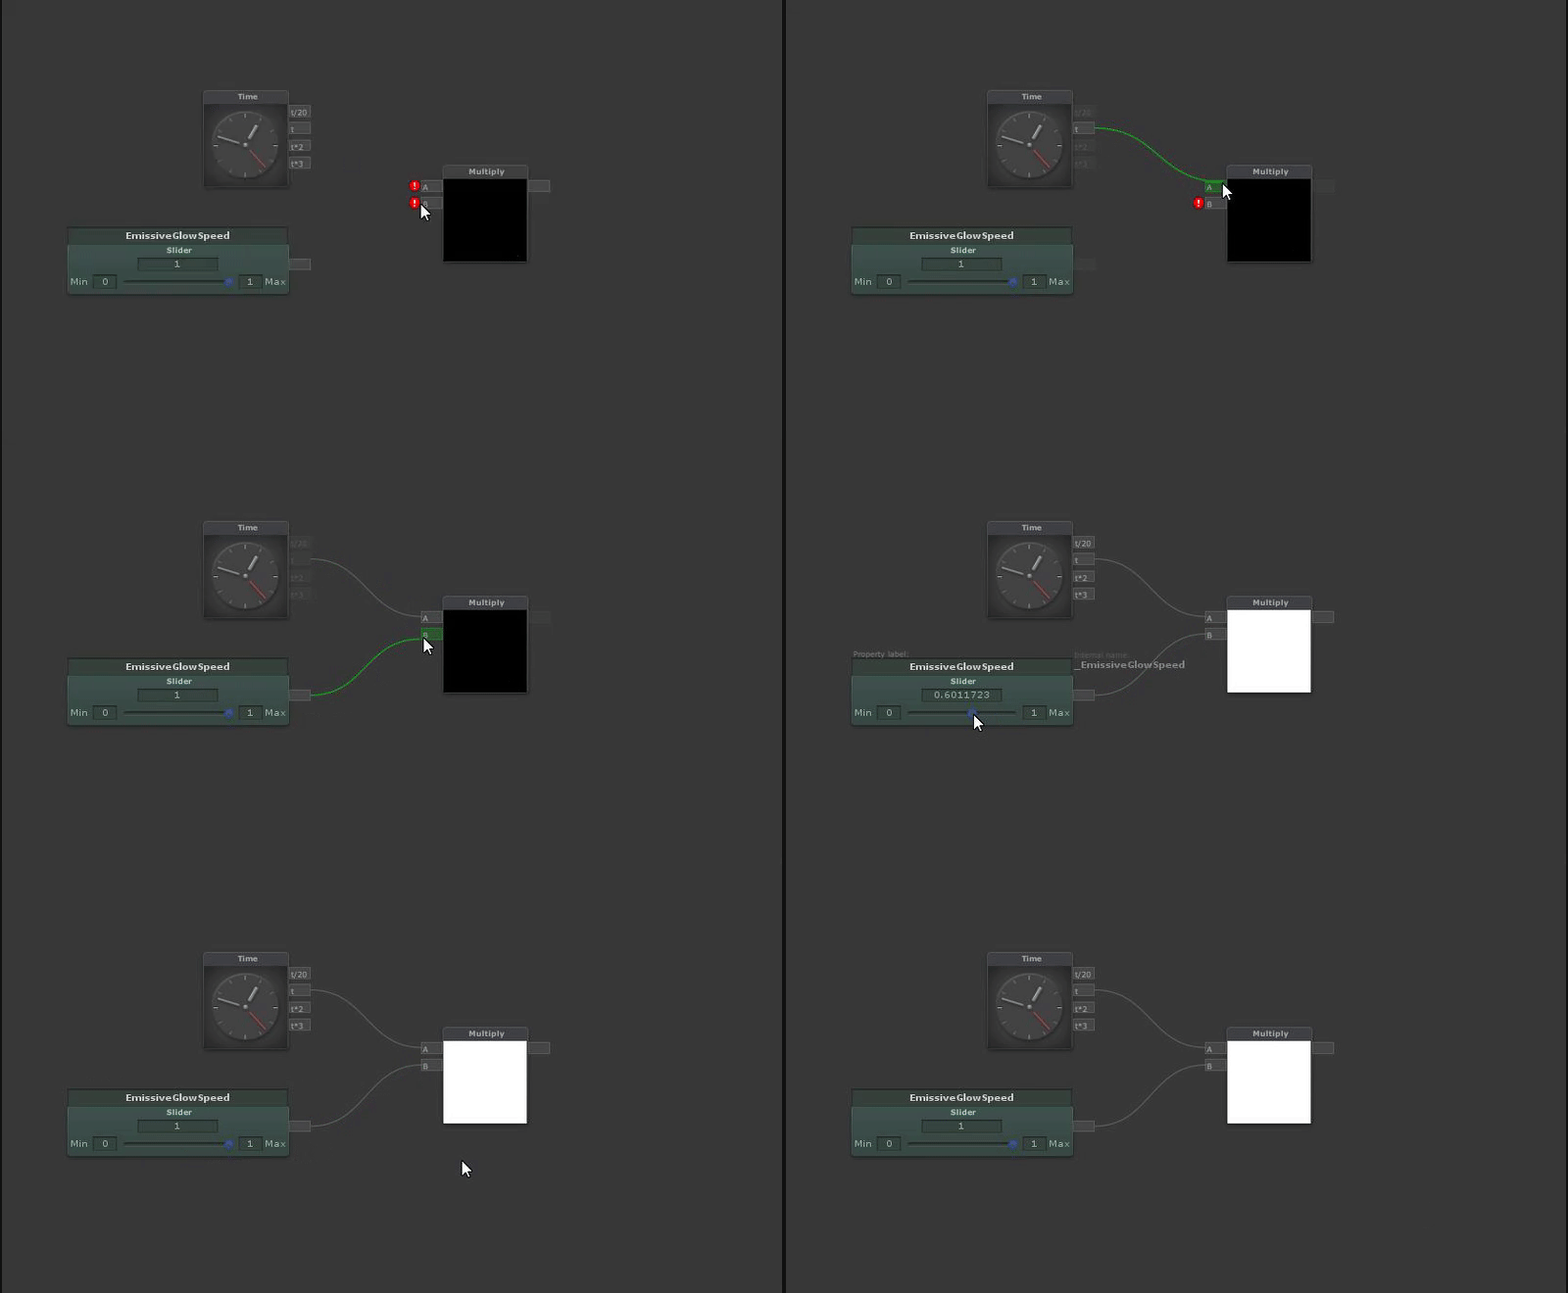
So, to start with that lets add a "TimeControl" setup with a value/slider, a time node and multiply both. Remember to rename the value/slider with something like: EmissionSpeed,GlowSpeed or something like that, and set it to 1.
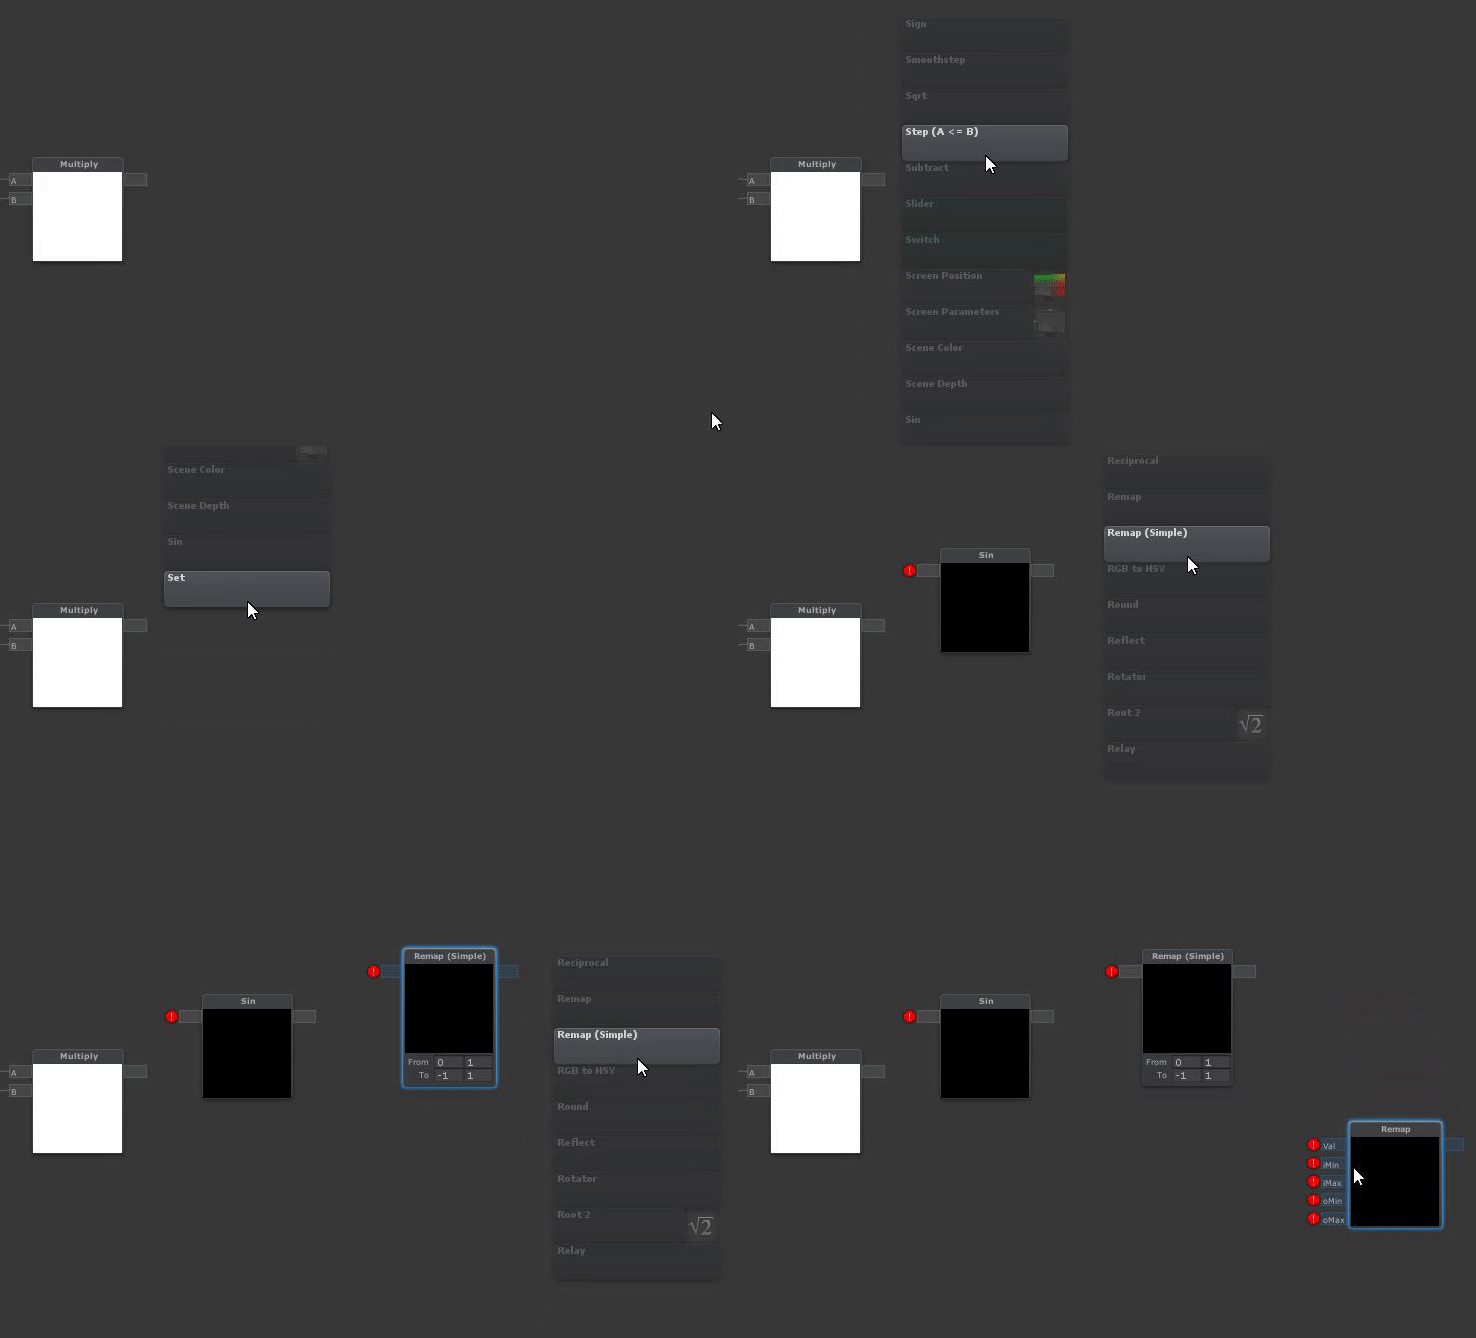
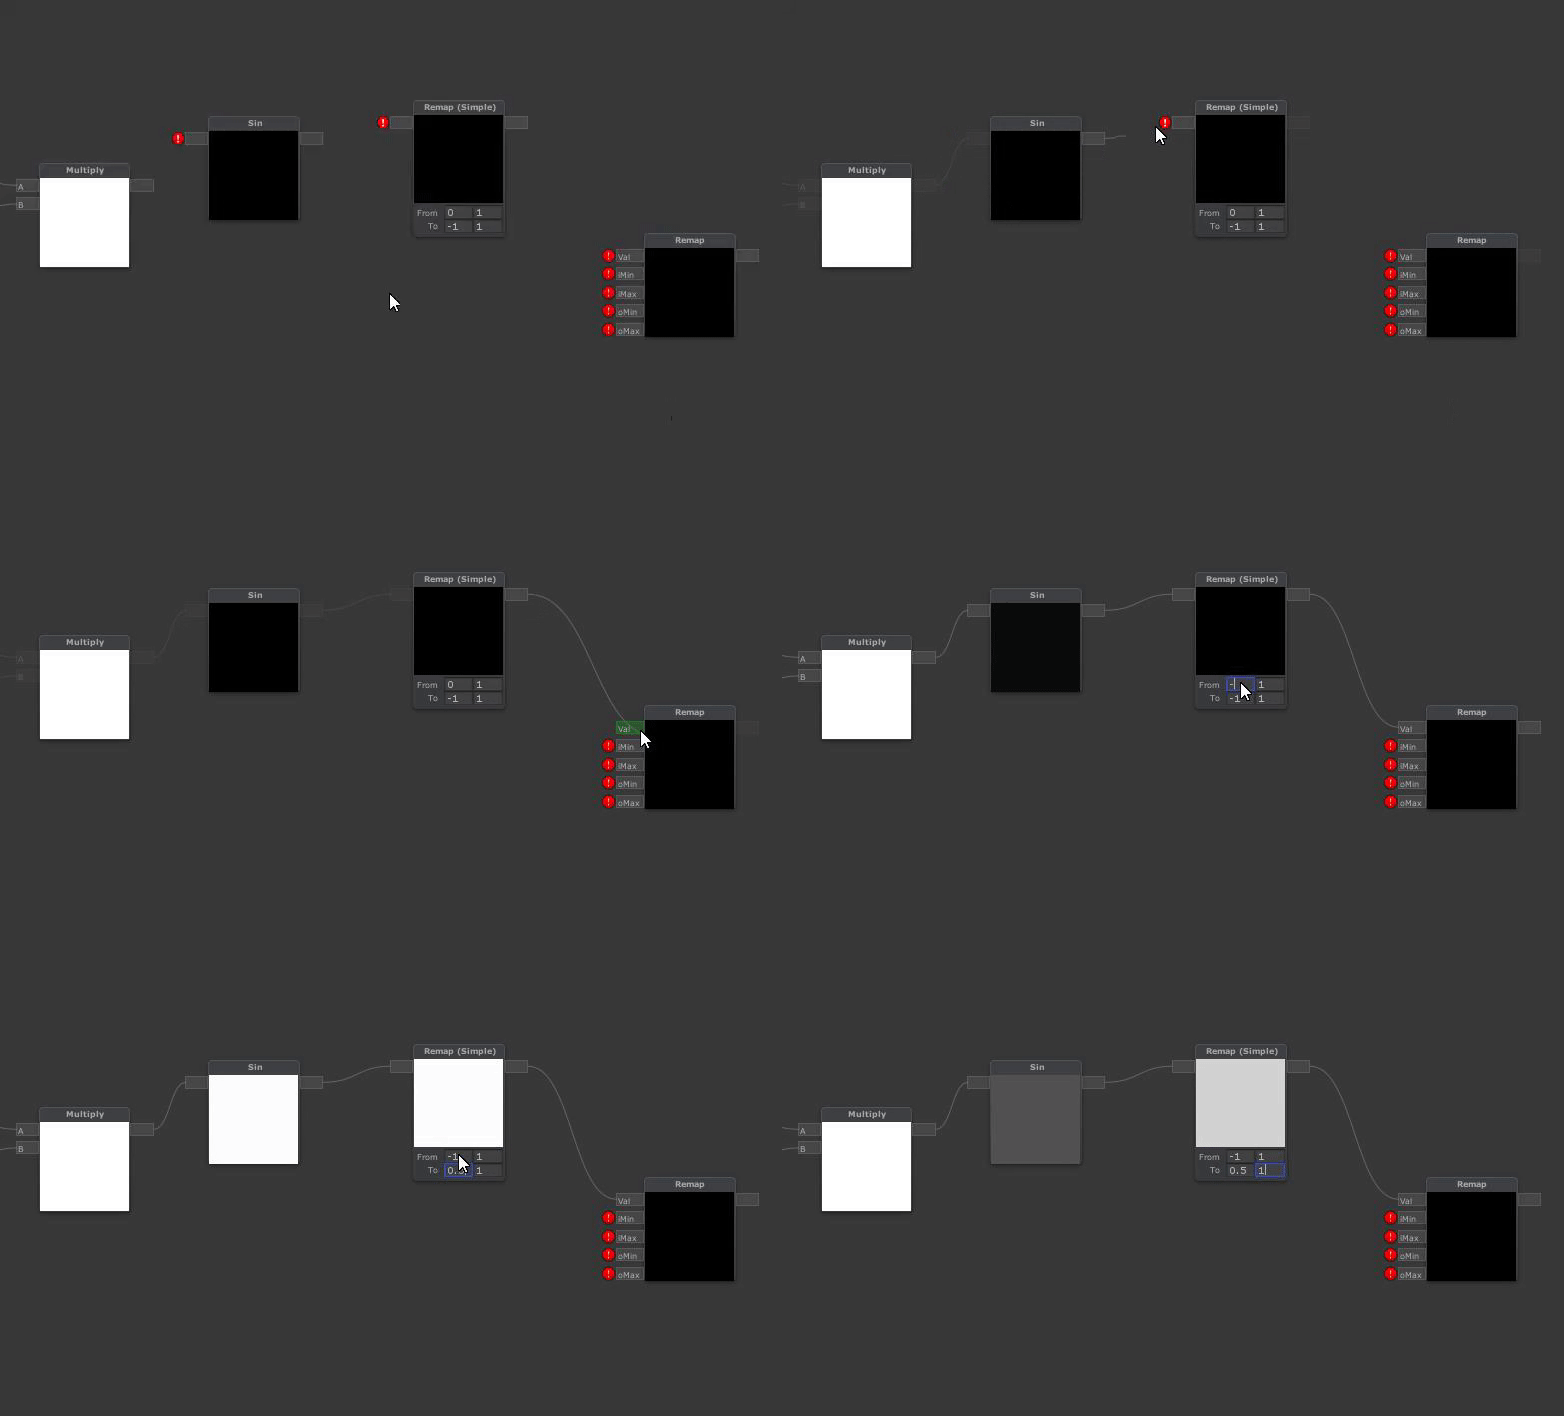
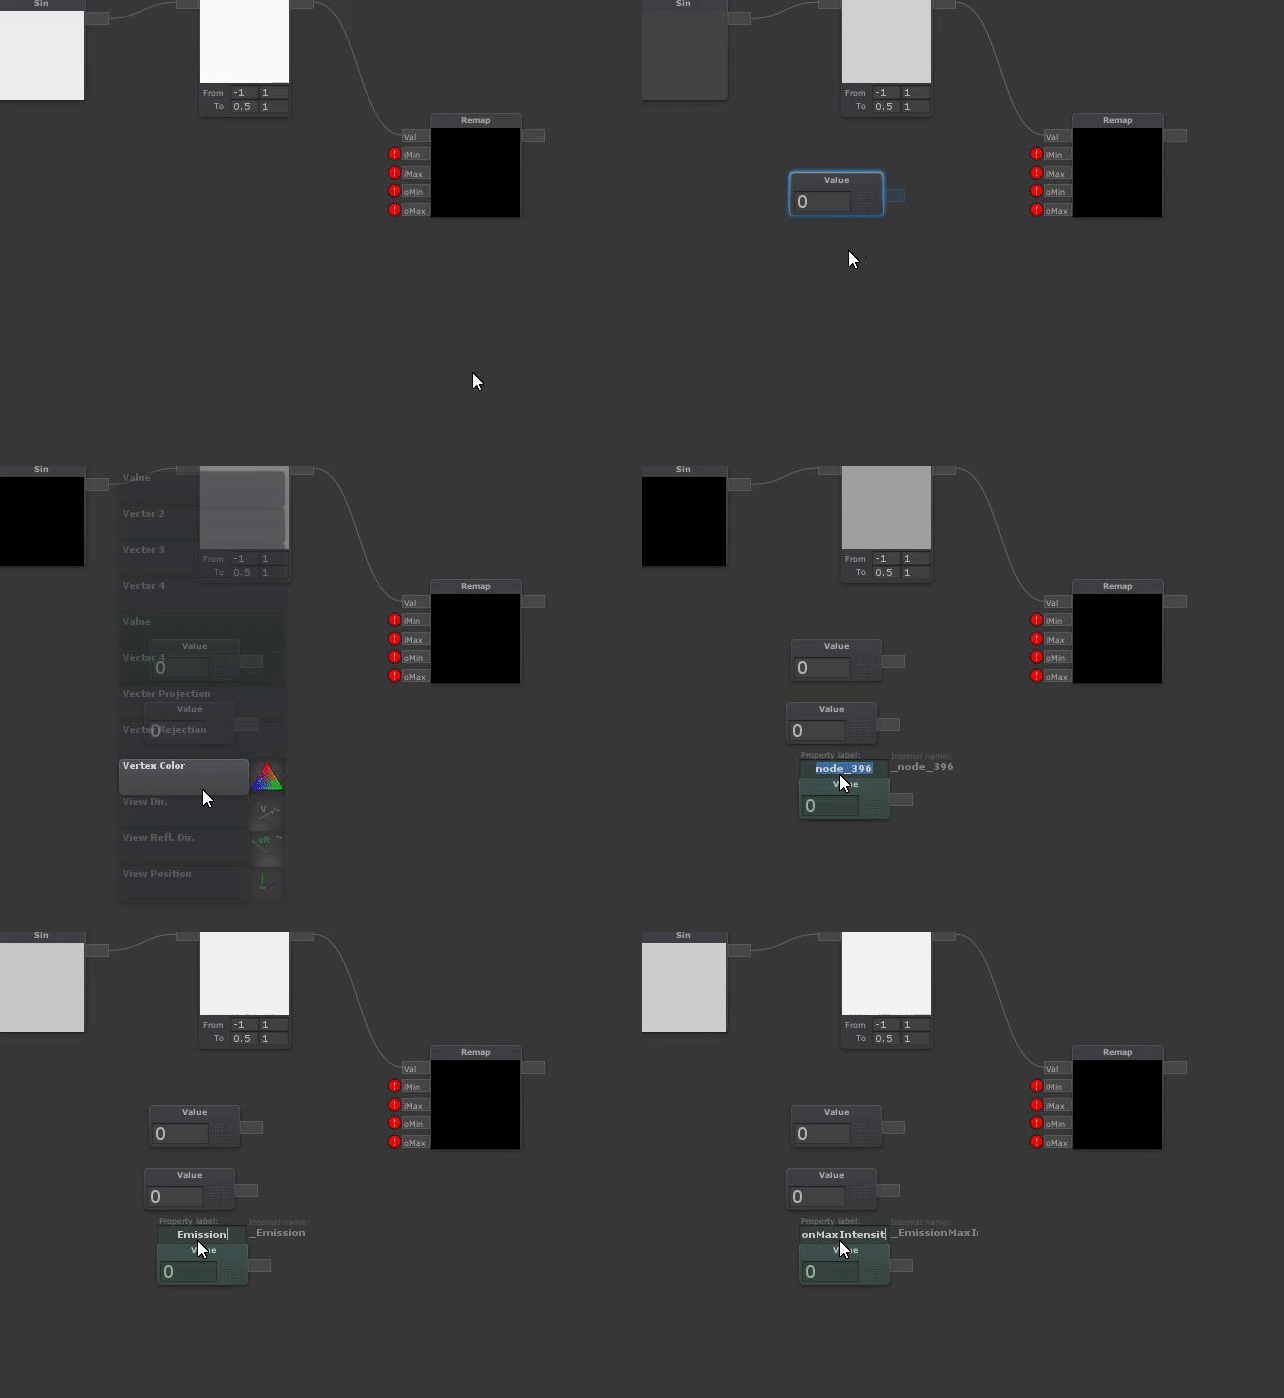
Now, we will need something to change the emission intensity over time, so we will do that with remaps and sin. We are going to use sin to make the value go in and out over time, then remapping a bit to get the wave we want from that sin, and then taking that output to an intensity remap.
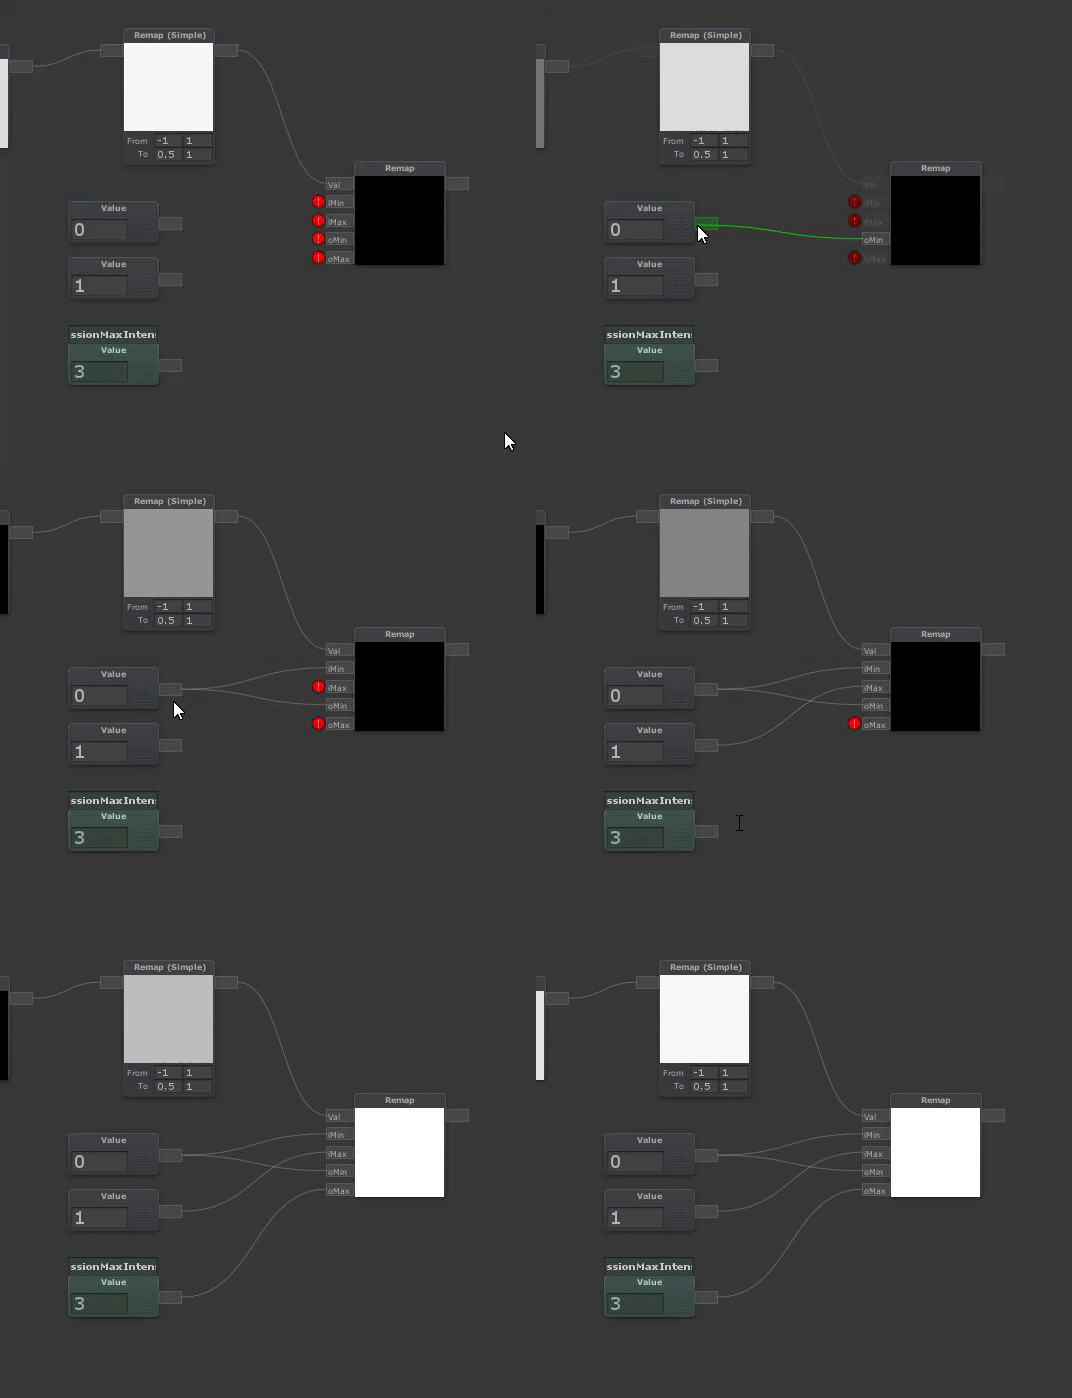
Now we have that set, lets create some values to say that Remap what limits we want for the intensity. Im going to encapsulate between 0 the minimums because a lower than 0 emission will emit in negative and thats not what we want. And at the maximum a 1 on the input(it wont get more than 1 because we are remapping it before) and a 3 Property value to let anybody change the max intensity.
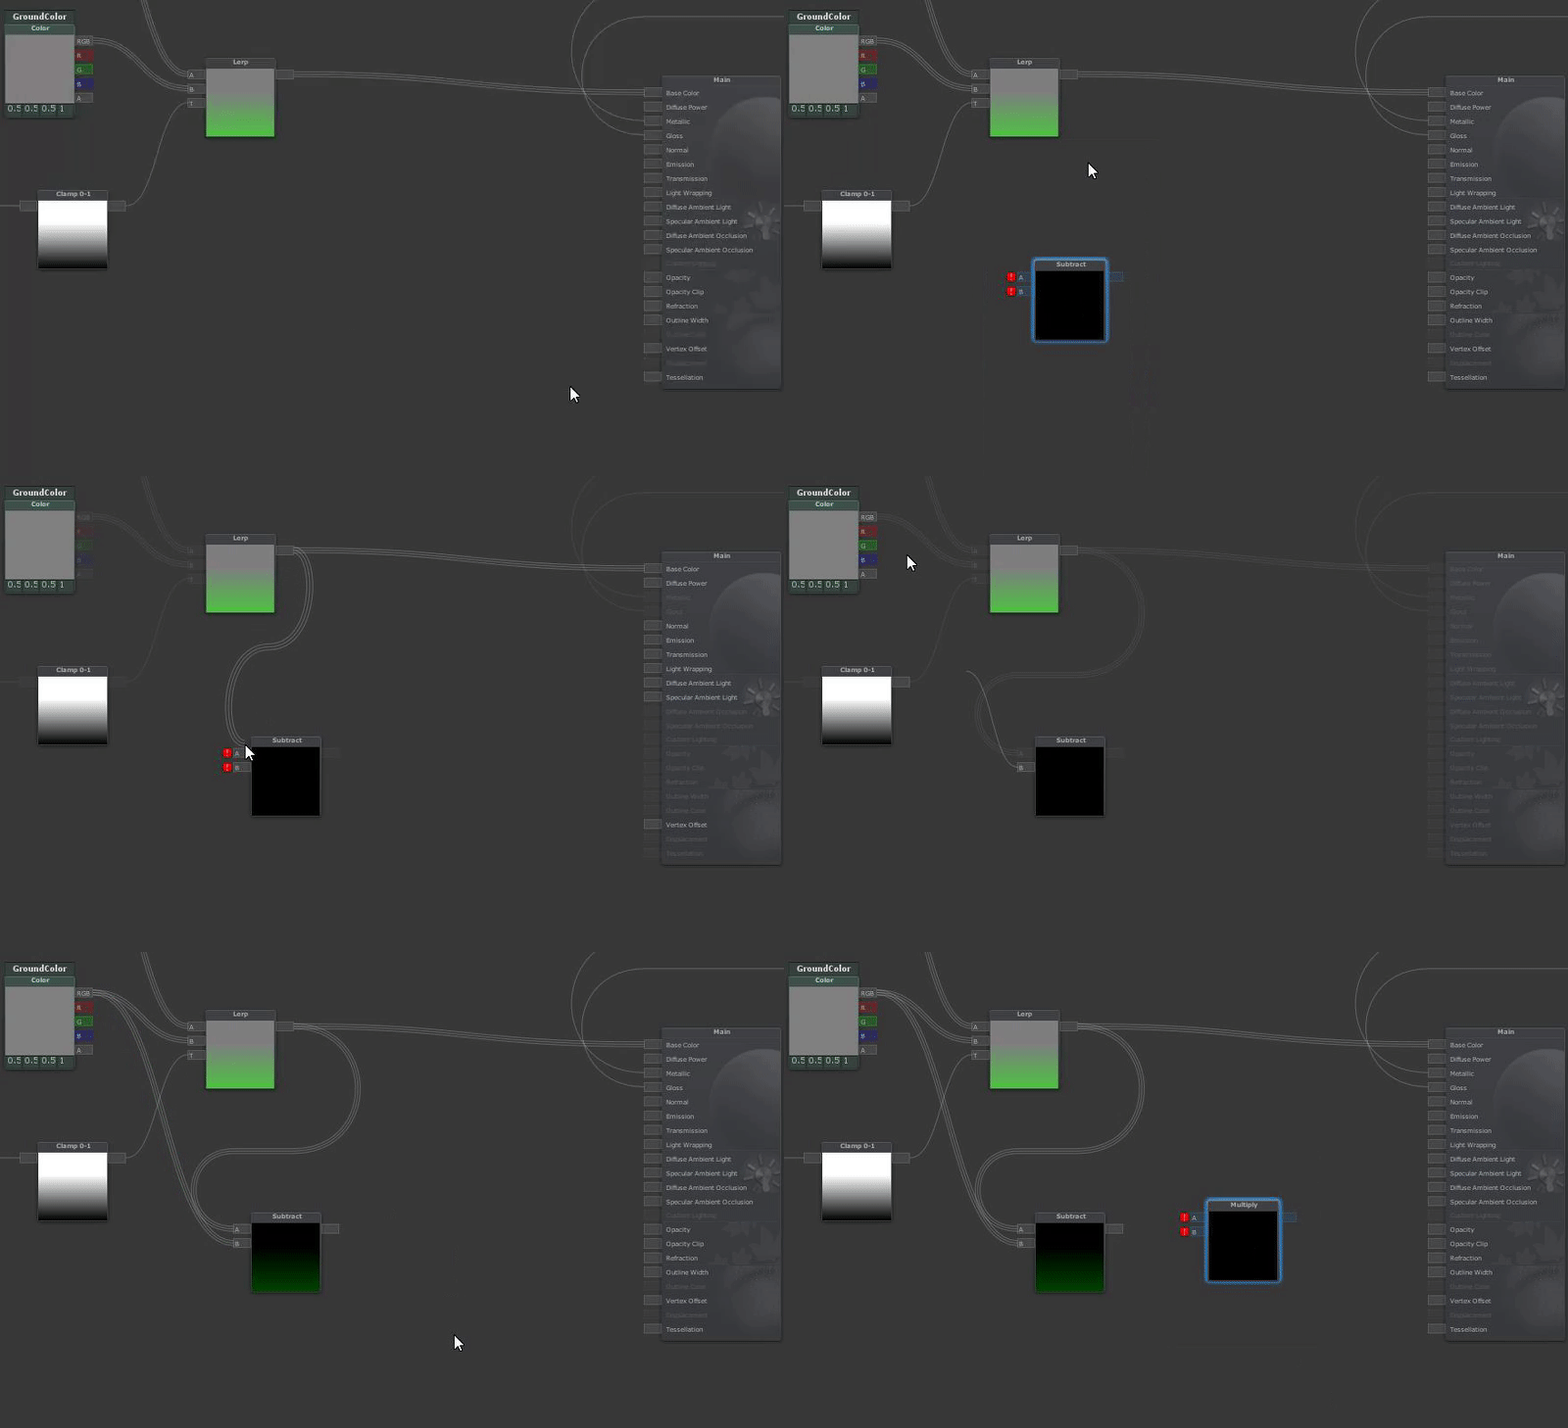
Now that we have a guide for the emission, we will need the colors and substract the ground from it because the ground color dont have to emit anything. We will do this with Substract and a multiply, then outputing to Emission.
So we have finished the shader!!
Isnt that optimized but its an example of what to do with this kind of things.
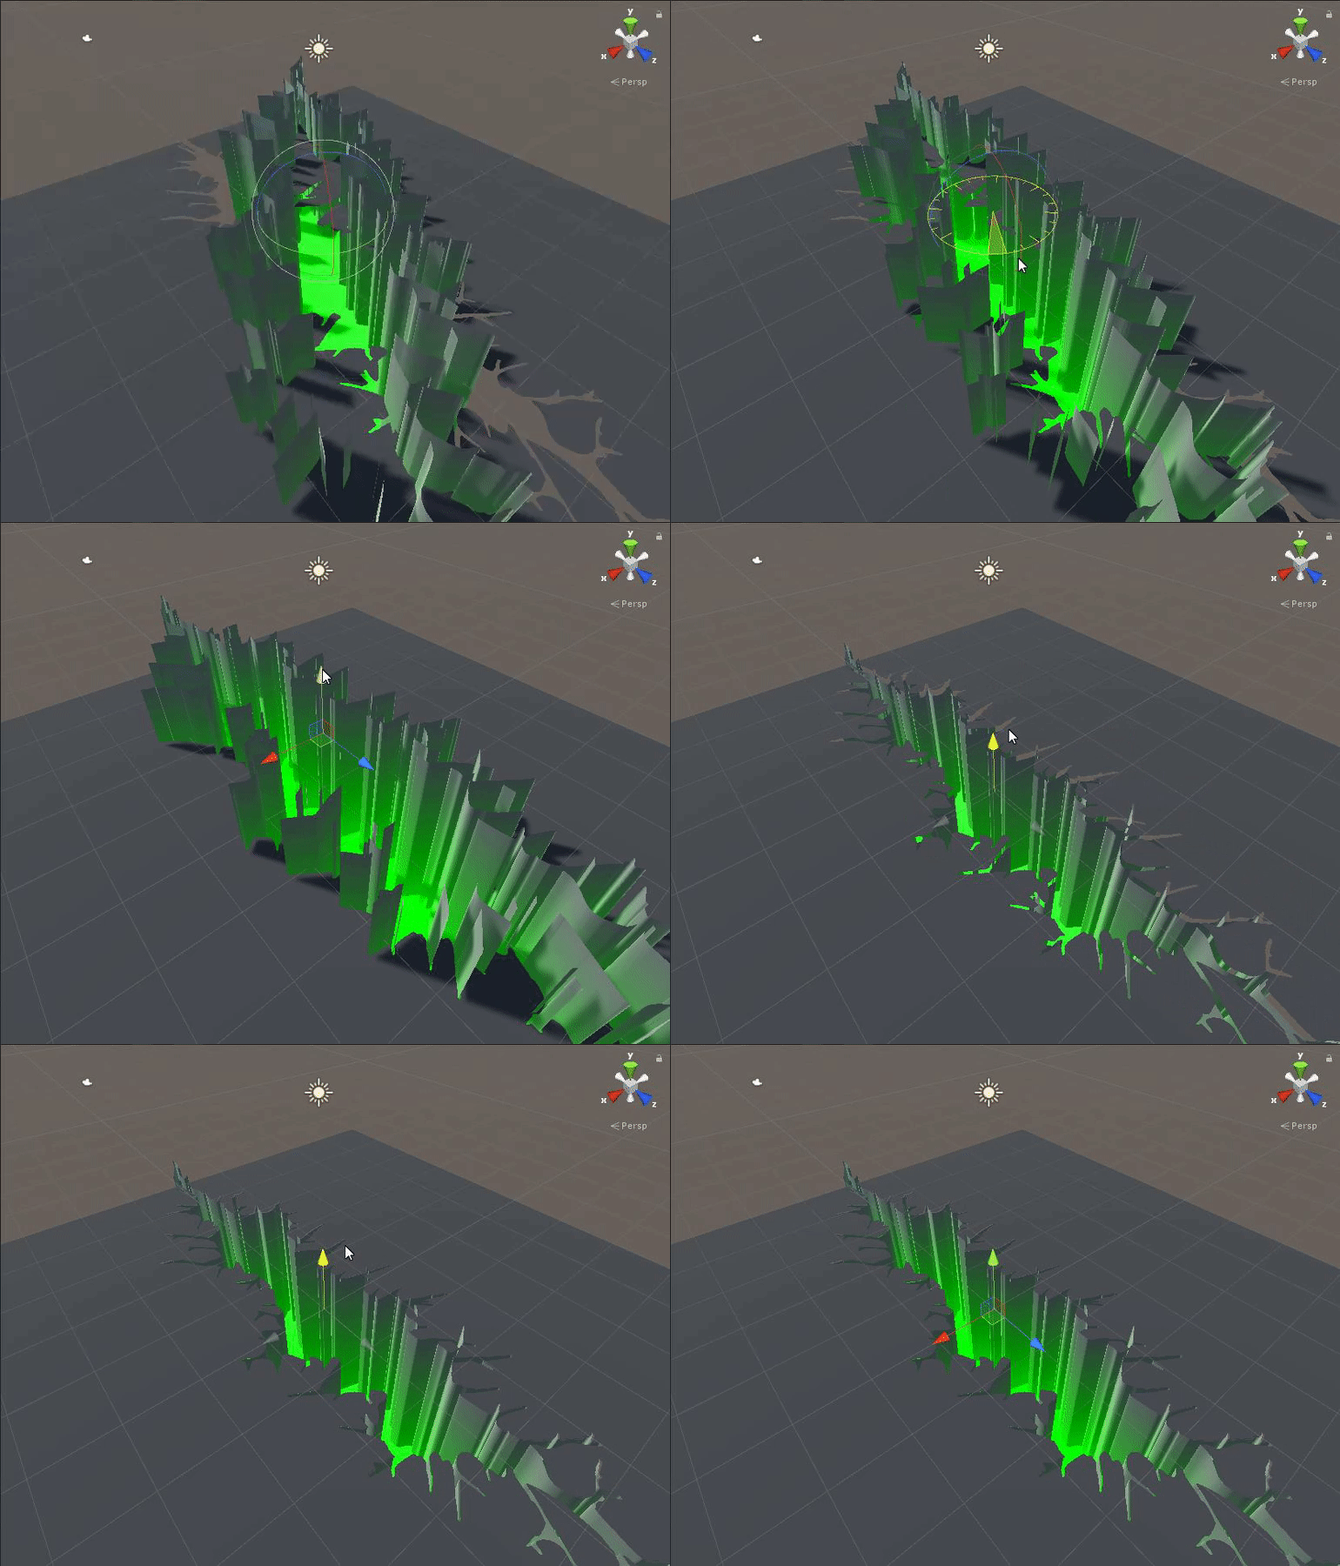
Lets go ahead to the scene and see the mesh.
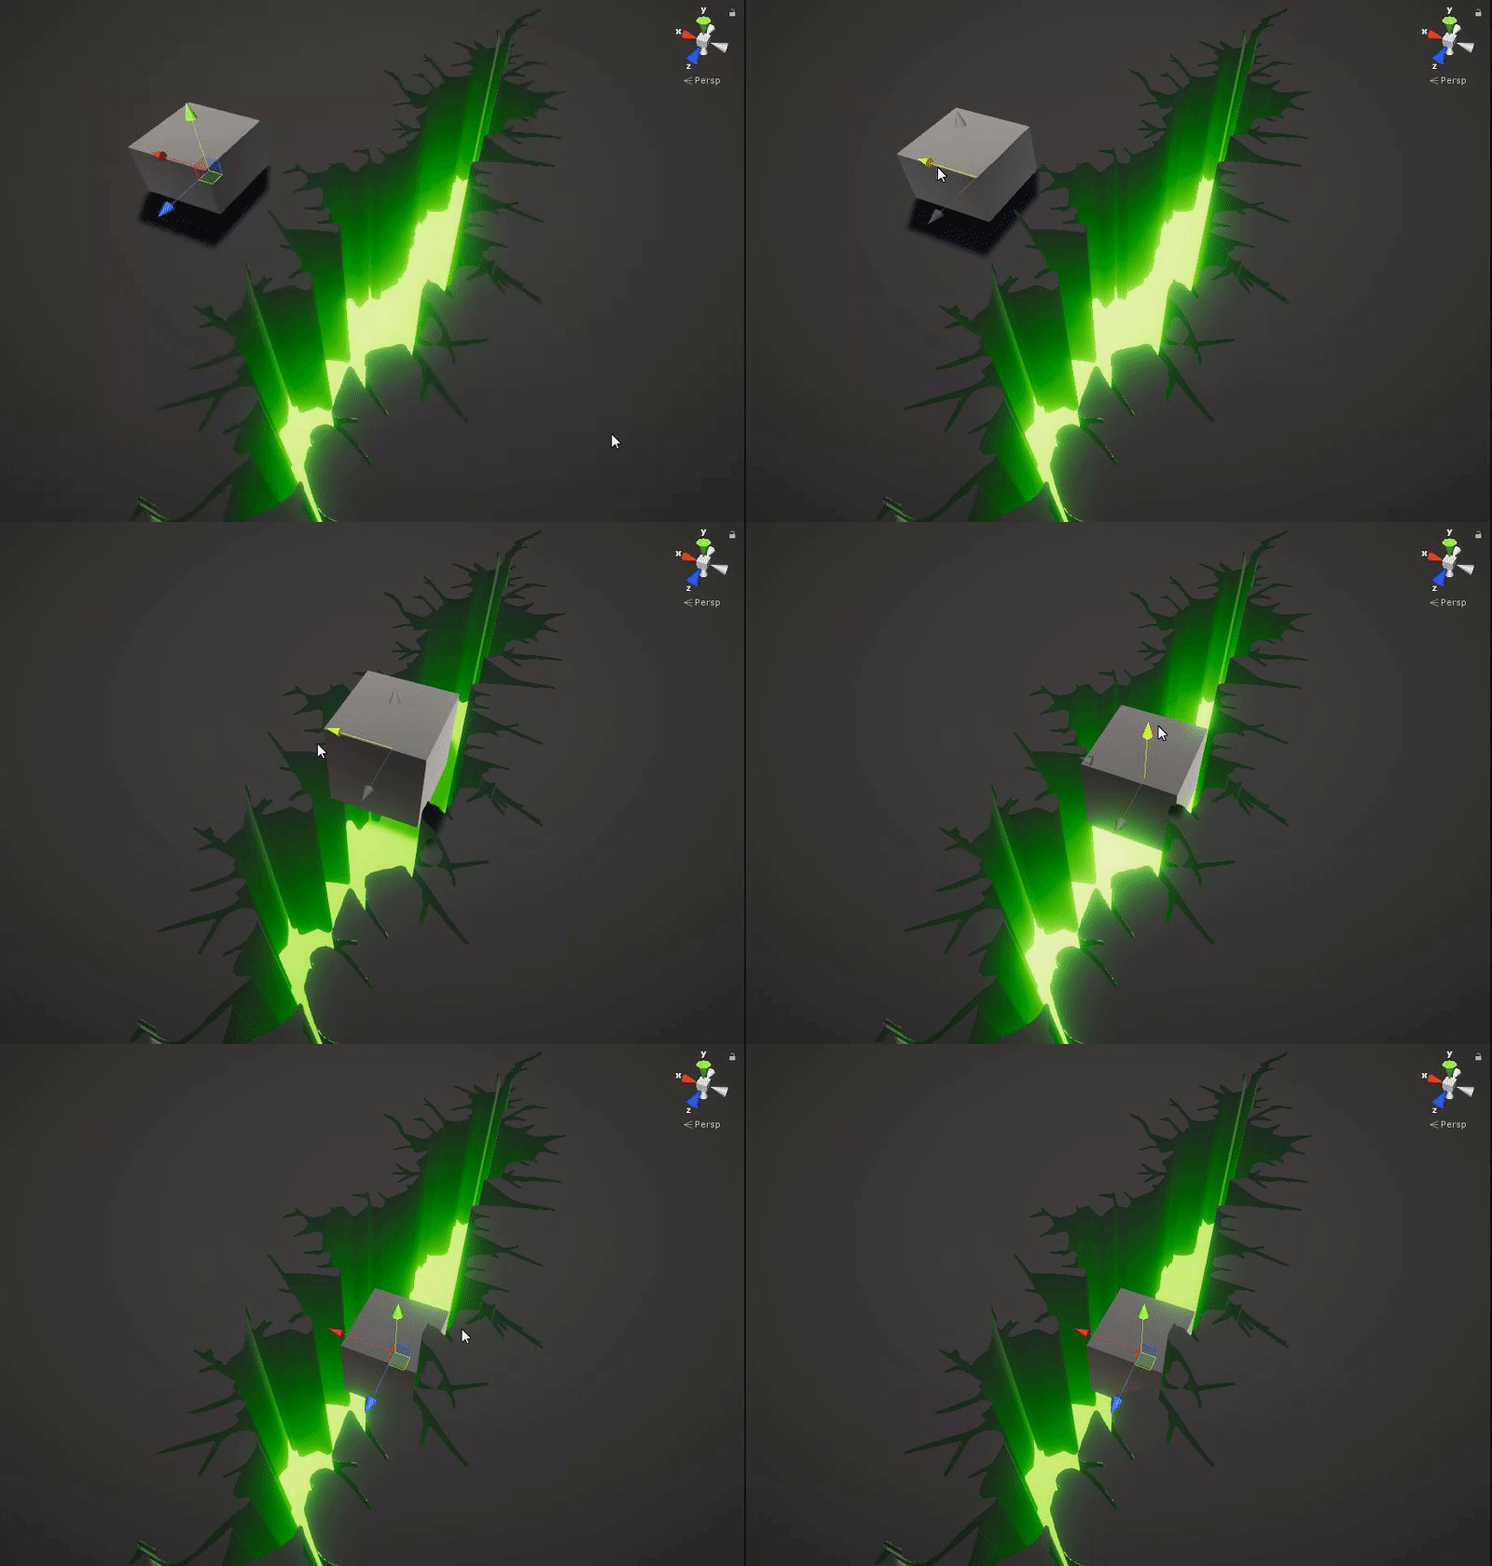
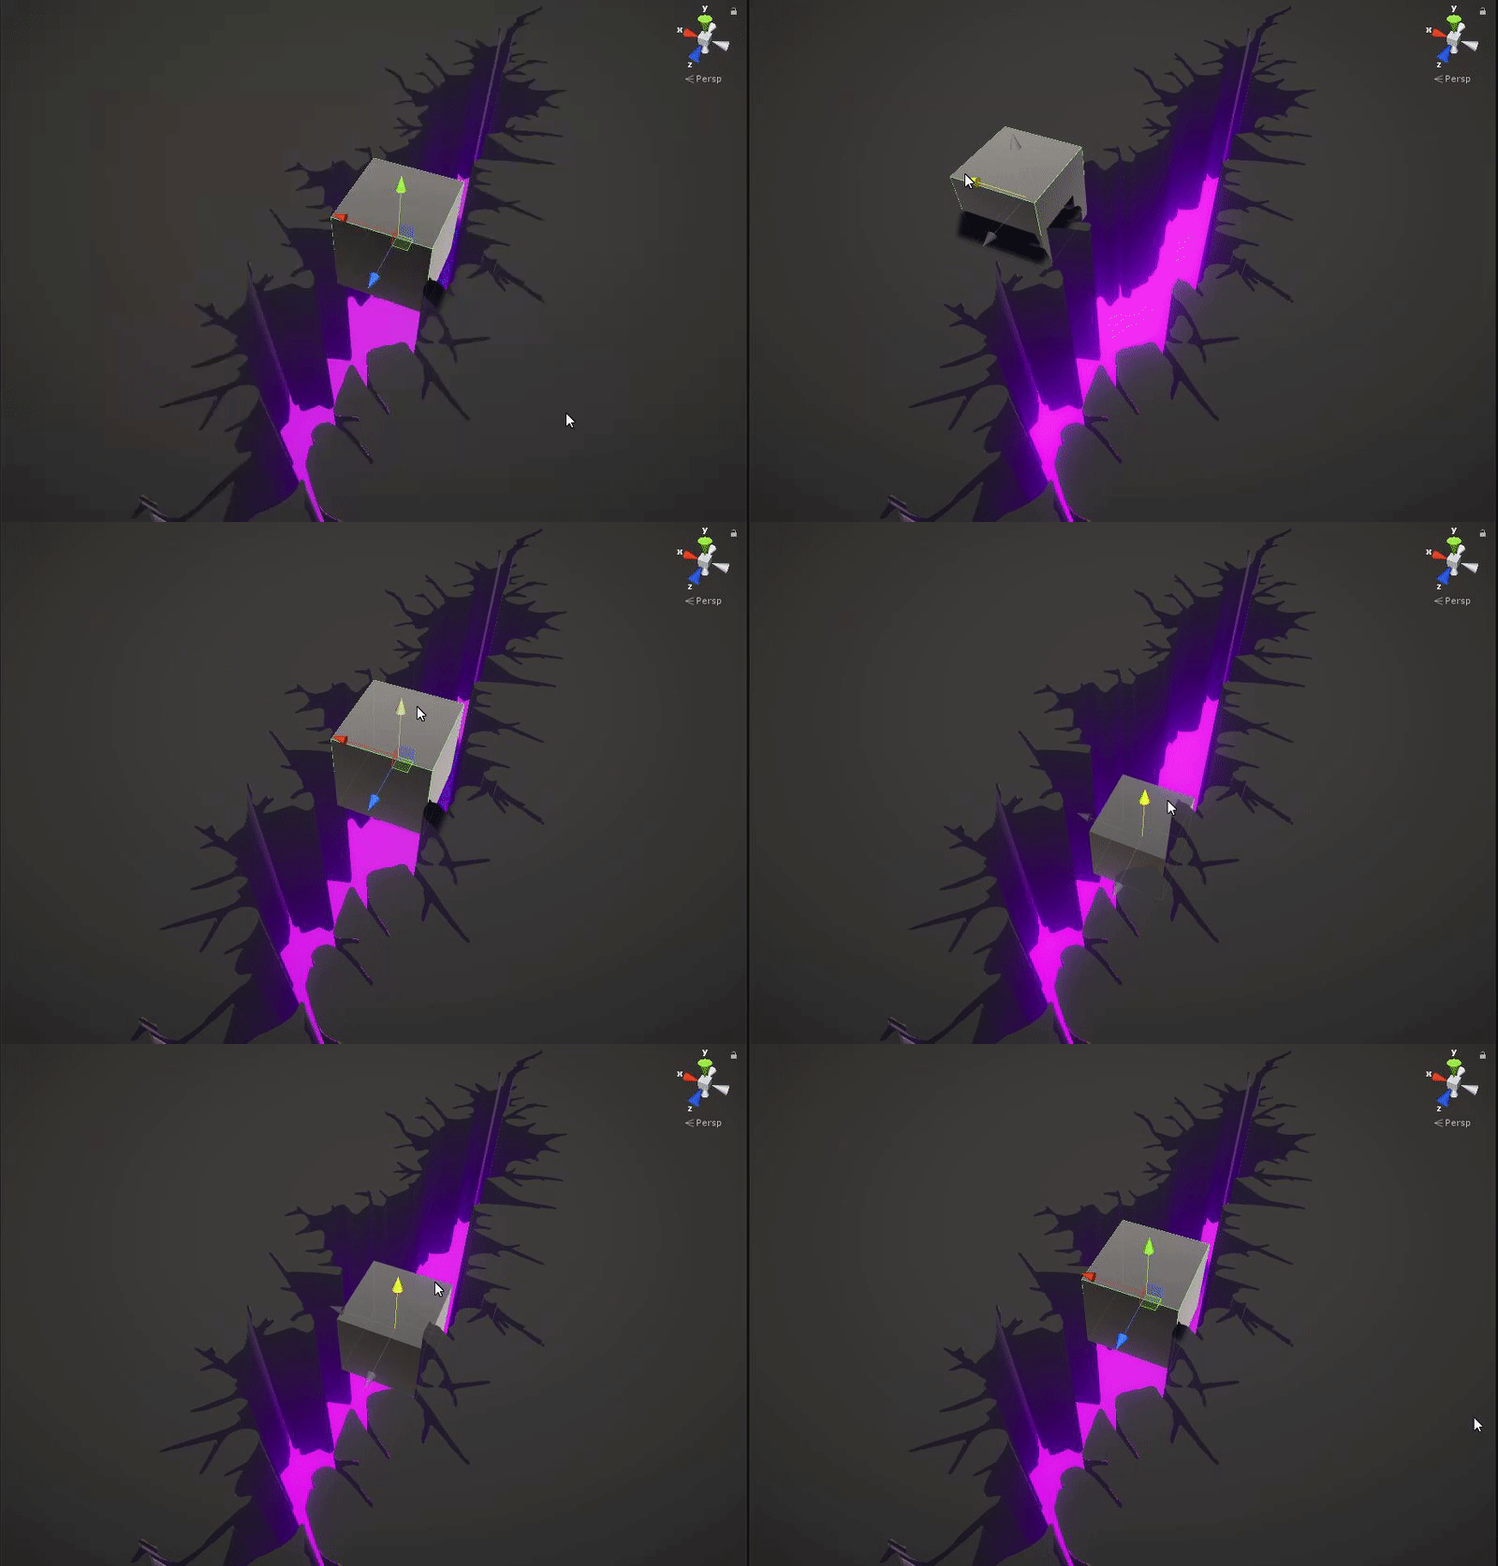
Yay! this starts to look nice. Now its time for the "worst" part, atleast for me. Making a fit of the mesh with the mask.
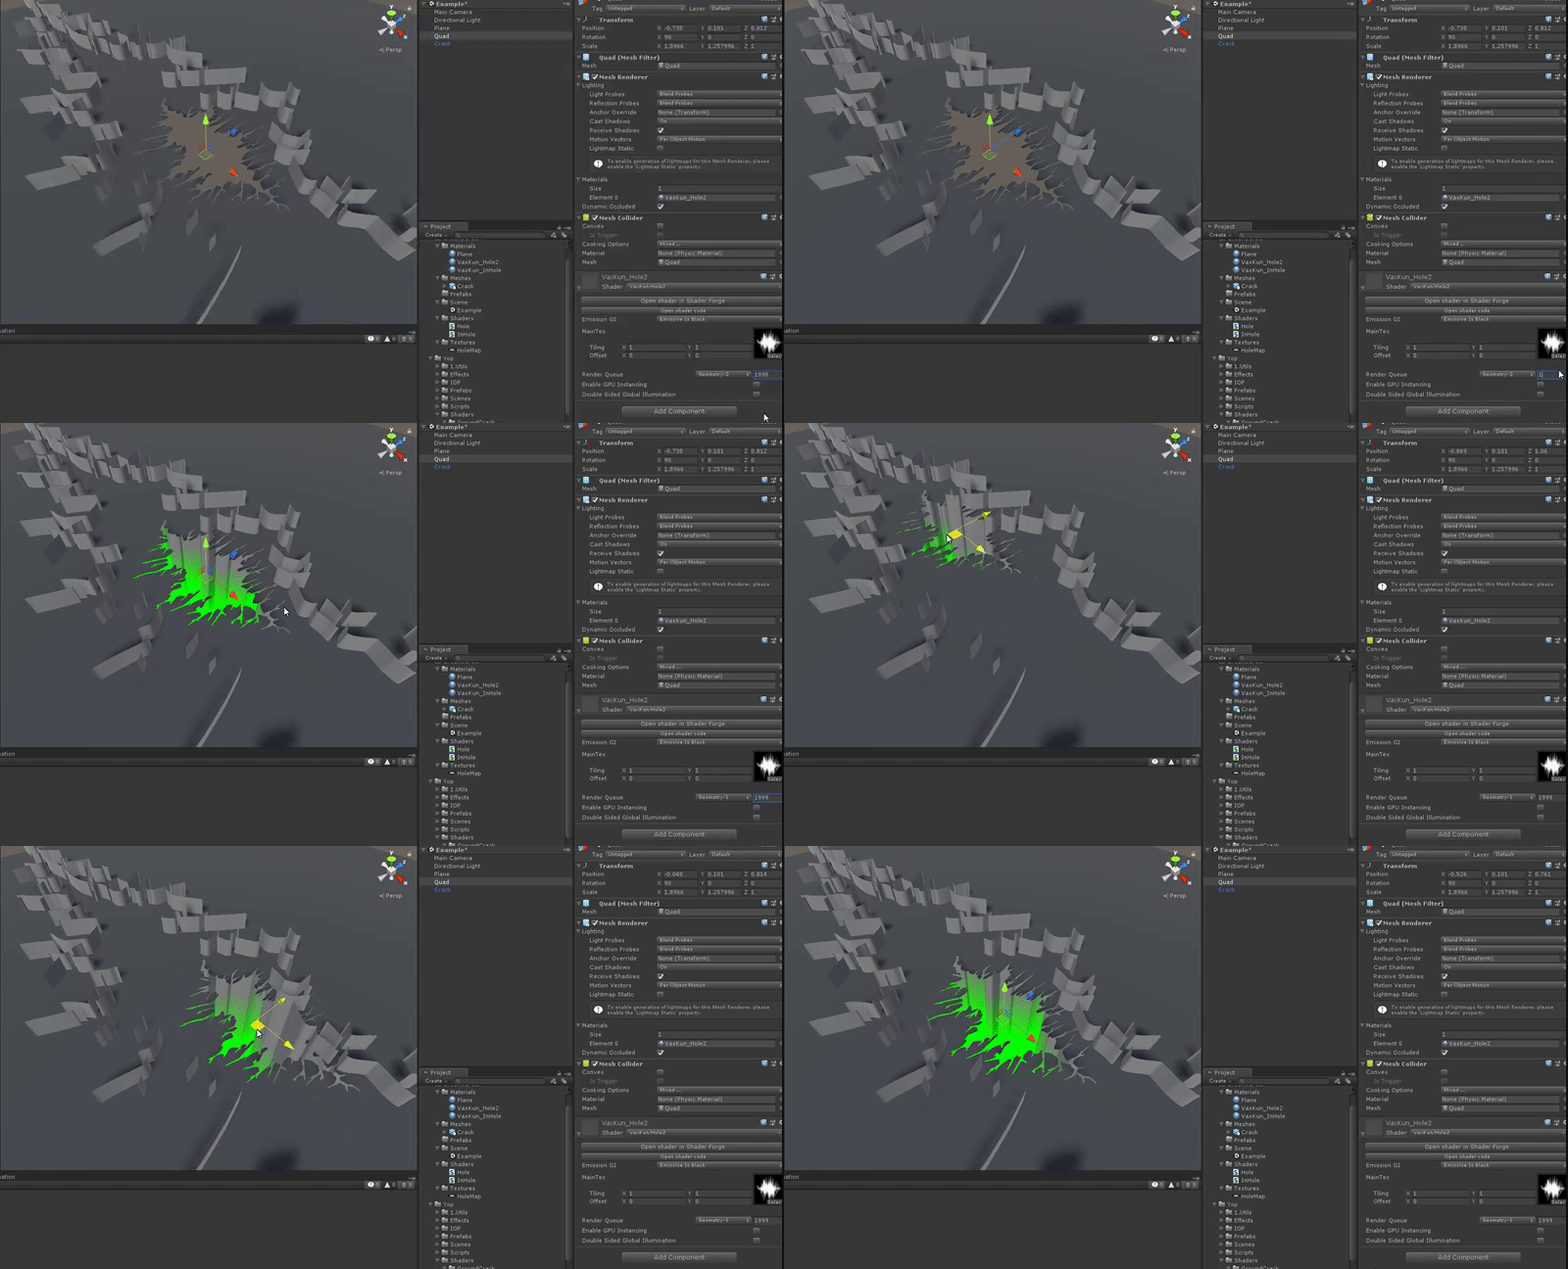
First, lets set the Render Queue of the Hole shader to 1999 to see the. Why not setting it in the moment we were creating the shader? Well simply because of the order. like in the Sorting layers of unity all are at 0, so our 0 is 1998.
Now its time to the sync.
But hey, where is the real glow, where is the bloom?
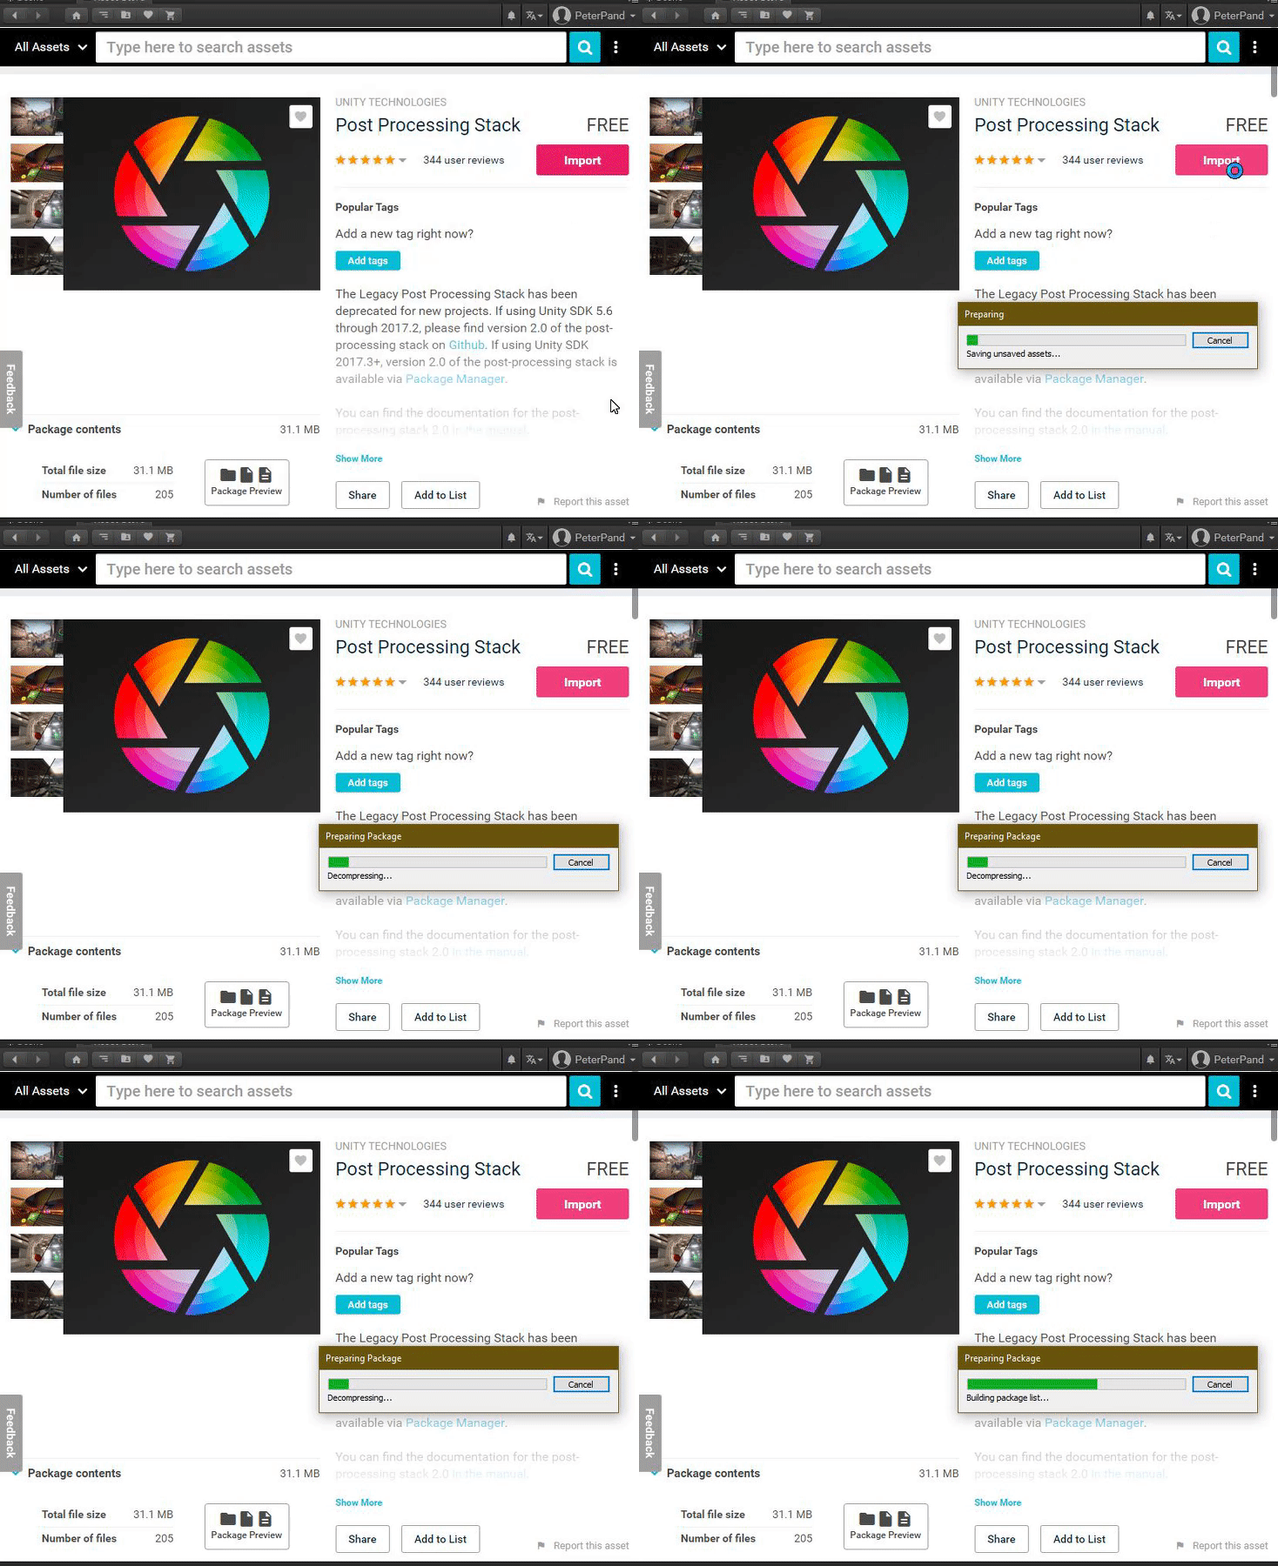
Well, maybe bloom is laizng around on postprocessing stack. So lets go ahead into unity asset store and search for post processing stack, then import it.
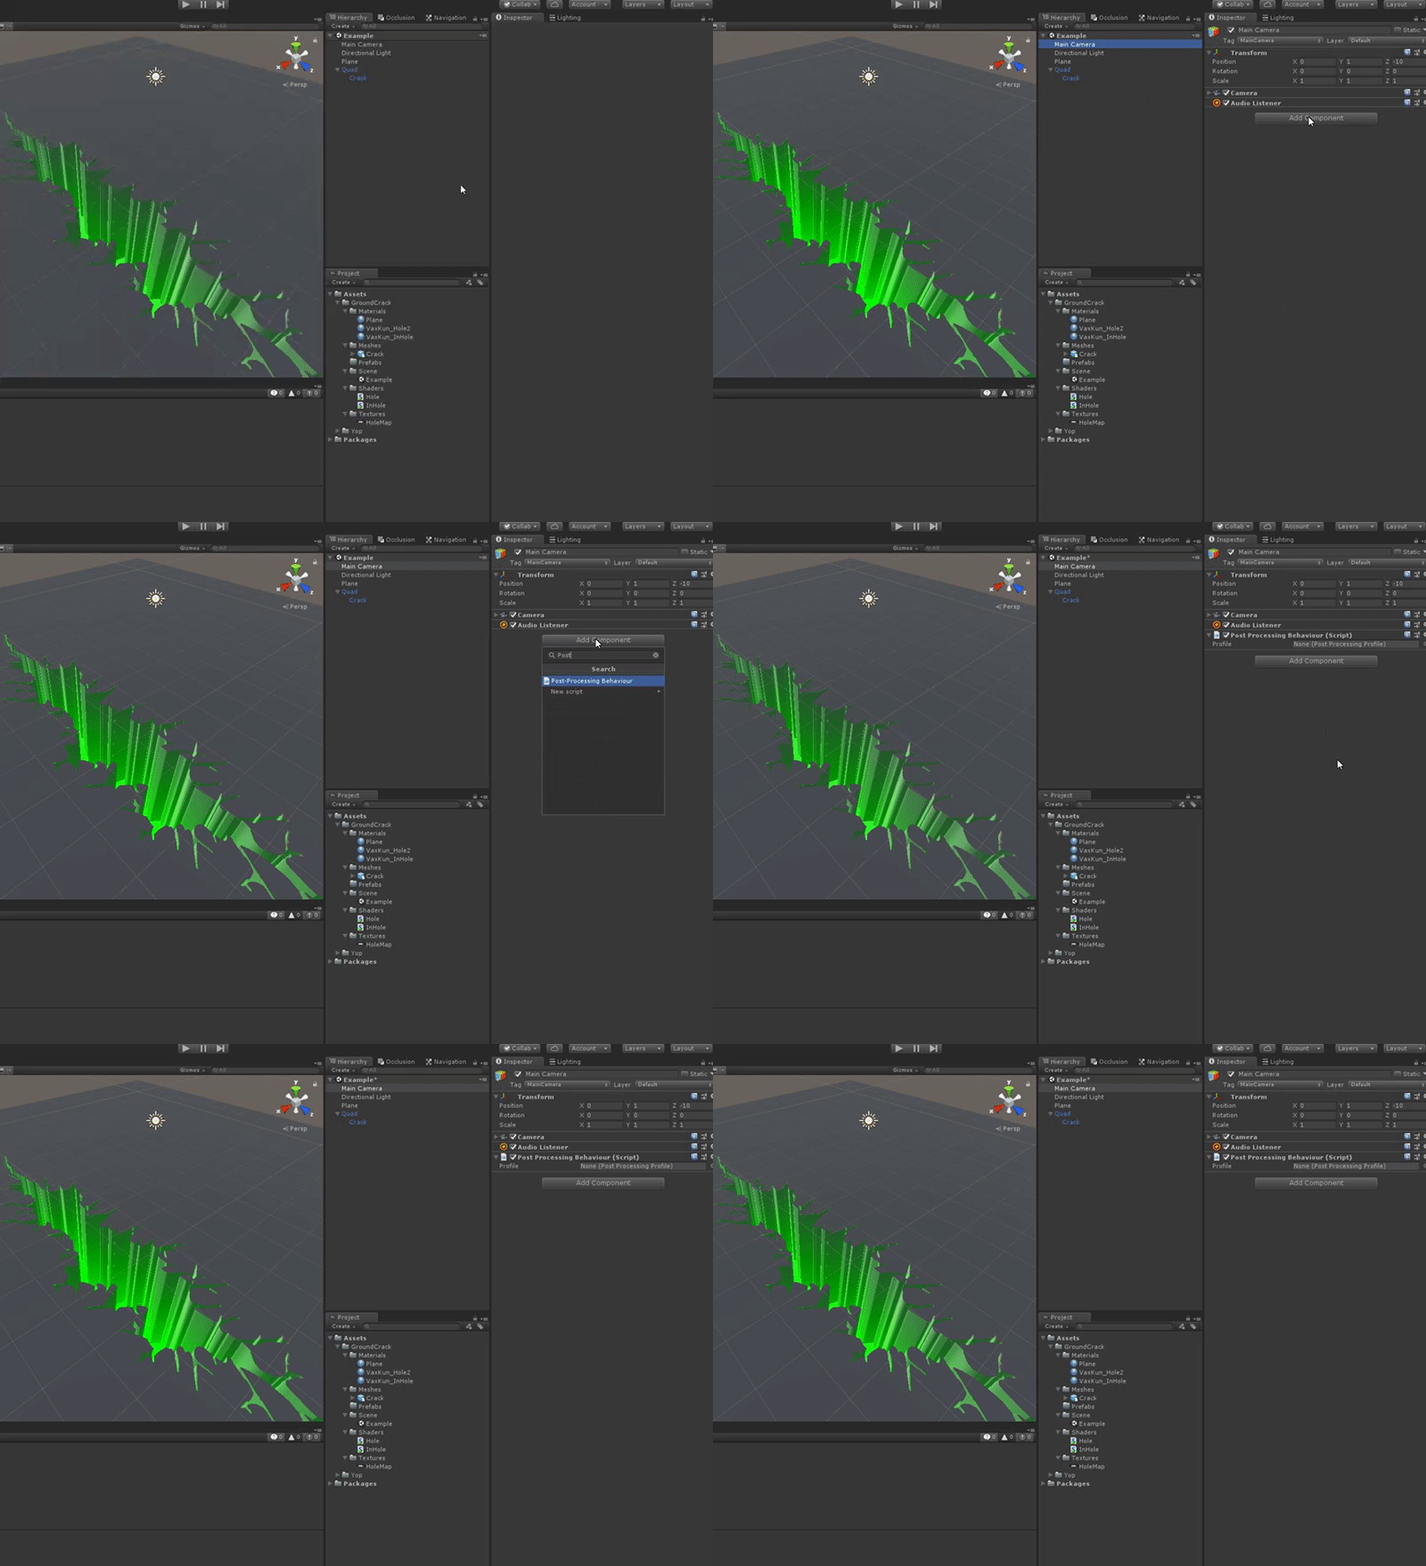
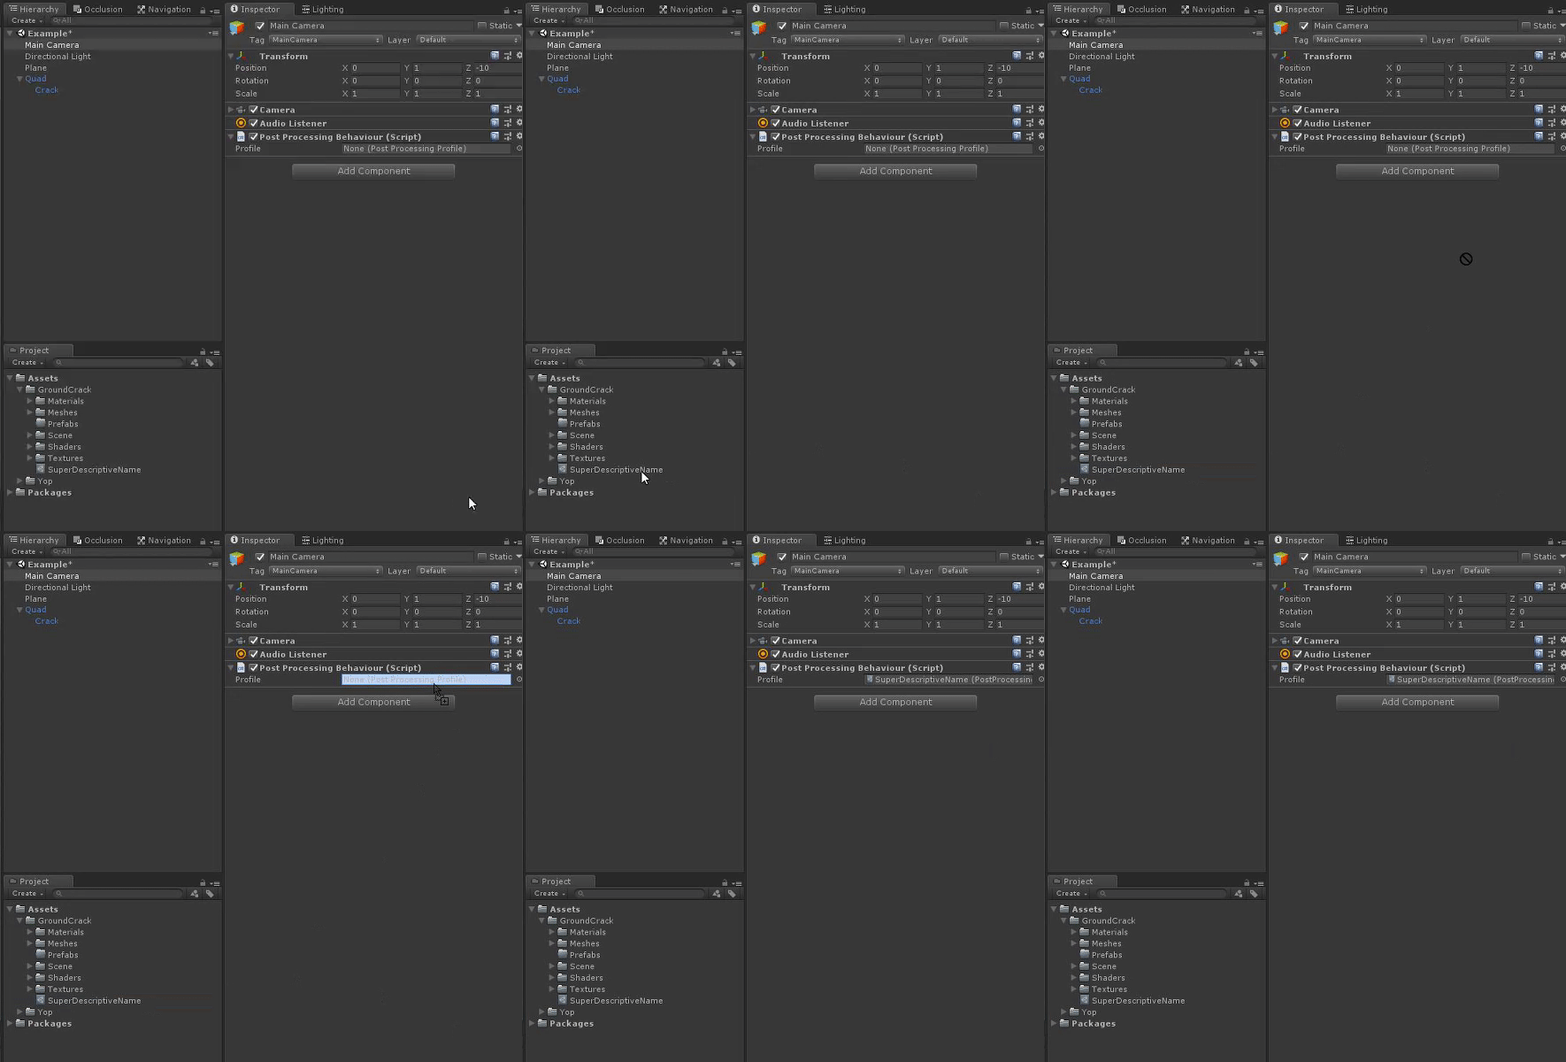
Once its imported, lets go back to the scene and select the camera, to add it a Post-Processing Behavour.
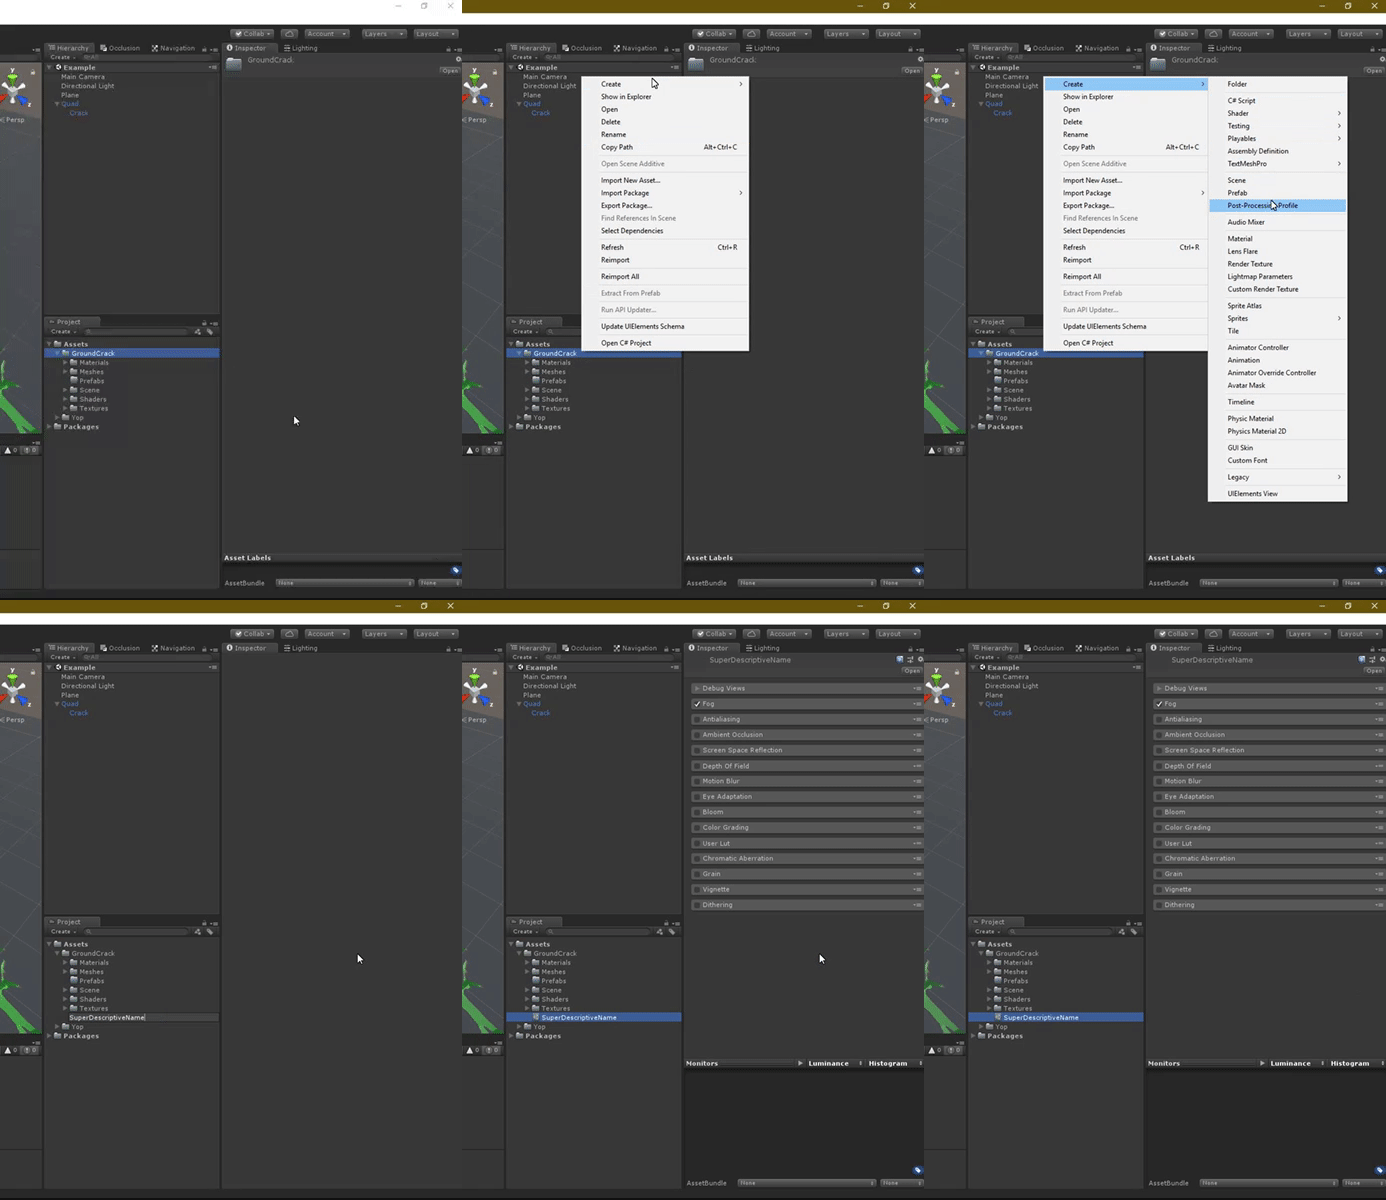
Okay, now, we have to create the PostProcessingProfile the Camera behaviour asks, so go to the project and create one, call it however you want, but it should be descriptive, to know what post processing filters are we using, or where are we using the filters...
Now, add that profile to the camera because we want to see the changes while we are doing it.
Did you noticed the post processing power that has appeared on the scene now??
If dont, its ok because we havent done anything with the profile.
If yes, you should see a doctor or stop eating weird things.
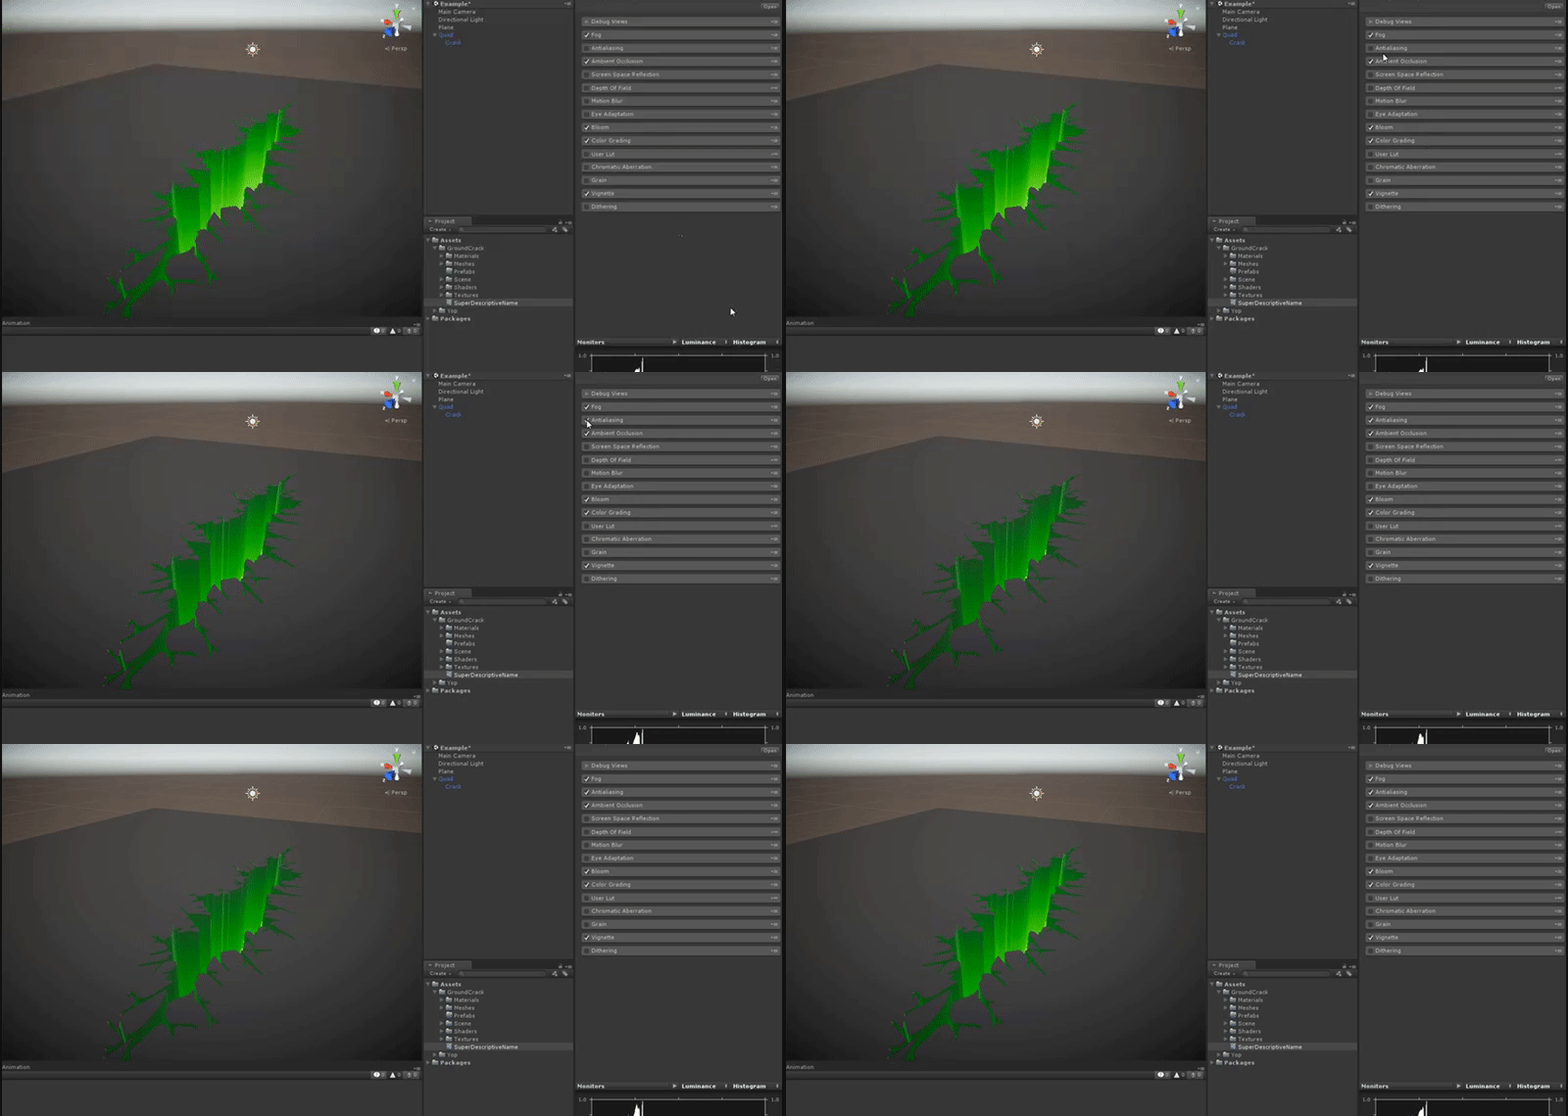
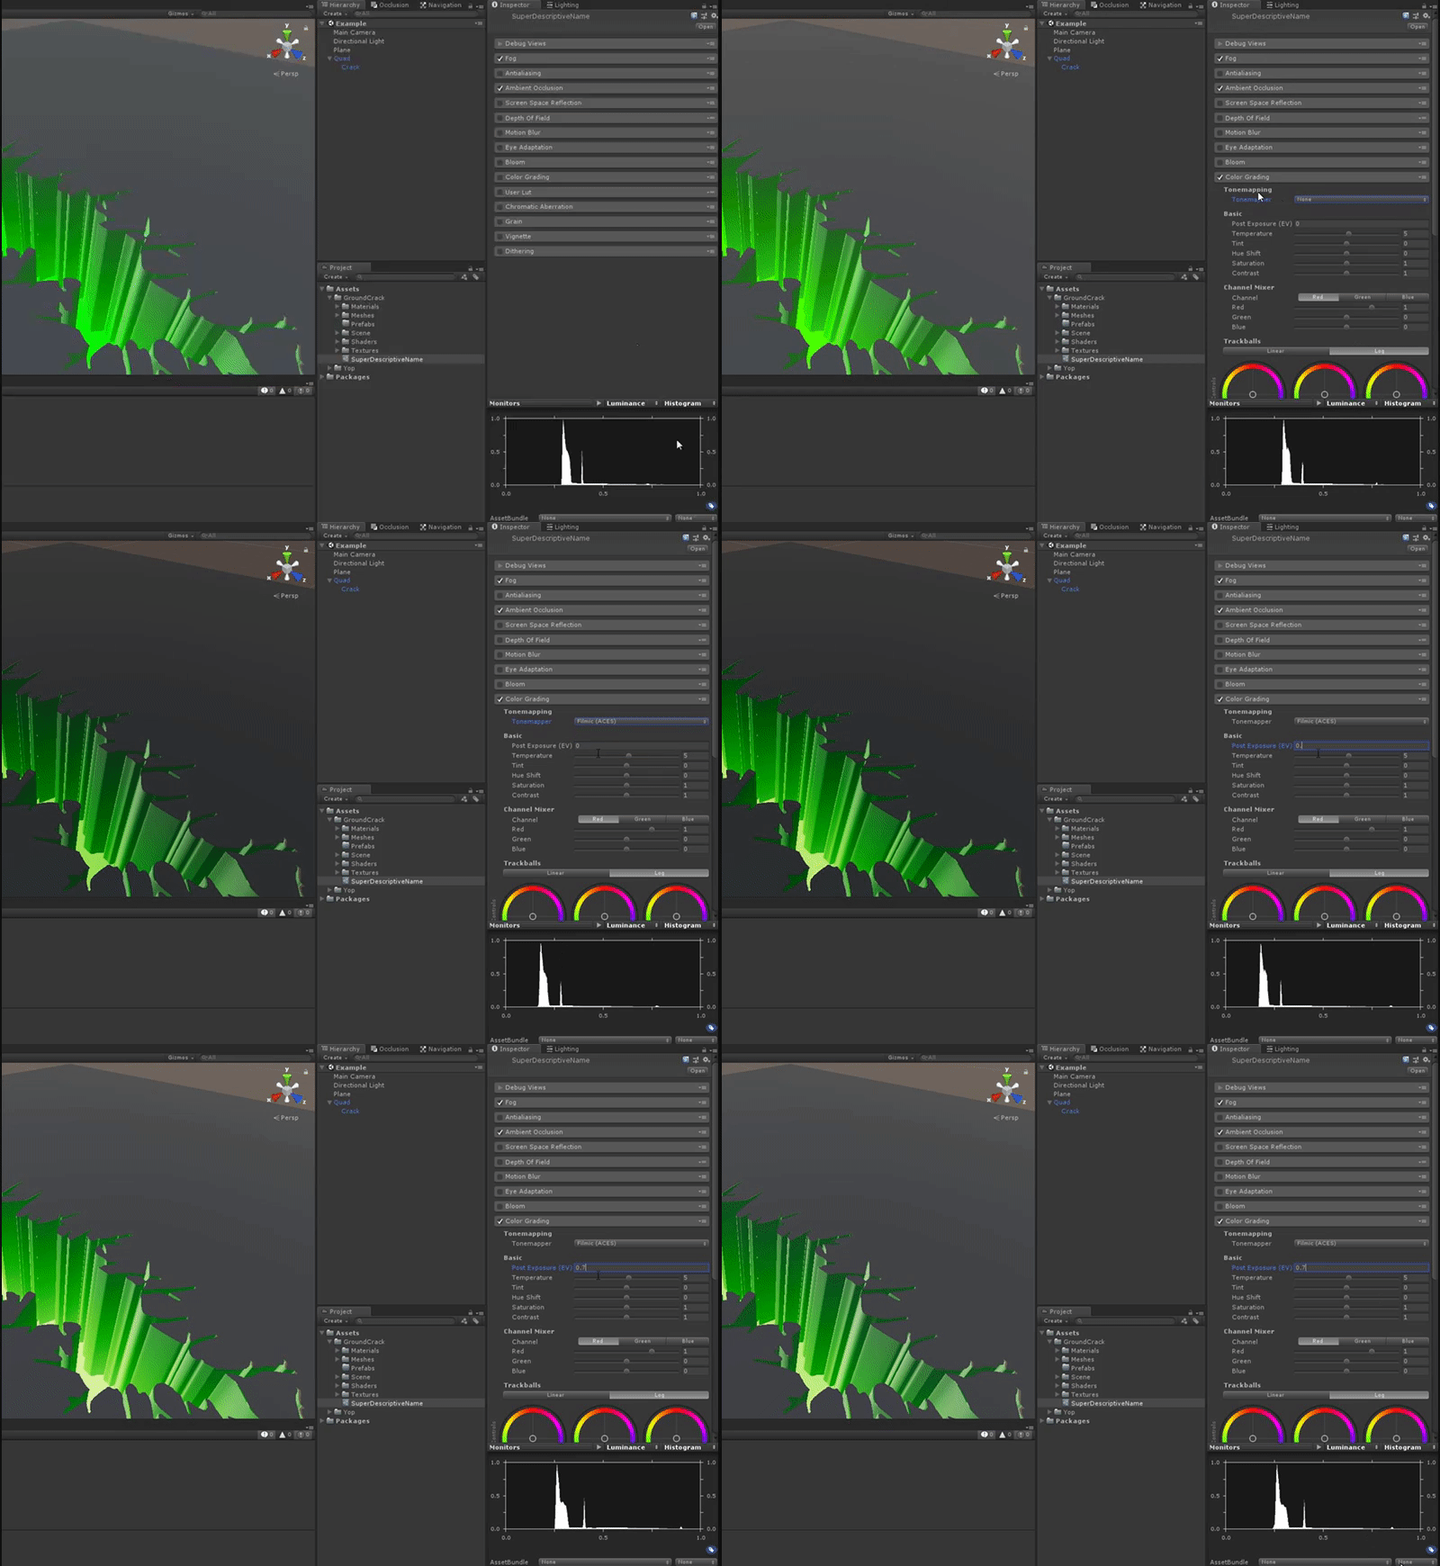
So, select the profile and start adding the antialiasing (Because we dont like sharp edges).
Now, a bit of color grading in FILMIC, but bumping up a bit the Exposure.
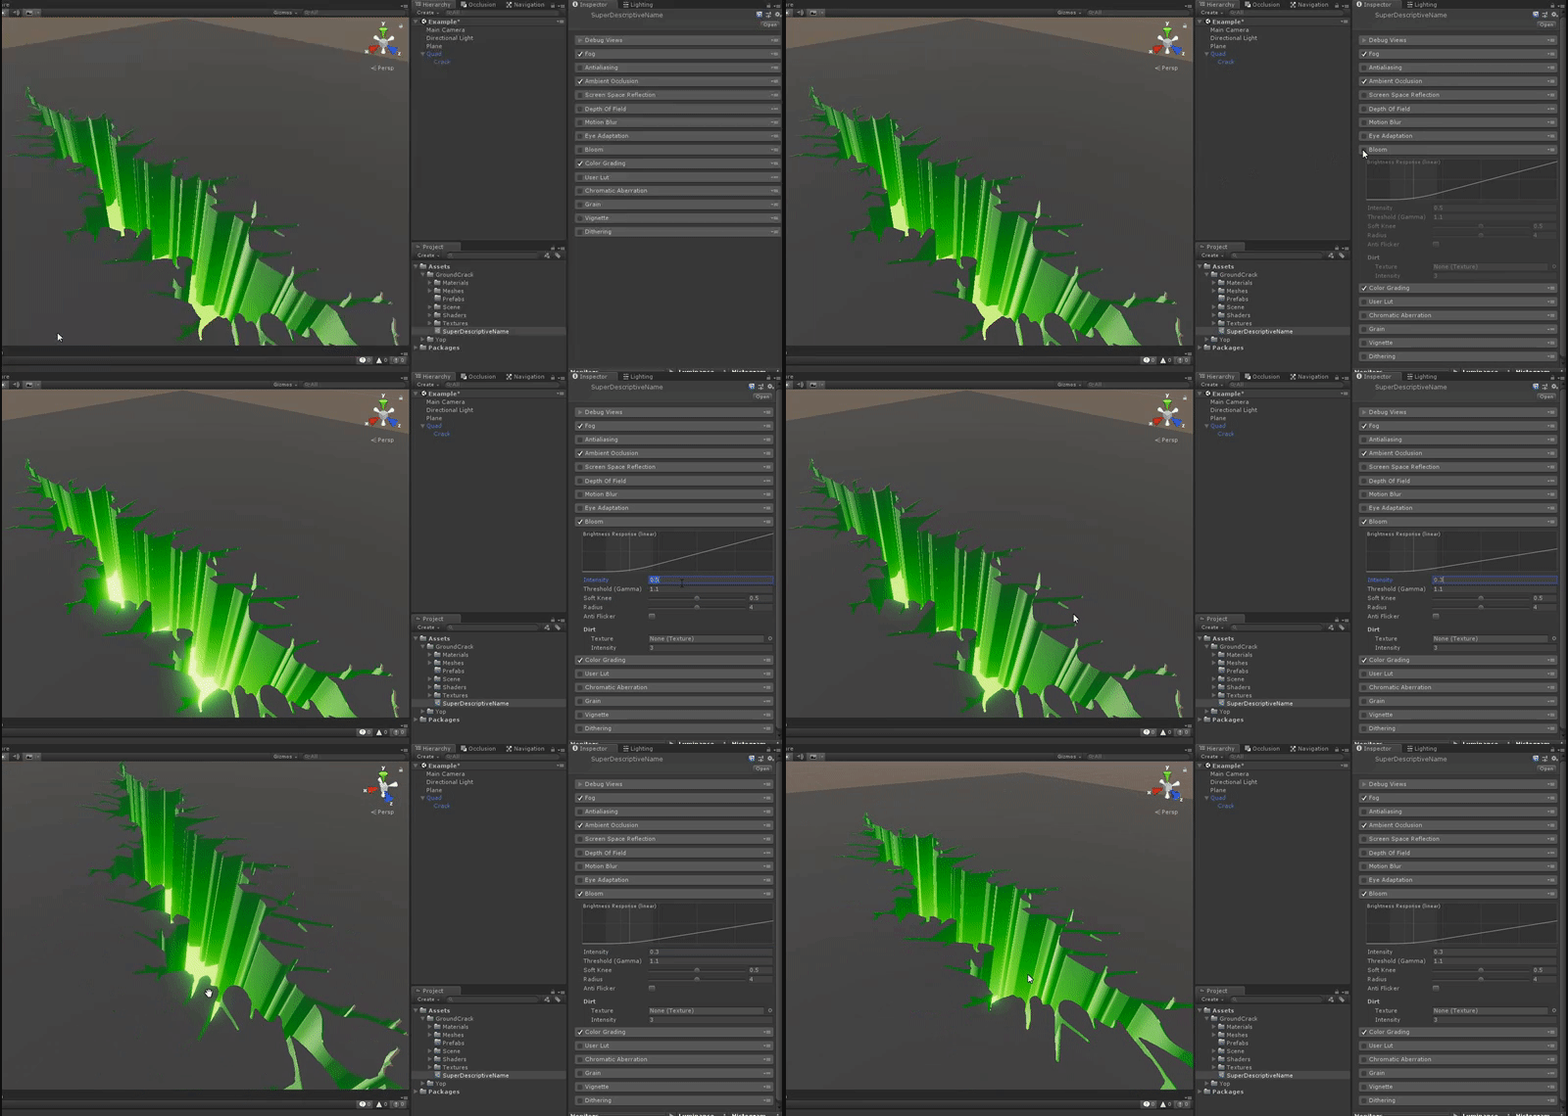
Wow, its looking nice now huh. Well now its time for the star filter: Bloom.
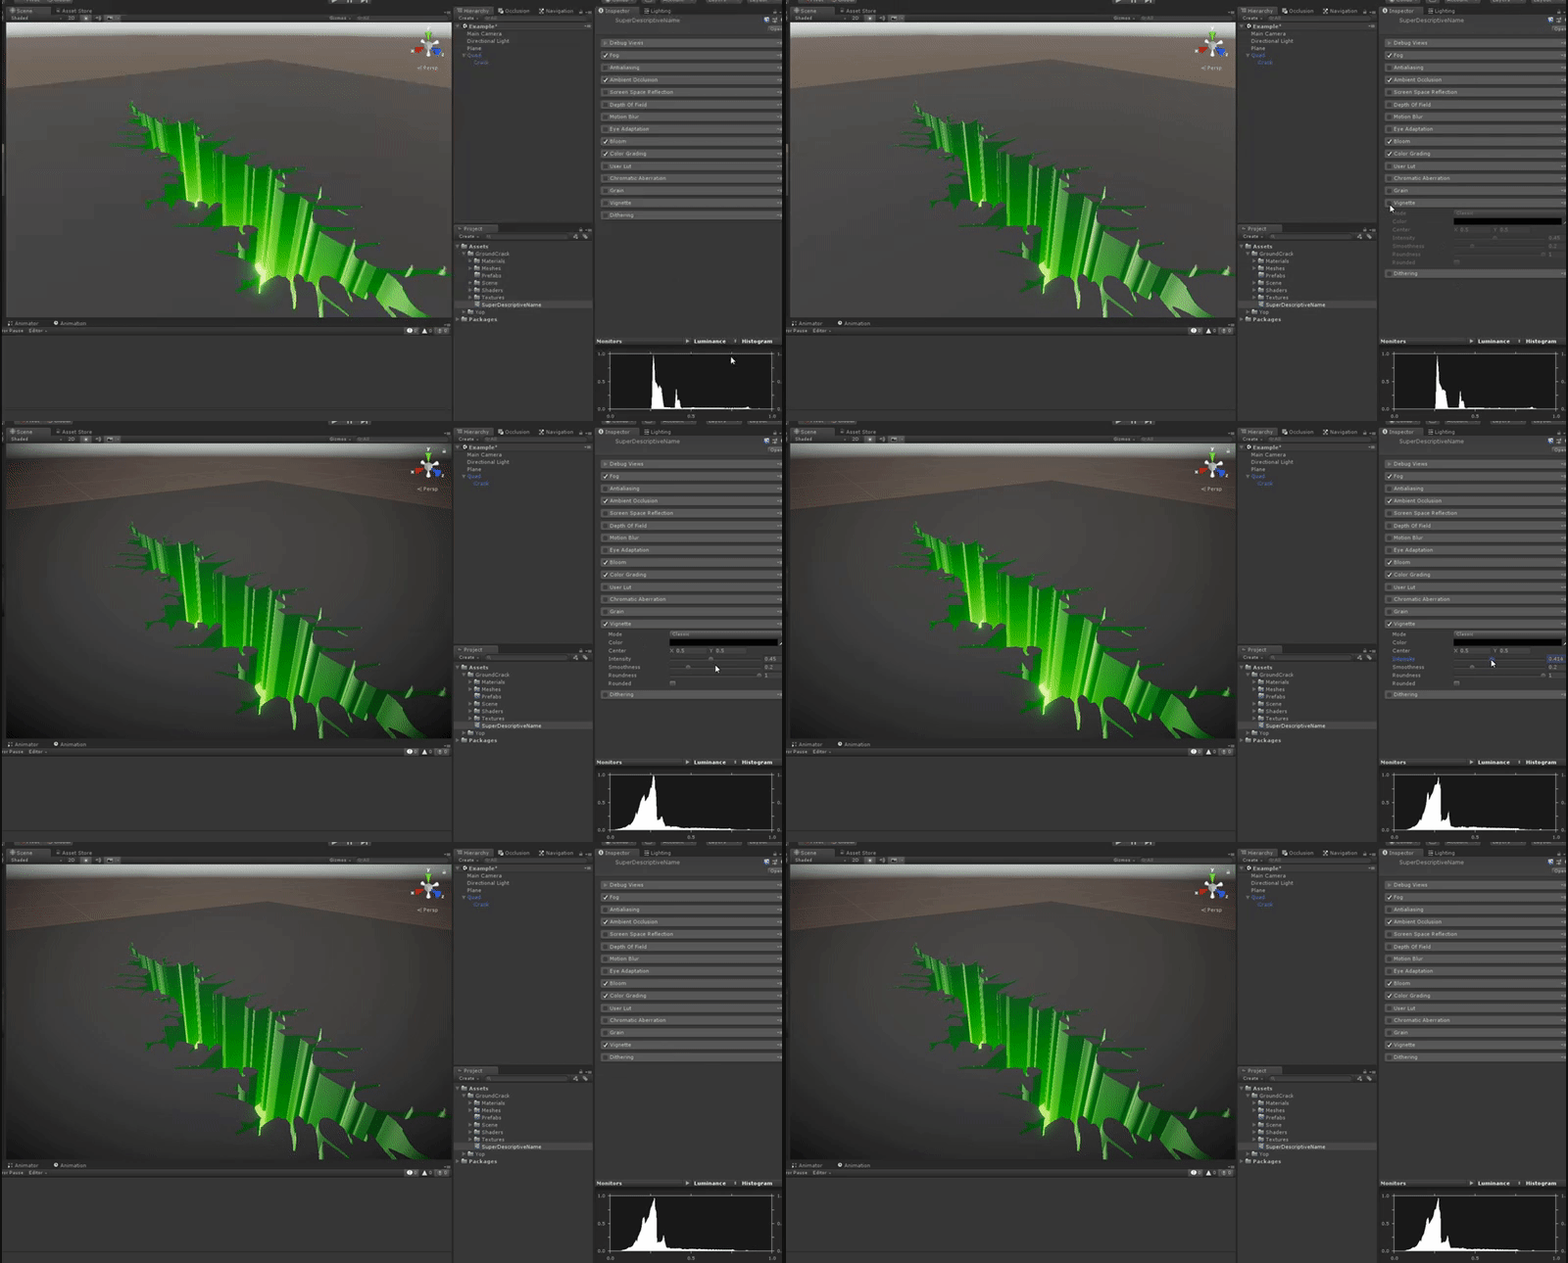
To finish up the post processing, add a vignette
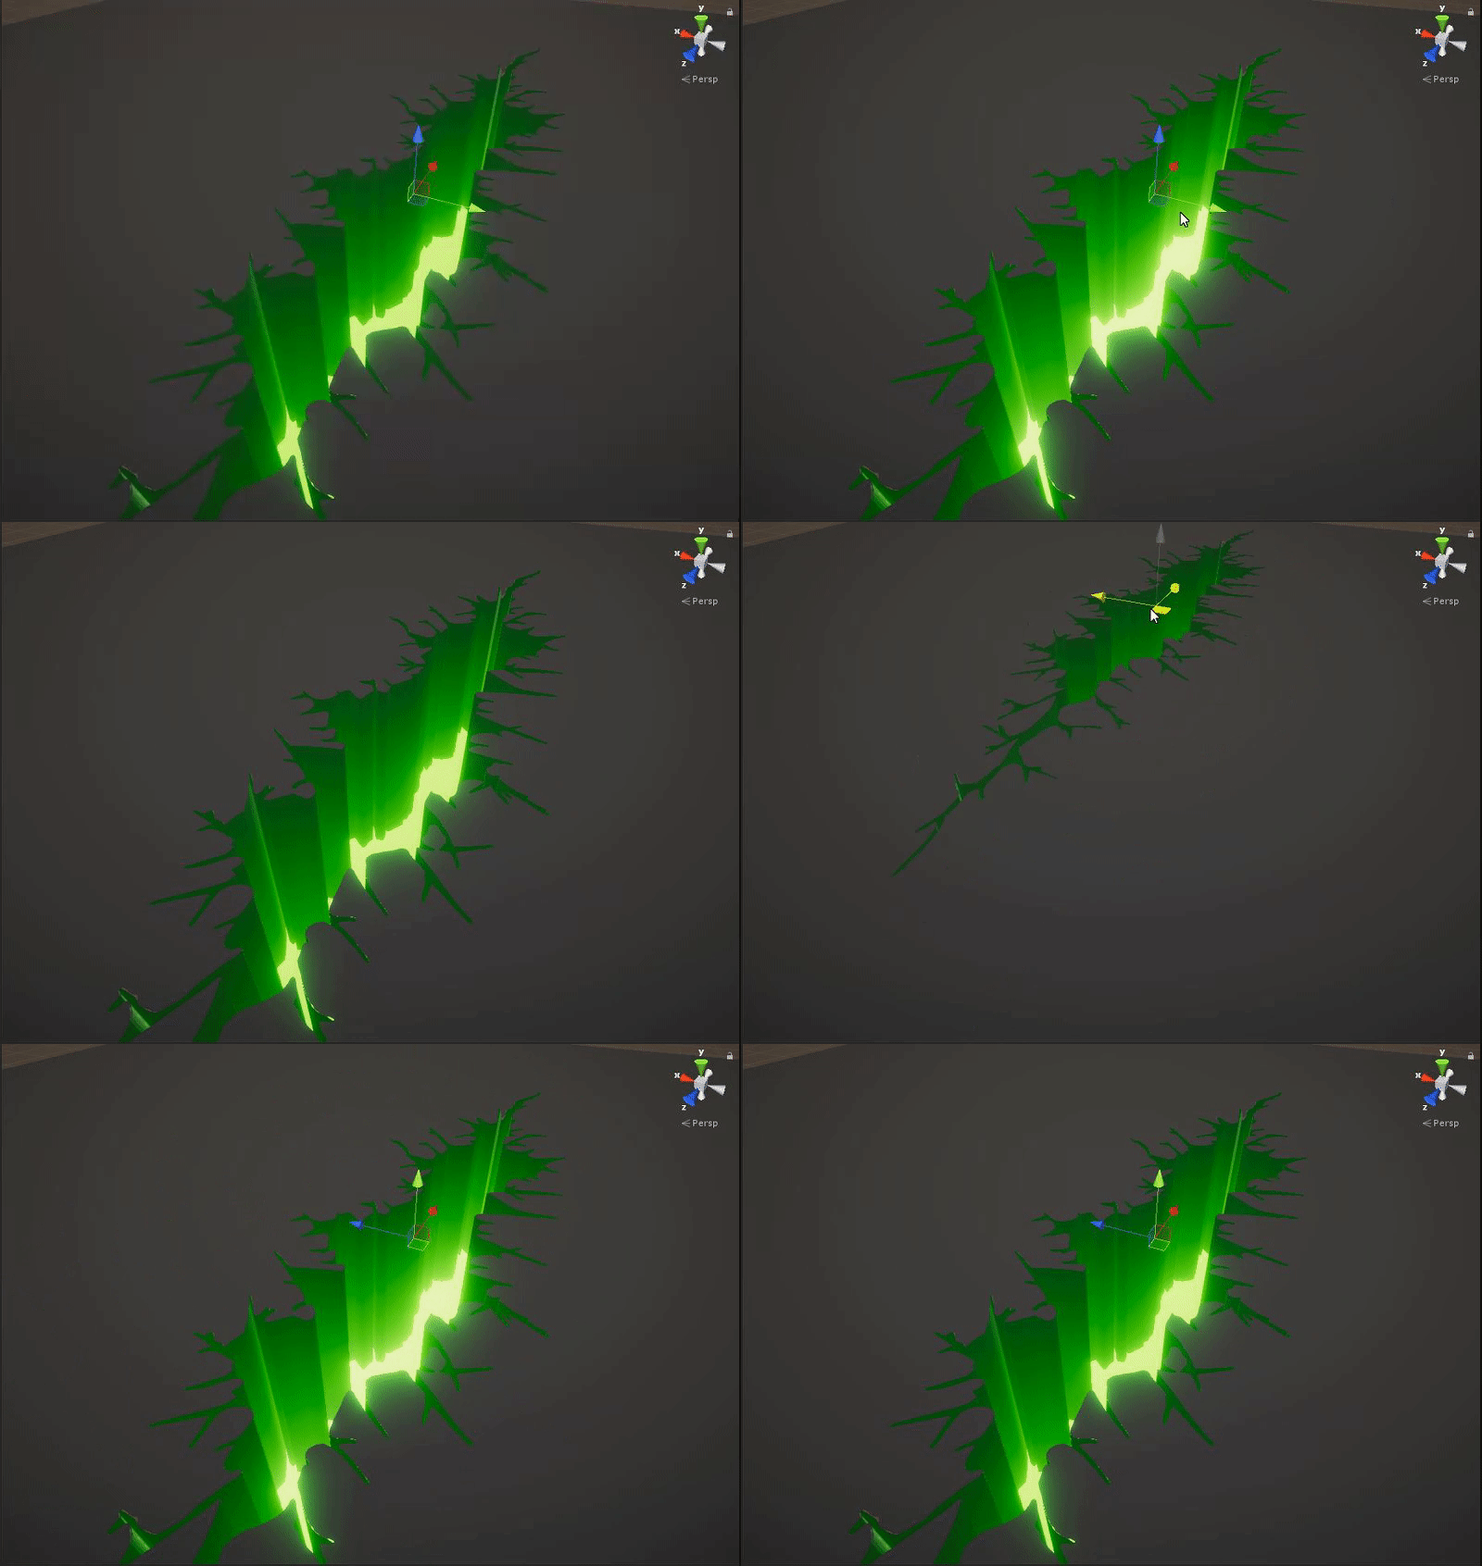
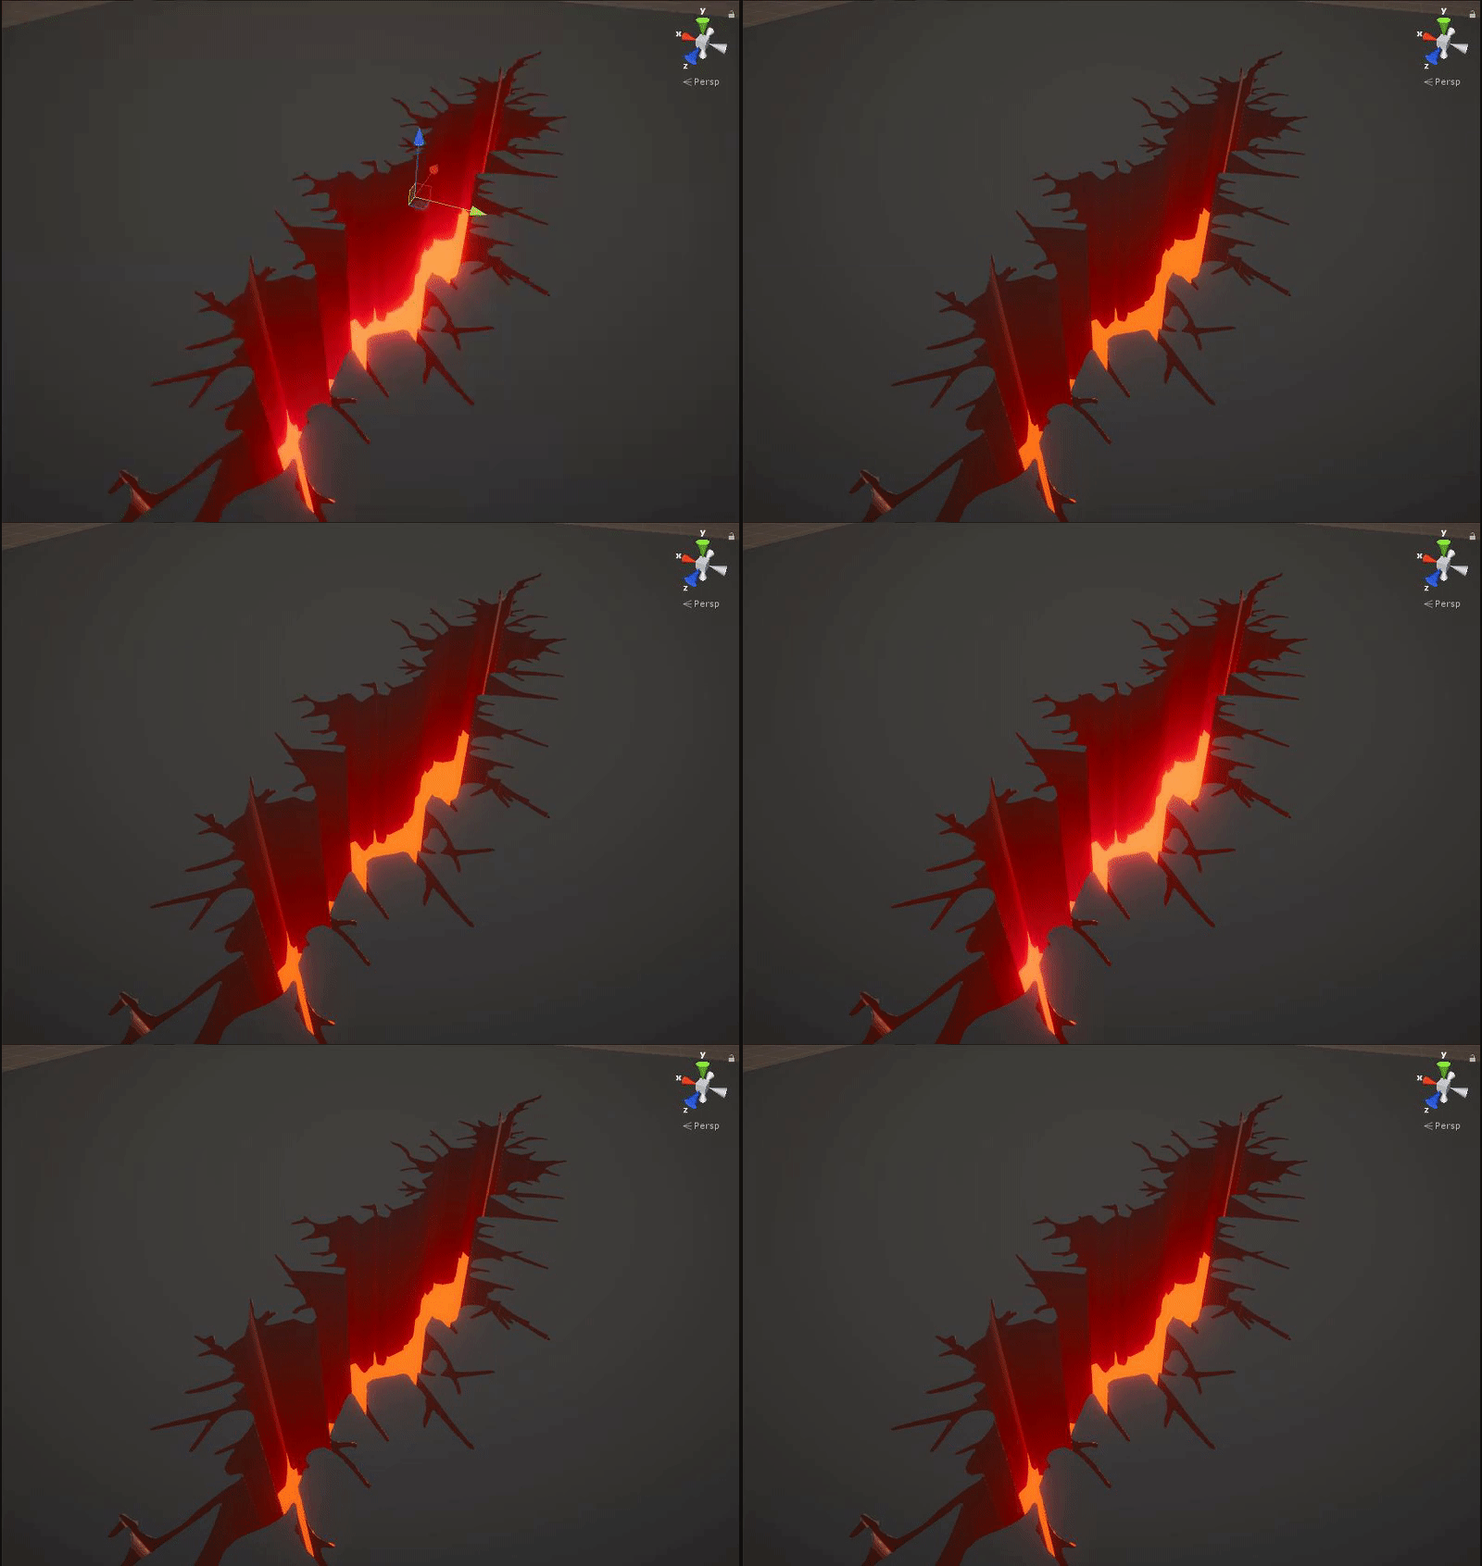
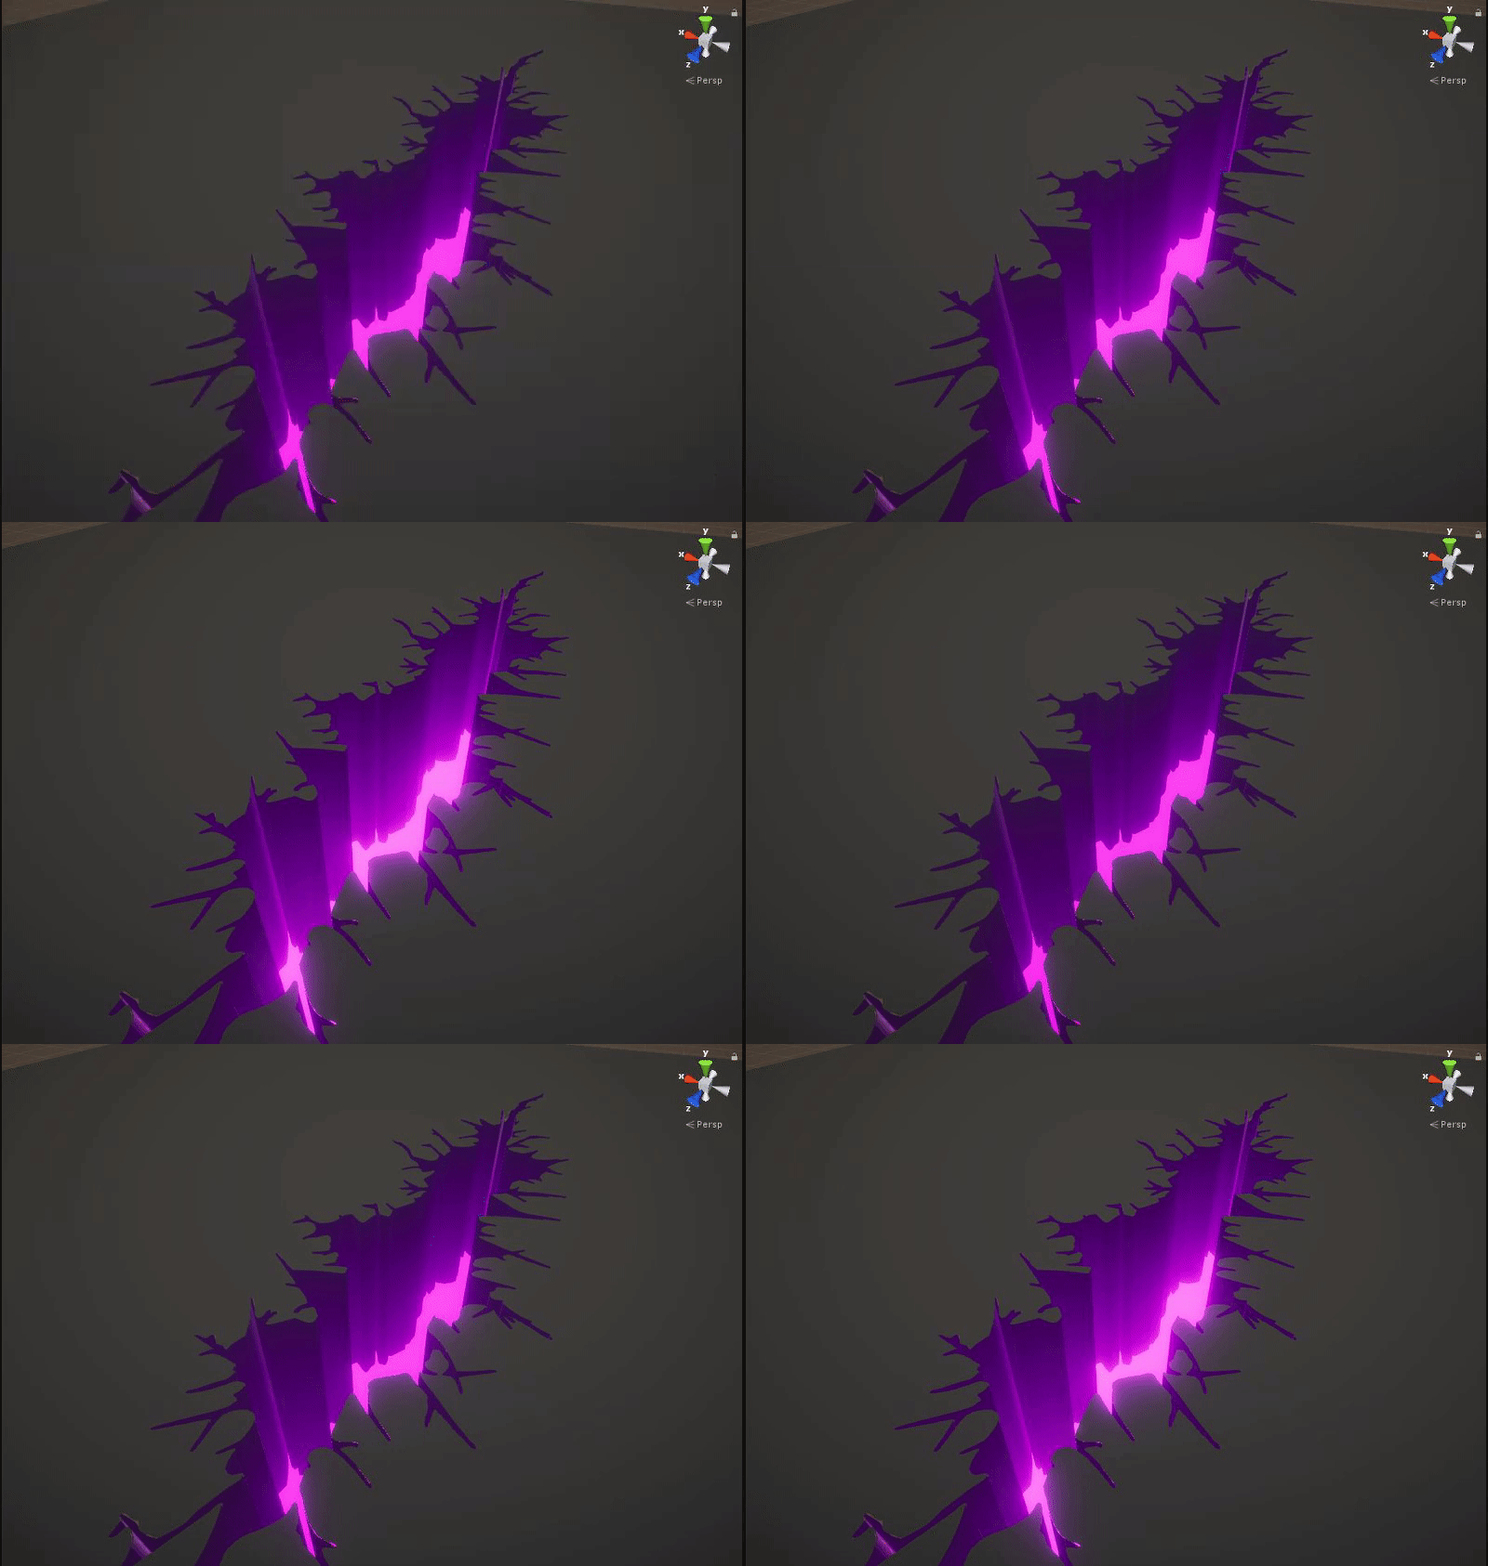
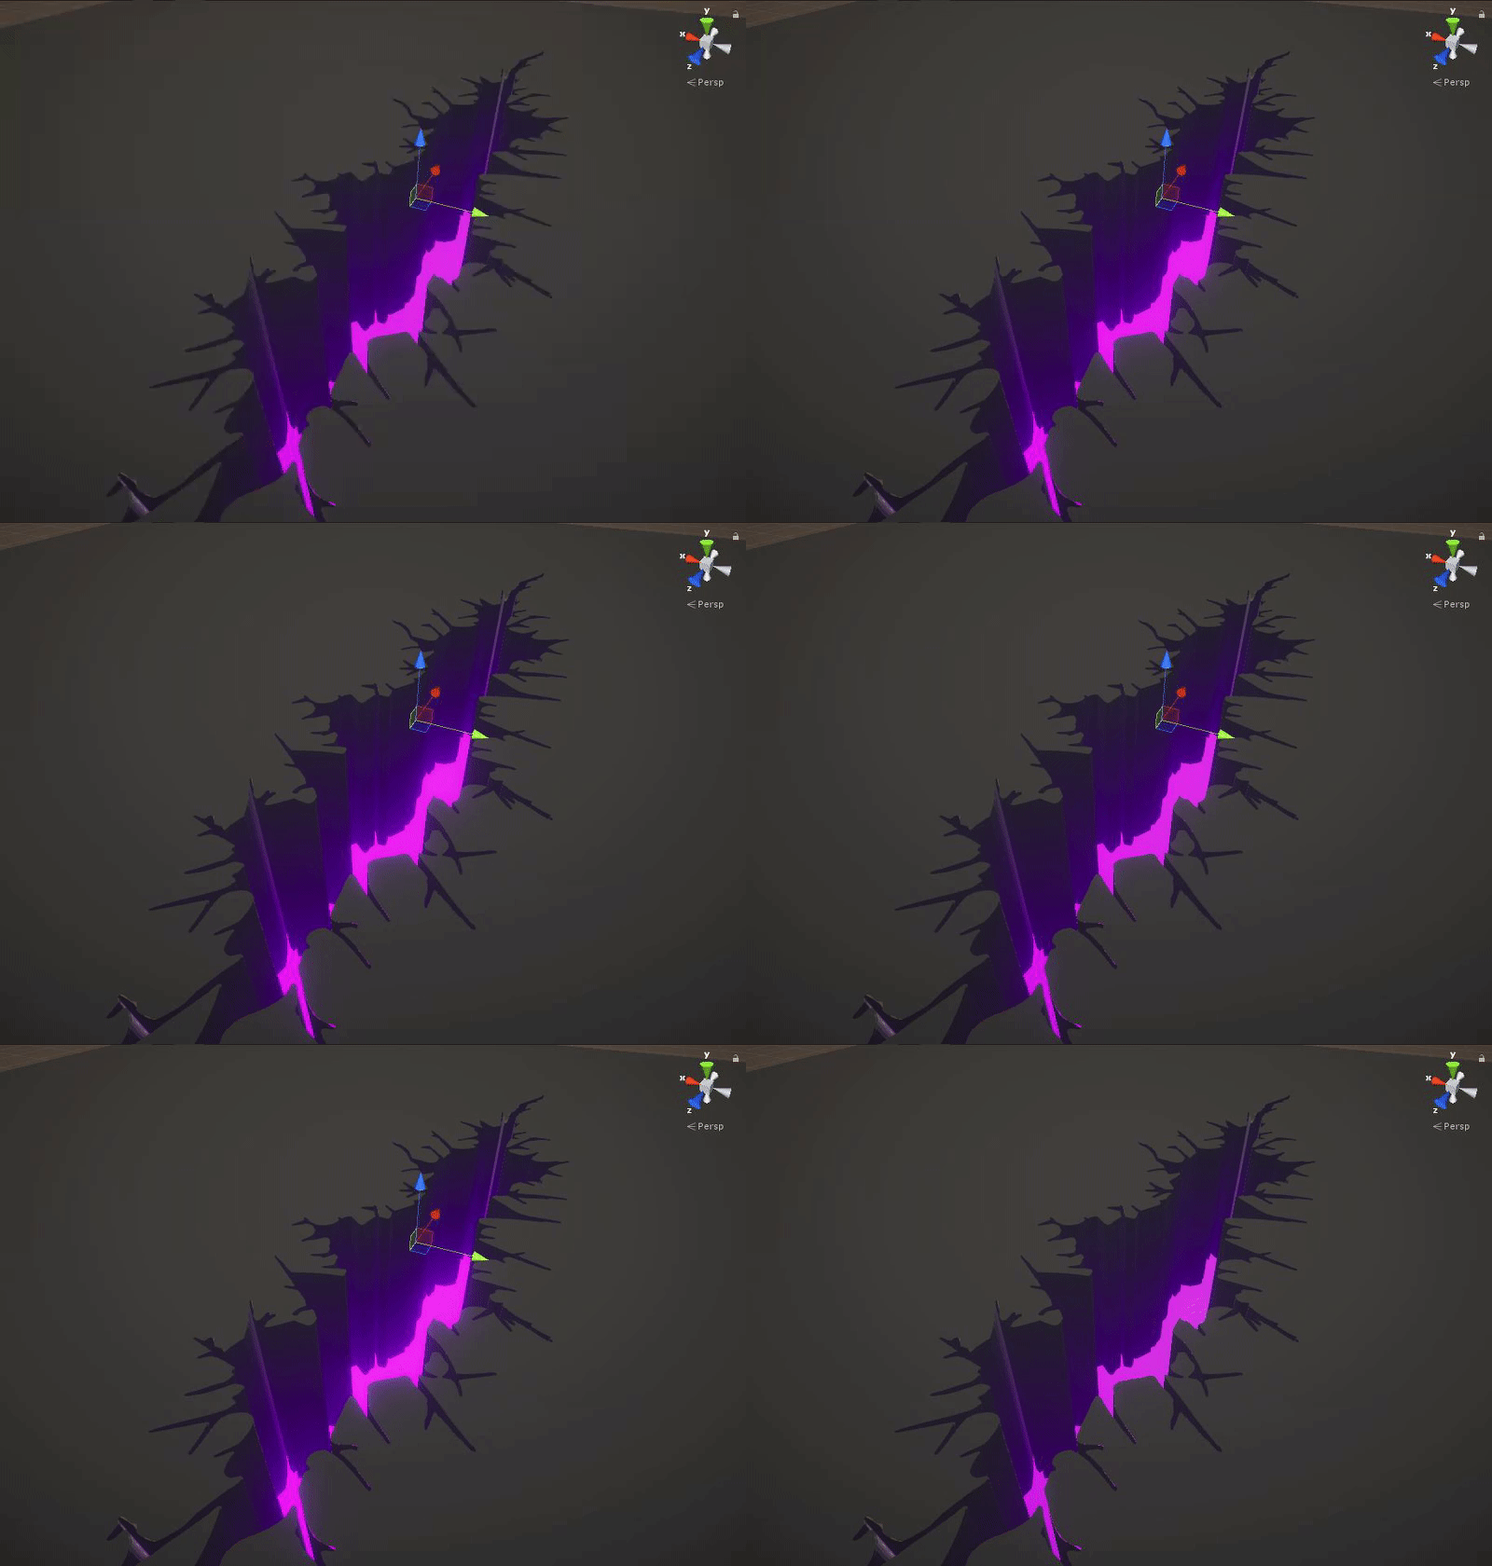
Congrats!! the effect is finished :D
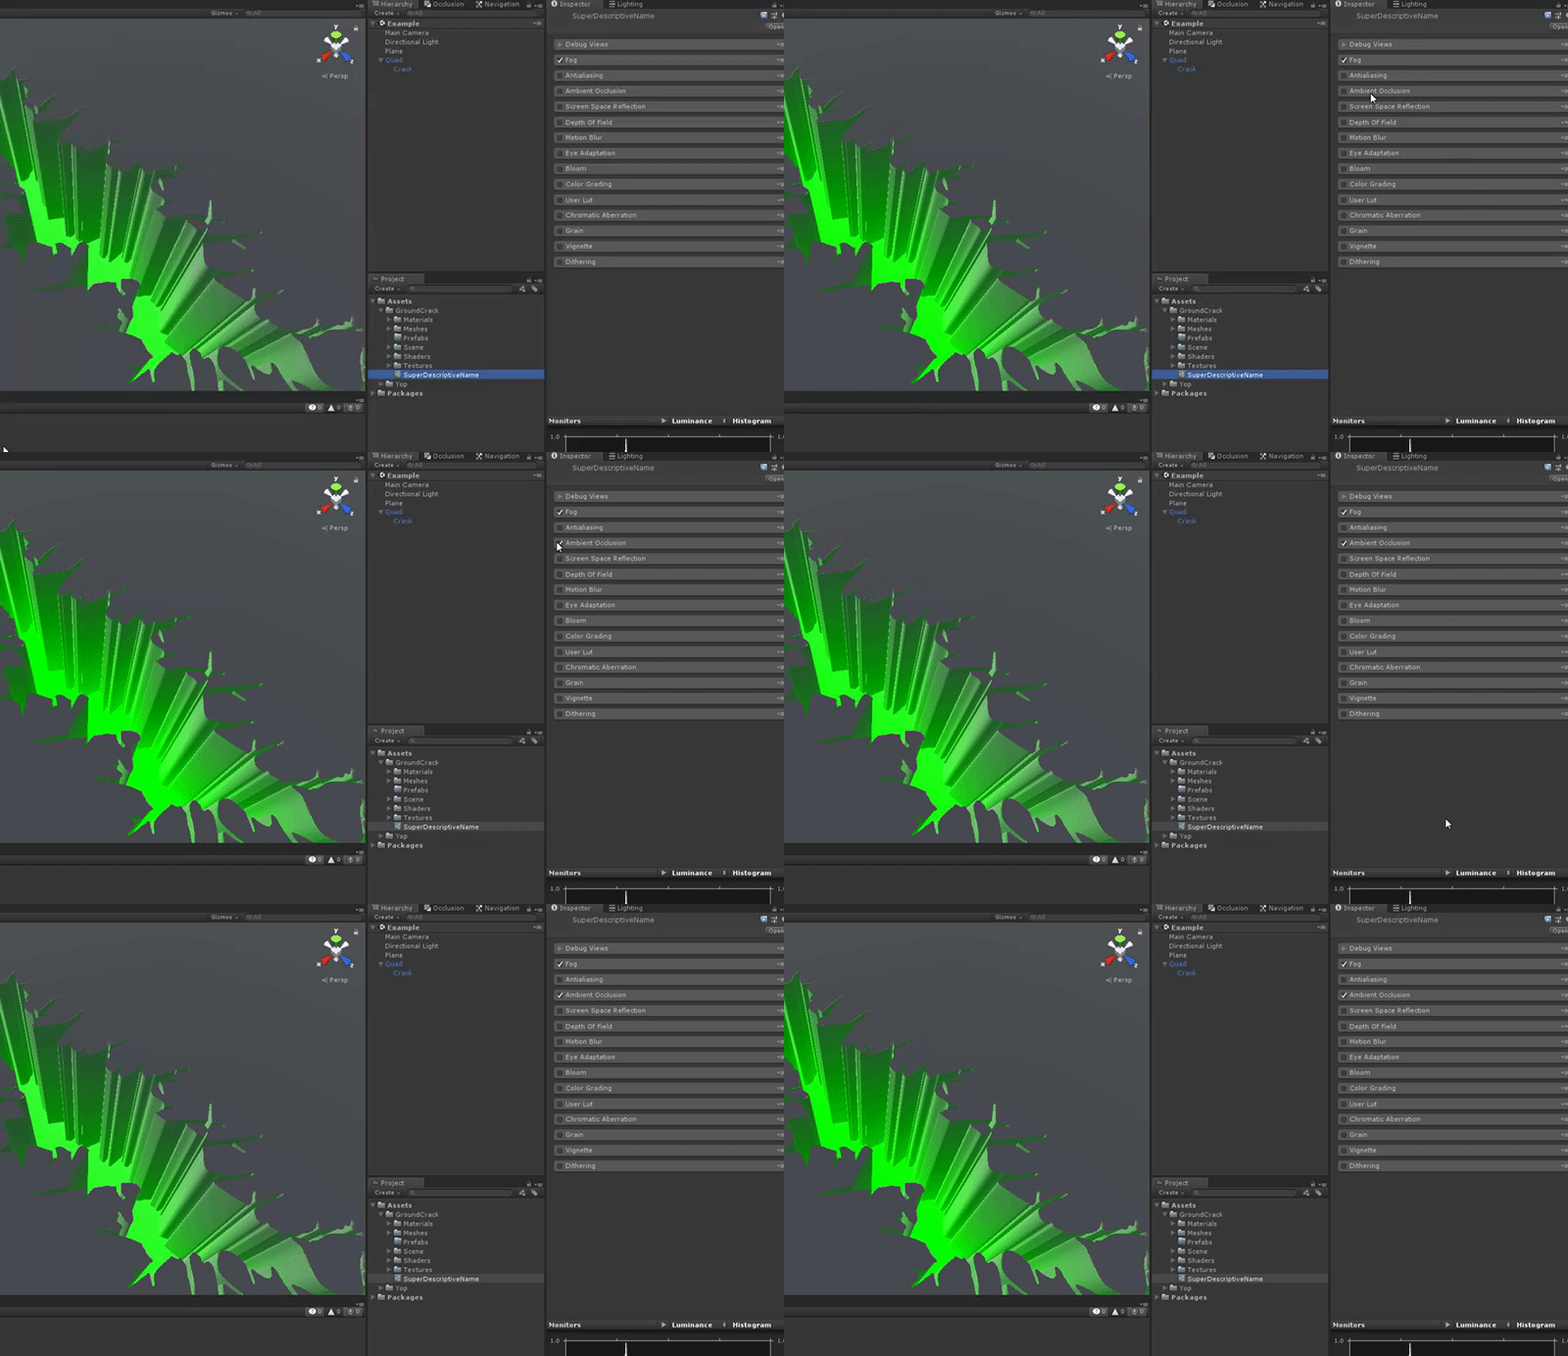
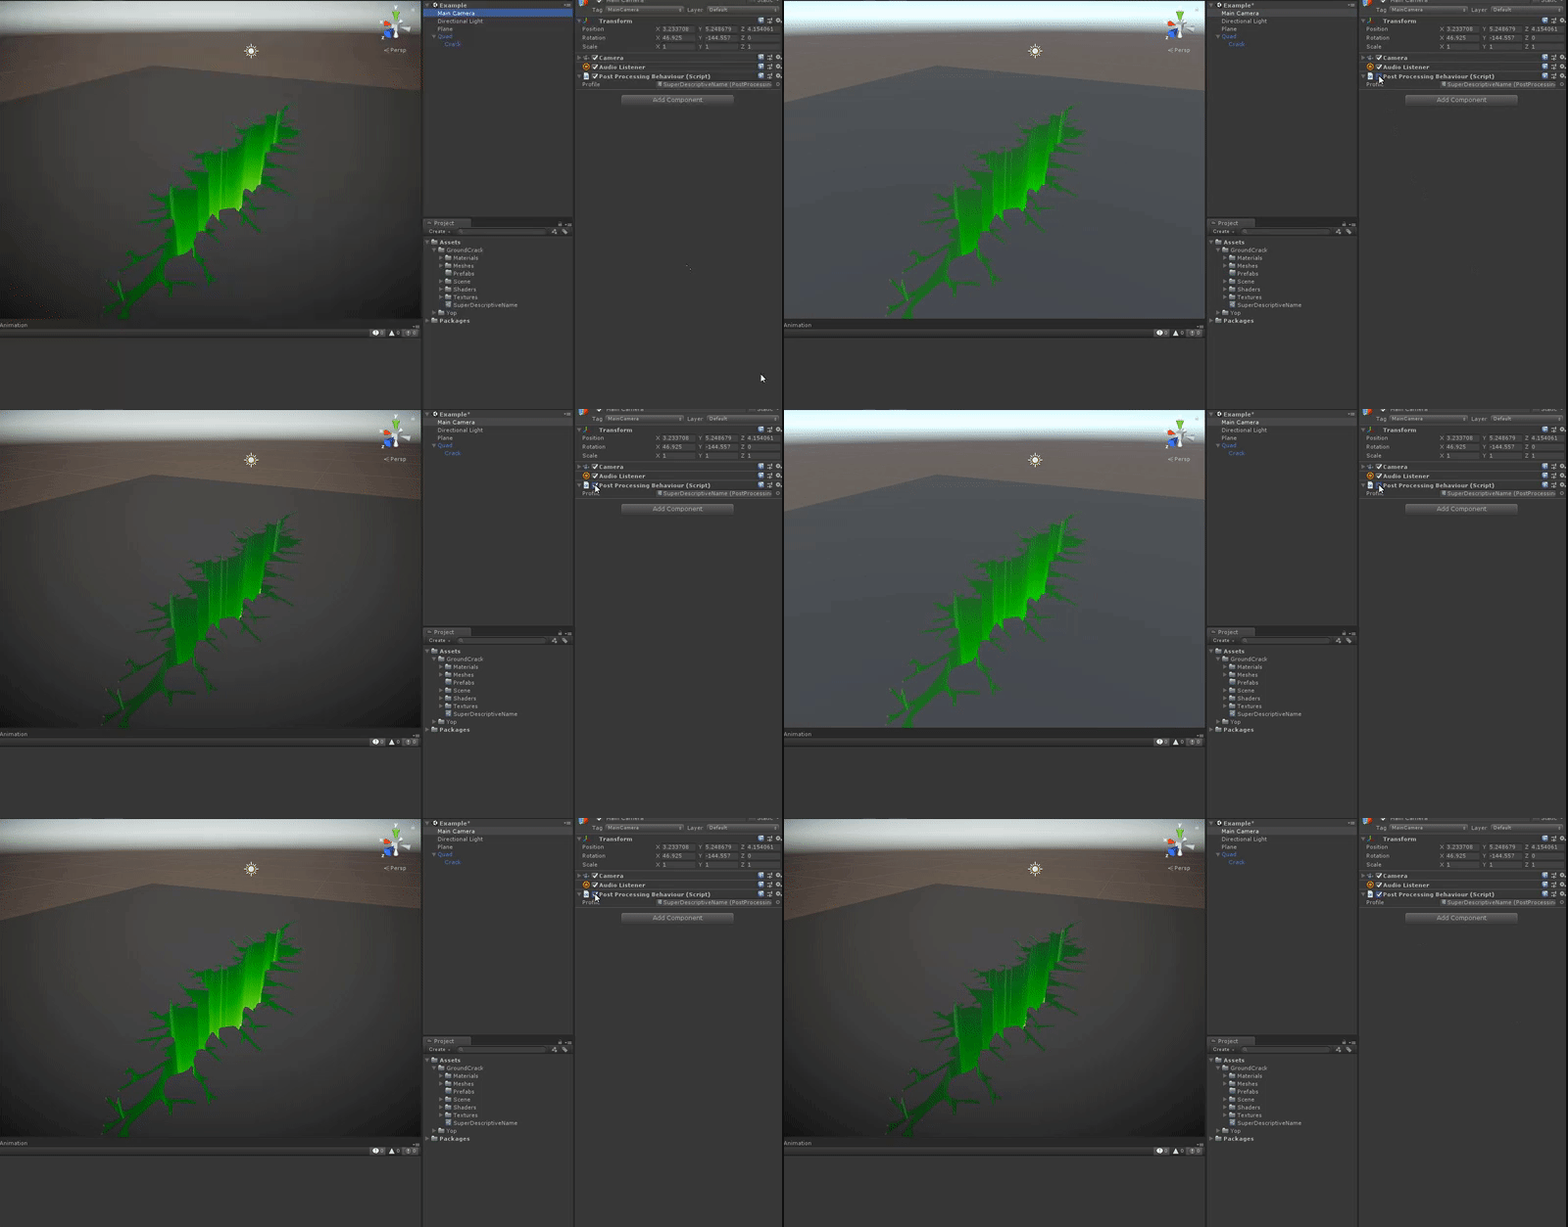
Looks quite nice tho. Im going to leave here a comparison with the post processing and some color/Intensity tweaks
Of course this effect can be tweaked and do with it whatever you want :D
For the final thing if you want to enter something, you will only need to set the Render Queue to 1998 :D
Have good dev day!!
PD: All this project assets for the patrons will be on next post :D
